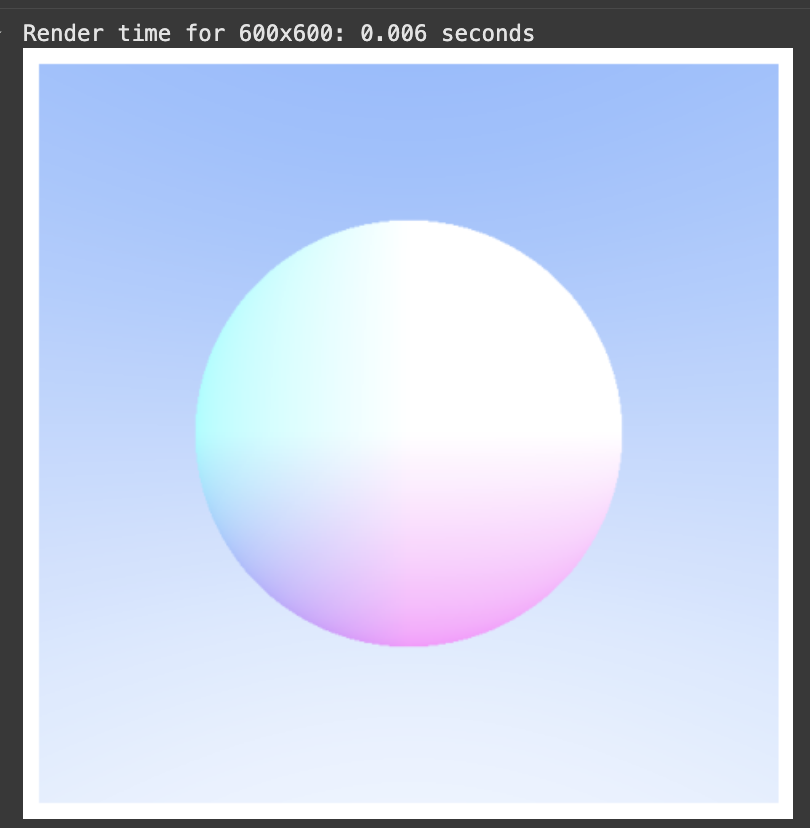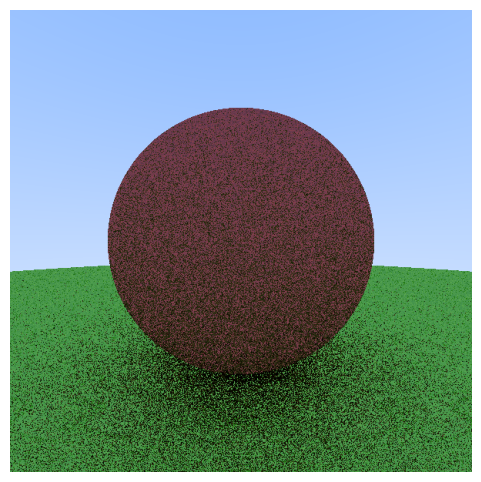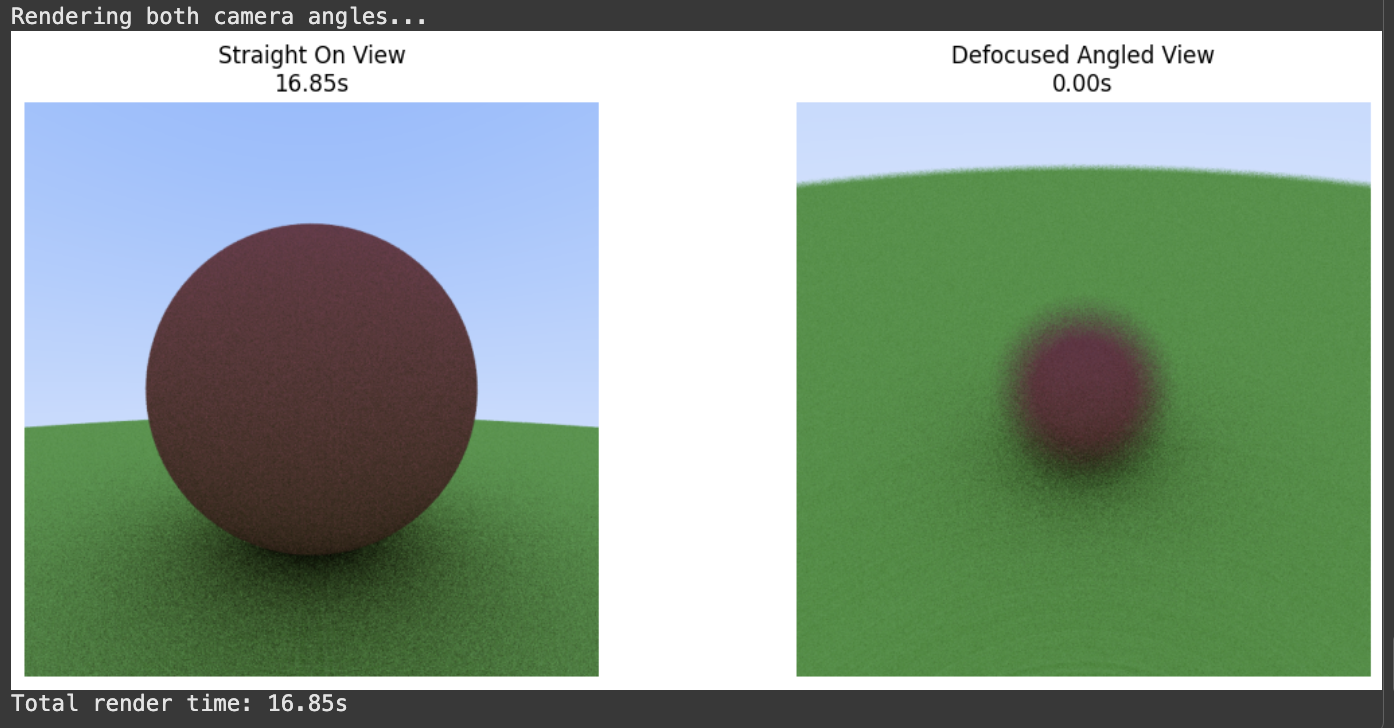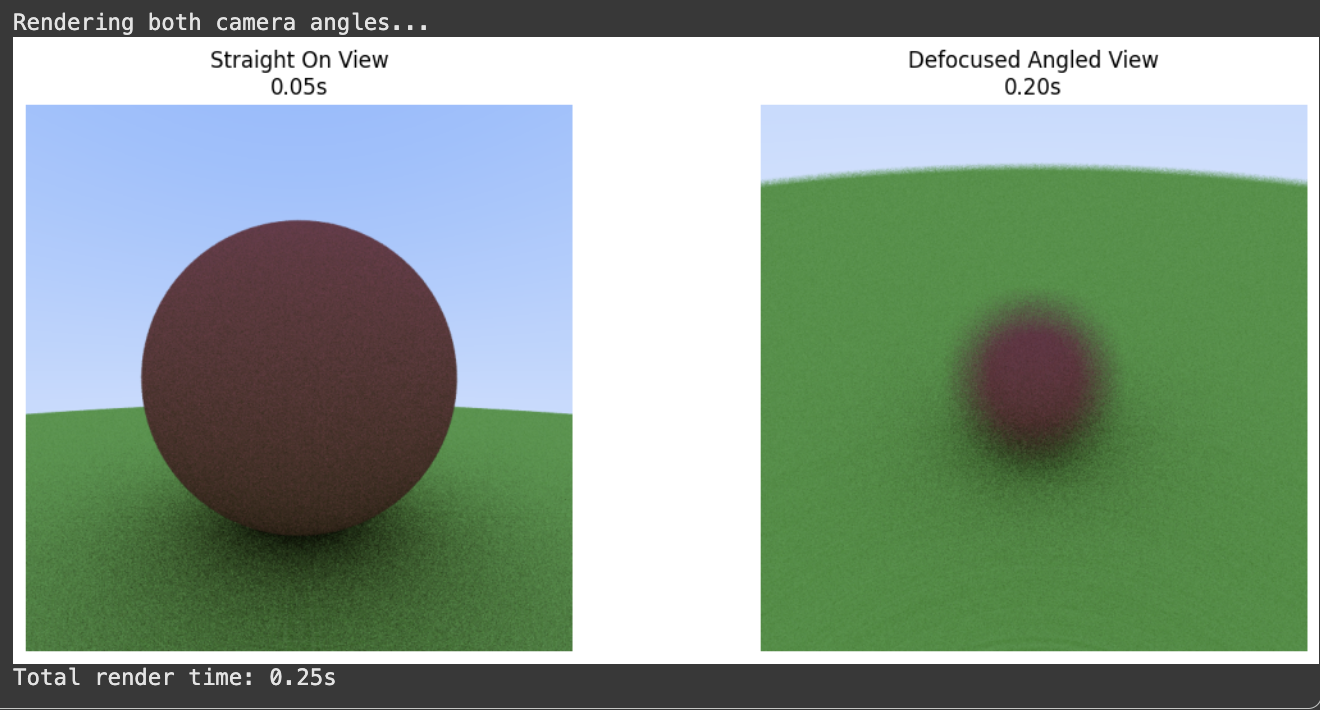
<?xml version="1.0" encoding="utf-8"?><feed xmlns="http://www.w3.org/2005/Atom" ><generator uri="https://jekyllrb.com/" version="3.10.0">Jekyll</generator><link href="https://kayleegeorge.github.io/feed.xml" rel="self" type="application/atom+xml" /><link href="https://kayleegeorge.github.io/" rel="alternate" type="text/html" /><updated>2026-02-15T07:21:55+00:00</updated><id>https://kayleegeorge.github.io/feed.xml</id><title type="html">Kaylee George</title><subtitle>personal website</subtitle><entry><title type="html">Generative worlds</title><link href="https://kayleegeorge.github.io/blog/generative-worlds/" rel="alternate" type="text/html" title="Generative worlds" /><published>2025-10-10T00:00:00+00:00</published><updated>2025-10-10T00:00:00+00:00</updated><id>https://kayleegeorge.github.io/blog/procedural-worlds</id><content type="html" xml:base="https://kayleegeorge.github.io/blog/generative-worlds/"><![CDATA[<p>I’m very excited about immersive worlds. Worldbuilding is the “process of constructing an imaginary world or setting.”</p>
<p>My interest in worldbuilding was actually sparked in a Classics seminar I took at Stanford my last year called <em>The Pastoral Ideal</em> [1]. It’s something that filmmakers, game creators, sci-fi writers, even philosophers explore. Iconic fantasy universes like J.R.R. Tolkien’s <em>Lord of The Rings</em> and George R.R. Martin’s <em>A Song of Ice and Fire</em> (adapted into <em>Game of Thrones</em>) have deep histories, invented languages, and intricate political systems that make their worlds feel truly lived-in. Game devs balance this same depth with interactivity, allowing players to explore and shape these universes firsthand.</p>

<p>Some of <em>my</em> favorite worlds are Fullmetal Alchemist, Attack on Titan, Studio Ghibli films, and Avatar: the Last Airbender. One day I want to be able to step into a complex visual world like Arcane (praised for its stunningly unique art style).</p>

<p>**</p>

<p>Graphics programming is also worldbuilding, just with different tools. Things like real-time rendering and procedural generation (think Minecraft’s infinite terrain) let us translate imagination into tangible explorable universes. The next era of these imaginative worlds will be unlocked by AI models that can generate not just terrain, but rich worlds with coherent physics and cultures.</p>

<p>To that end, I’ve been building some toy projects to explore some basic building blocks for procedural world generation like SDFs [3]. This evolved into…</p>

<h2 id="procedural-planets">Procedural Planets</h2>

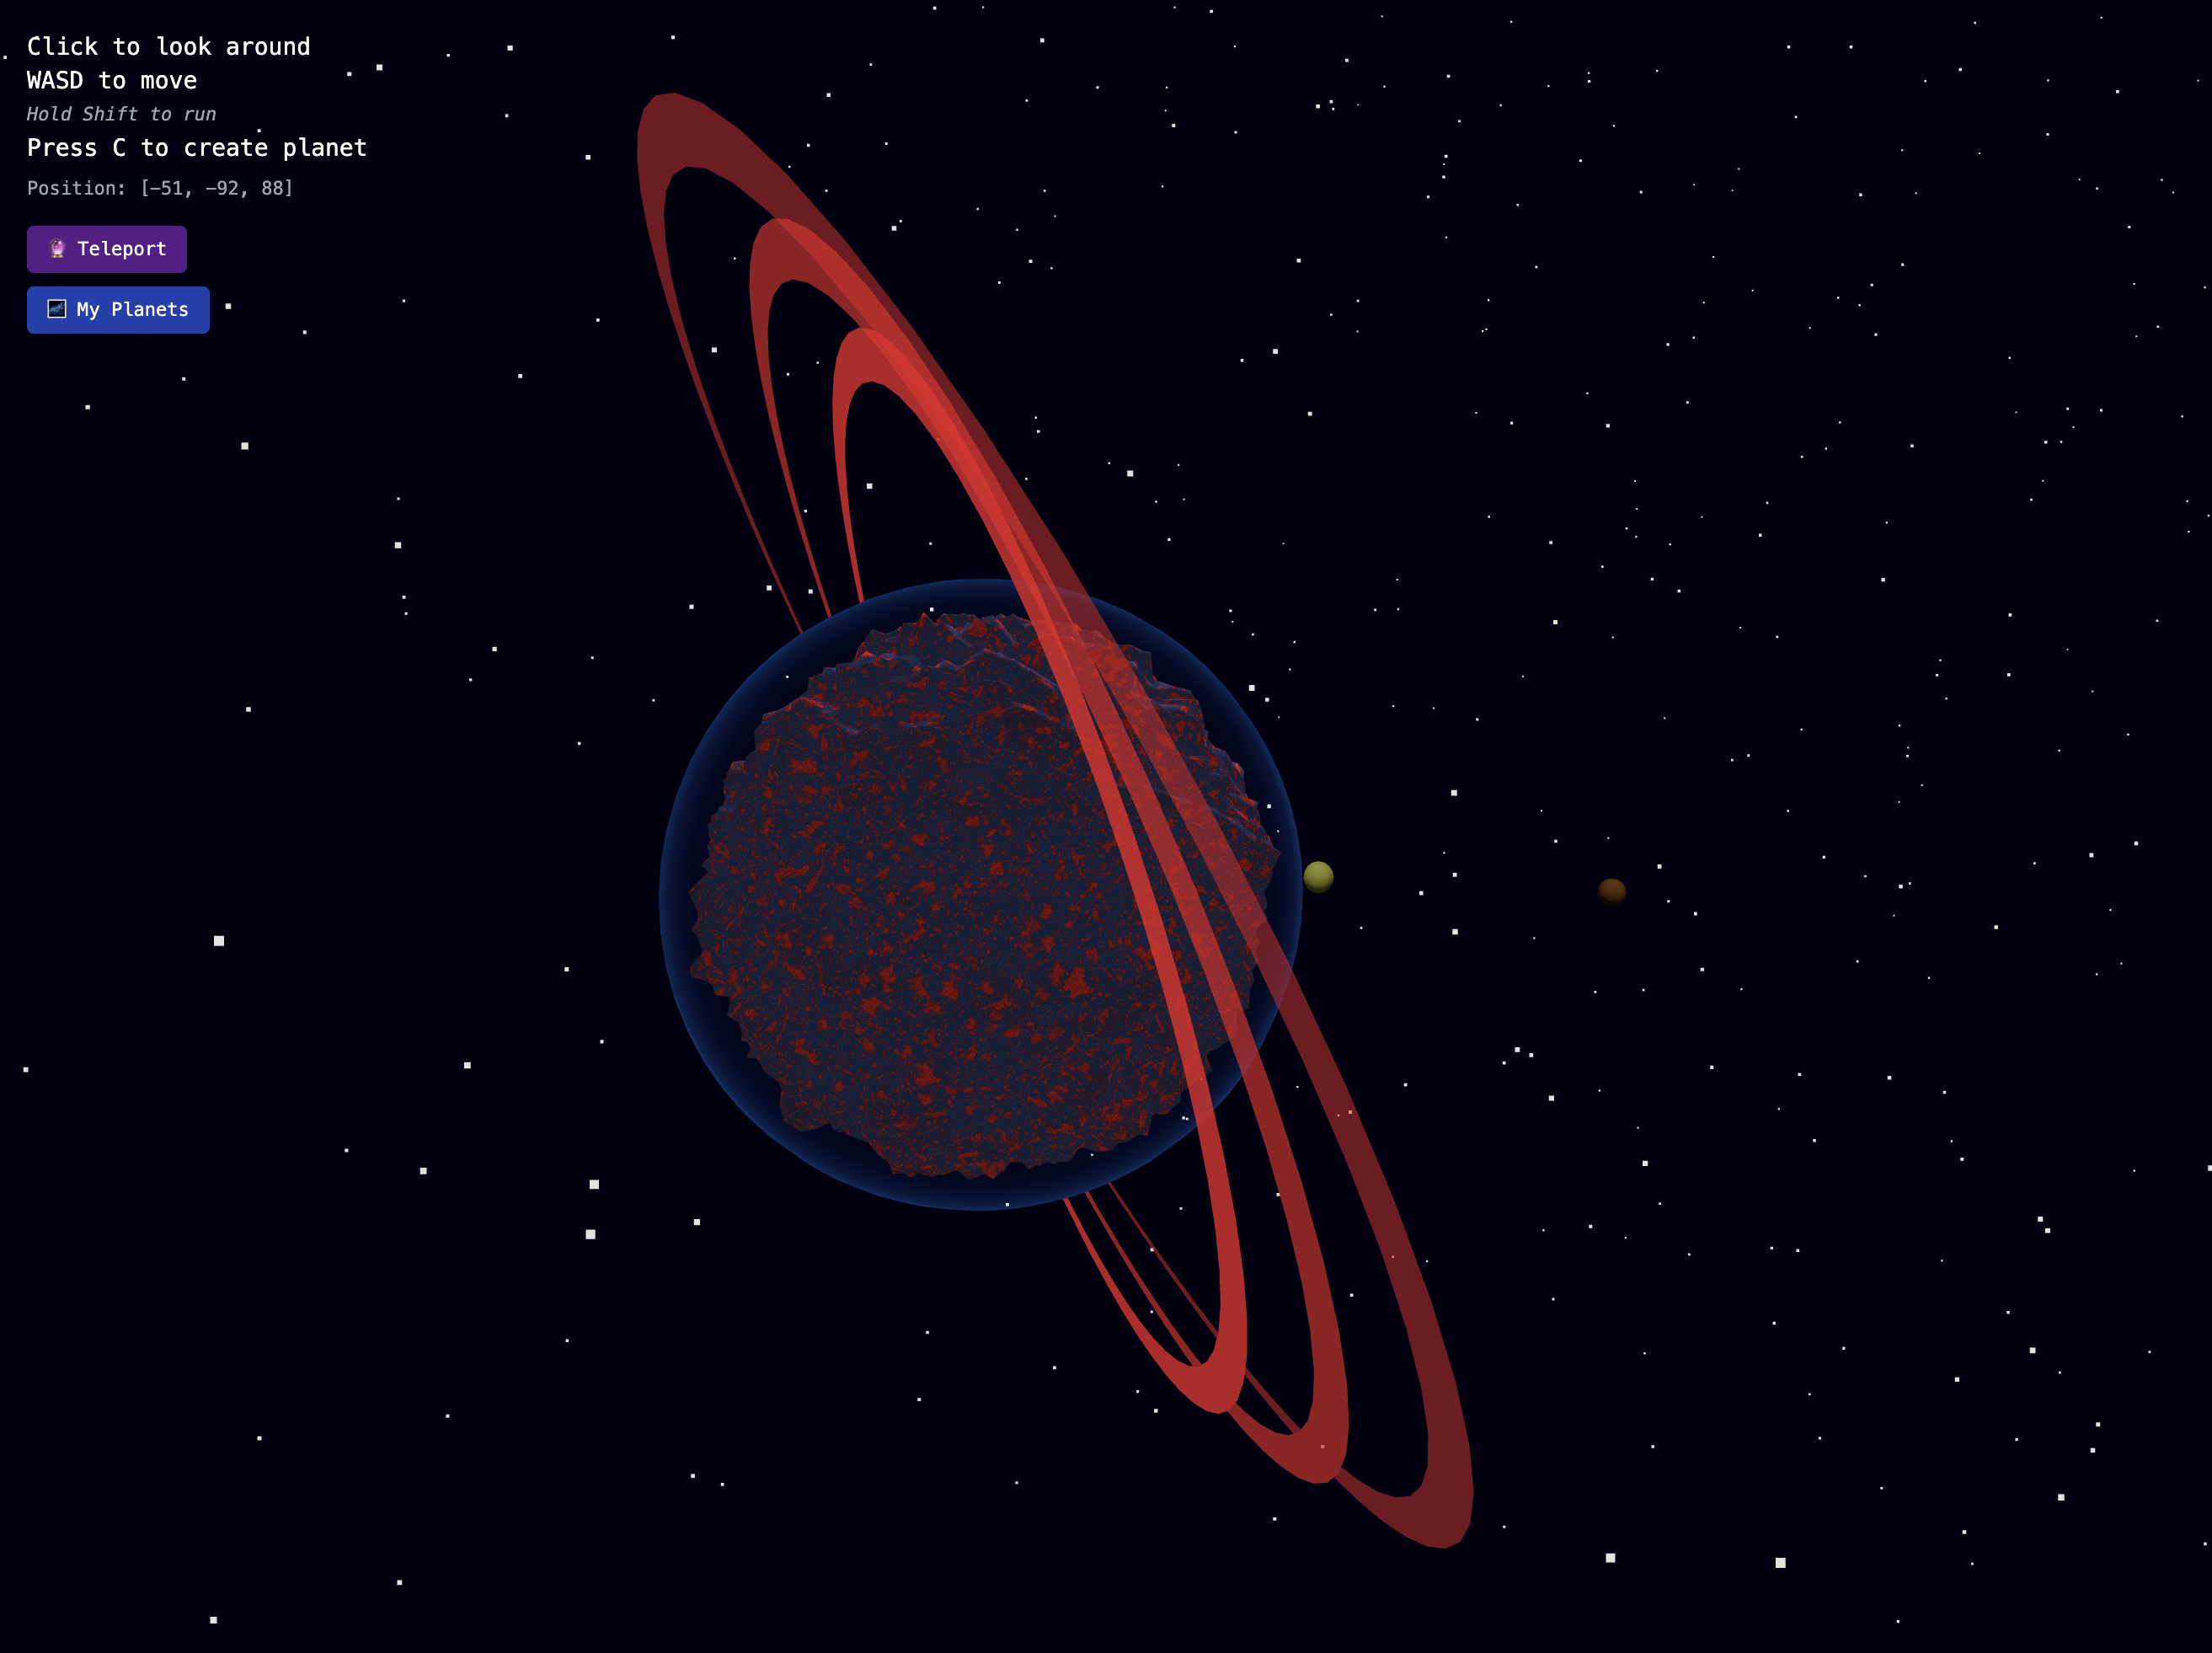
<p>Procedural Planets is simple browser-based galaxy where anyone can create procedurally generated planets using mathematical noise functions. <strong>Make a planet <a href="https://planets.kay-r-george.workers.dev/">here</a>!!</strong></p>

<div class="align-center">
    <img src="/public/worlds/planet.png" width="600px" />
</div>

<p>This project is built on Three.js (a popular JS library that acts as the core WebGL abstraction layer used to render 3D graphics in a browser) and uses <a href="https://github.com/pmndrs/react-three-fiber">React Three Fiber</a> for React compatibility.</p>

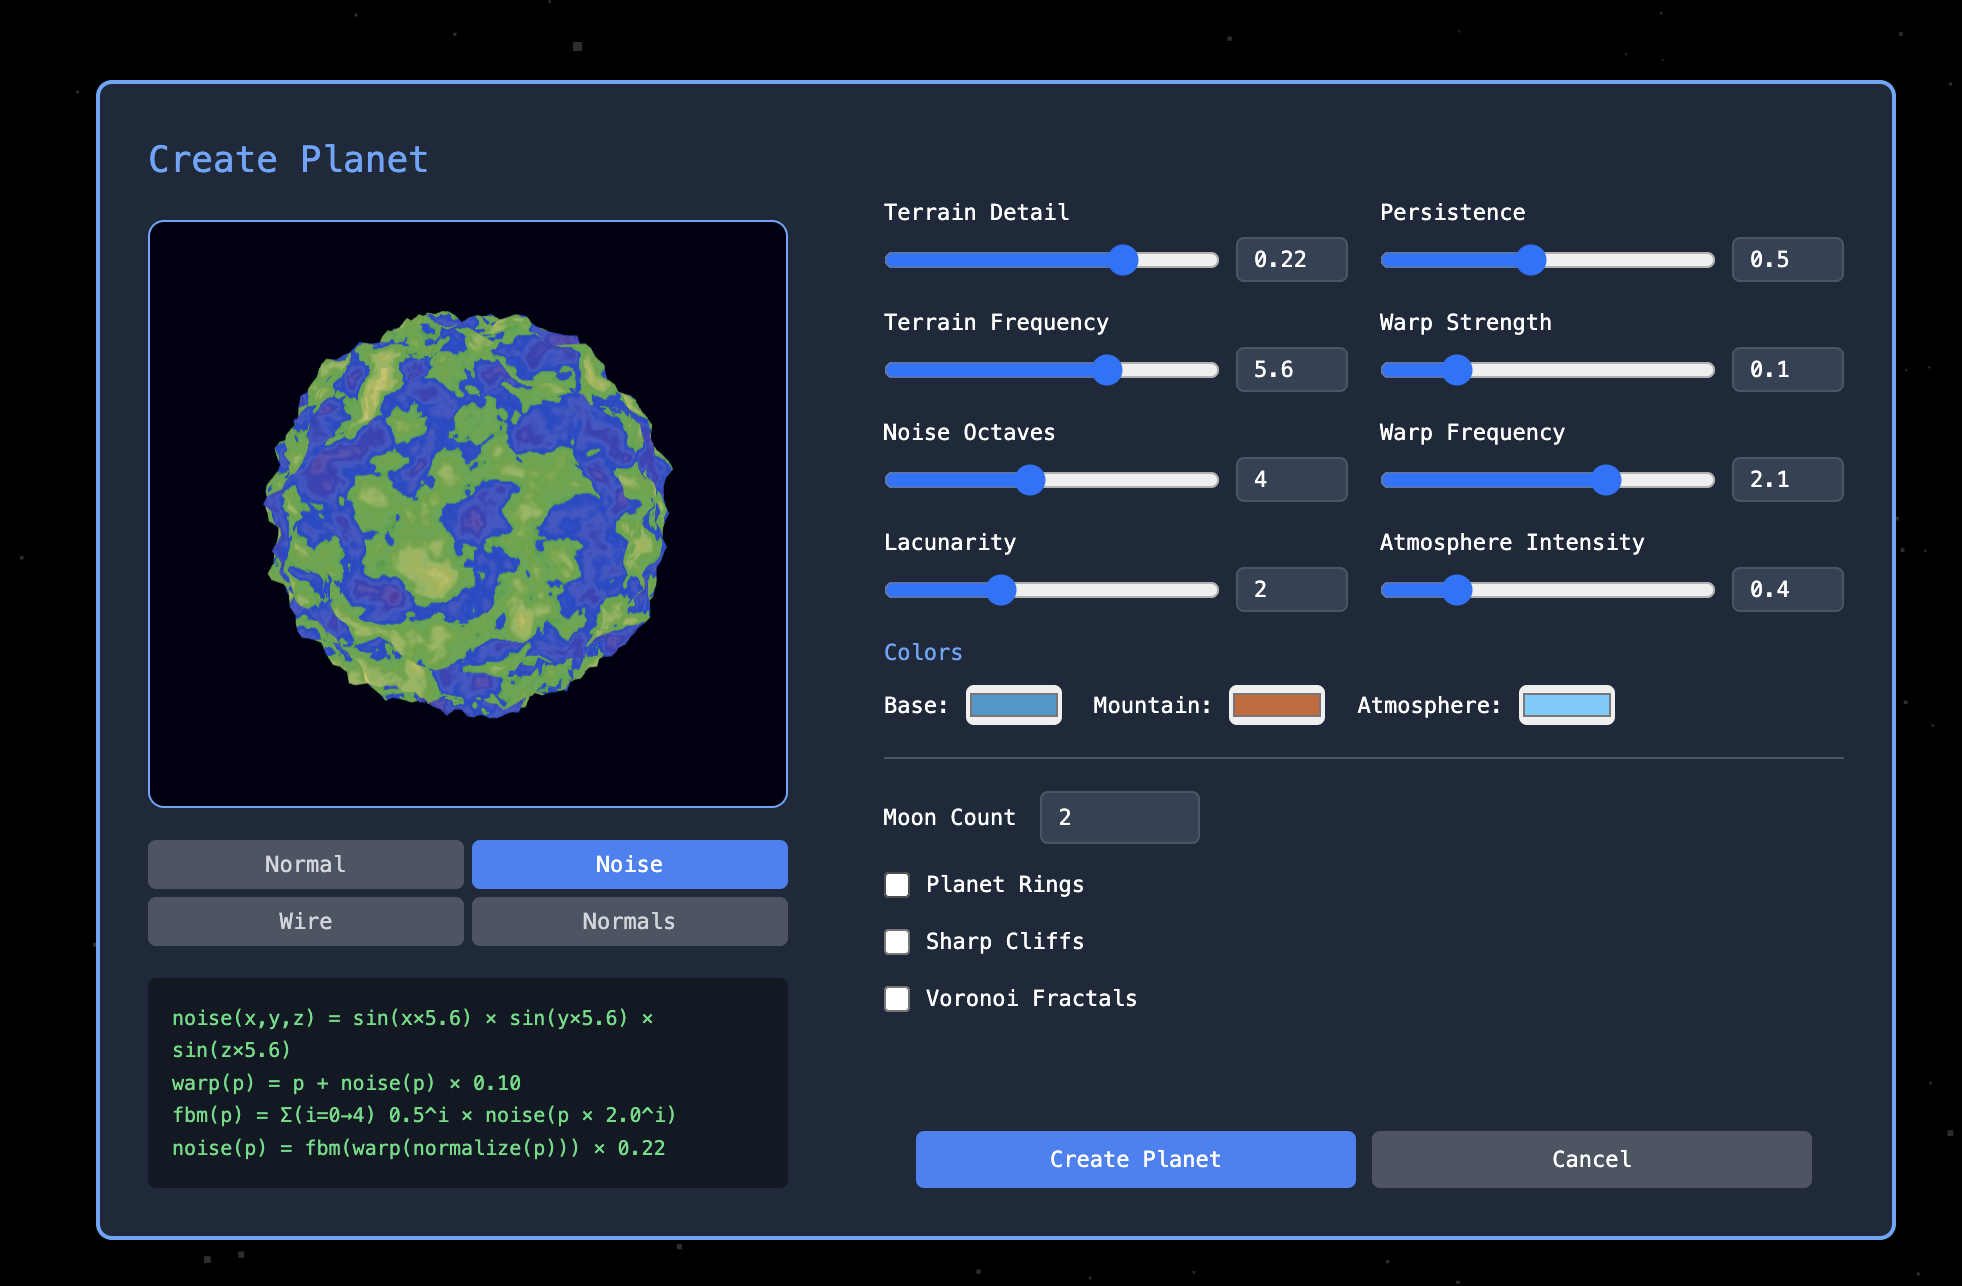
<p>When you create a planet, you can configure different parameters like terrain detail and noise octaves to create a unique terrain surface. The preview modes allow you to explore different planet features like noise (raw noise values as contour lines), wireframe (actual 3D mesh geometry), and normals (surface gradients).</p>

<p>The terrain generation uses procedural displacement mapping, which basically means noise functions determine how far to push each vertex outward from a base sphere.</p>

<p>The flow:</p>
<ol>
  <li>Start with a base sphere (96x96)</li>
  <li>Sample noise functions (3D Perlin noise with domain warping)</li>
  <li>Displace vertices (push each vertex outward or inward based on its noise value which creates varying terrain like mountains and valleys)</li>
  <li>Render the mesh (the displaced geometry is rendered as a standard Three.js polygon mesh using efficient GPU rasterization)</li>
</ol>

<div class="align-center">
  <img src="/public/worlds/create.png" width="600px" />
</div>

<p>Then, when you’re exploring the galaxy, the system uses a level-of-detail (LOD) pipeline that adapts the terrain detail complexity based on camera distance.</p>

<h3 id="why-procedural-noise">Why Procedural Noise?</h3>

<p>Traditional 3D graphics use polygon meshes, which are collections of triangles that approximate curved surfaces. This is great for static models but it has limitations for procedural generation (i.e. memory intensive, limited variety). Instead of storing fixed geometry, procedural noise allows you to simply store function parameters, like <code class="language-plaintext highlighter-rouge">noise(x, y, z, frequency=2.3, octaves=5)</code>, to generate terrain. This has advantages like tiny memory usage (just ~5KB of parameters vs ~50MB of mesh data) and diversity from different parameter combos.</p>

<p>Noise functions like Perlin noise take a 3D coordinate <code class="language-plaintext highlighter-rouge">(x, y, z)</code> and return a pseudo-random value. Using 3D noise (sampling the volume around each point rather than 2D noise mapped onto a sphere) allows the terrain to look more naturally continuous. To create more realistic planetary terrain, I use multiple mathematical functions that simulate natural randomness:</p>

<ol>
  <li><strong>3D Perlin Noise</strong> creates smooth, natural-looking height variations</li>
  <li><strong>Domain Warping</strong> distorts regular patterns for more organic-looking surfaces</li>
  <li><strong>Fractal Brownian Motion (FBM)</strong> allows multi-level details</li>
  <li><strong>Fractal Cracks</strong> generates surface features like canyons</li>
</ol>

<p>Let’s look at how these functions work:</p>

<p><strong>3D Perlin Noise</strong> generates smooth, continuous random values that look natural rather than chaotic. Whereas 2D noise mapped onto a sphere (which creates seams), true 3D noise samples the volume around each point. This noise implementation uses smootherstep interpolation for C² continuity to make sure terrain normals look smooth and don’t have unnatural-looking jumps:</p>

<div class="language-glsl highlighter-rouge"><div class="highlight"><pre class="highlight"><code><span class="kt">float</span> <span class="nf">noise3D</span><span class="p">(</span><span class="kt">vec3</span> <span class="n">p</span><span class="p">,</span> <span class="kt">float</span> <span class="n">freq</span><span class="p">)</span> <span class="p">{</span>
  <span class="n">p</span> <span class="o">*=</span> <span class="n">freq</span><span class="p">;</span>
  <span class="kt">vec3</span> <span class="n">i</span> <span class="o">=</span> <span class="n">floor</span><span class="p">(</span><span class="n">p</span><span class="p">);</span>
  <span class="kt">vec3</span> <span class="n">f</span> <span class="o">=</span> <span class="n">fract</span><span class="p">(</span><span class="n">p</span><span class="p">);</span>

  <span class="c1">// Smootherstep interpolation (C² continuous)</span>
  <span class="kt">vec3</span> <span class="n">u</span> <span class="o">=</span> <span class="kt">vec3</span><span class="p">(</span>
    <span class="n">smootherstep</span><span class="p">(</span><span class="n">f</span><span class="p">.</span><span class="n">x</span><span class="p">),</span>
    <span class="n">smootherstep</span><span class="p">(</span><span class="n">f</span><span class="p">.</span><span class="n">y</span><span class="p">),</span>
    <span class="n">smootherstep</span><span class="p">(</span><span class="n">f</span><span class="p">.</span><span class="n">z</span><span class="p">)</span>
  <span class="p">);</span>

  <span class="c1">// 8-corner gradient sampling with trilinear interpolation</span>
  <span class="c1">// ... (gradient calculations)</span>

  <span class="k">return</span> <span class="n">mix</span><span class="p">(</span><span class="n">nxy0</span><span class="p">,</span> <span class="n">nxy1</span><span class="p">,</span> <span class="n">u</span><span class="p">.</span><span class="n">z</span><span class="p">);</span>
<span class="p">}</span>
</code></pre></div></div>

<p>This is combined with domain warping, which is a technique where you distort the coordinate space before sampling your noise function. Instead of getting noise at position (x,y,z), you first warp those coordinates using another noise function, then sample at the warped position:</p>

<div class="language-javascript highlighter-rouge"><div class="highlight"><pre class="highlight"><code>  <span class="c1">// Without domain warping (regular sample)</span>
  <span class="kd">const</span> <span class="nx">height</span> <span class="o">=</span> <span class="nx">noise3D</span><span class="p">(</span><span class="nx">x</span><span class="p">,</span> <span class="nx">y</span><span class="p">,</span> <span class="nx">z</span><span class="p">,</span> <span class="nx">frequency</span><span class="p">);</span>

  <span class="c1">// With domain warping (distort coordinates first)</span>
  <span class="kd">const</span> <span class="nx">warpX</span> <span class="o">=</span> <span class="nx">x</span> <span class="o">+</span> <span class="nx">noise3D</span><span class="p">(</span><span class="nx">x</span><span class="p">,</span> <span class="nx">y</span><span class="p">,</span> <span class="nx">z</span><span class="p">,</span> <span class="nx">warpFreq</span><span class="p">)</span> <span class="o">*</span> <span class="nx">warpStrength</span><span class="p">;</span>
  <span class="kd">const</span> <span class="nx">warpY</span> <span class="o">=</span> <span class="nx">y</span> <span class="o">+</span> <span class="nx">noise3D</span><span class="p">(</span><span class="nx">x</span><span class="o">+</span><span class="mf">5.2</span><span class="p">,</span> <span class="nx">y</span><span class="o">+</span><span class="mf">1.3</span><span class="p">,</span> <span class="nx">z</span><span class="o">+</span><span class="mf">8.7</span><span class="p">,</span> <span class="nx">warpFreq</span><span class="p">)</span> <span class="o">*</span> <span class="nx">warpStrength</span><span class="p">;</span>
  <span class="kd">const</span> <span class="nx">warpZ</span> <span class="o">=</span> <span class="nx">z</span> <span class="o">+</span> <span class="nx">noise3D</span><span class="p">(</span><span class="nx">x</span><span class="o">+</span><span class="mf">9.1</span><span class="p">,</span> <span class="nx">y</span><span class="o">+</span><span class="mf">2.8</span><span class="p">,</span> <span class="nx">z</span><span class="o">+</span><span class="mf">4.6</span><span class="p">,</span> <span class="nx">warpFreq</span><span class="p">)</span> <span class="o">*</span> <span class="nx">warpStrength</span><span class="p">;</span>
  <span class="kd">const</span> <span class="nx">height</span> <span class="o">=</span> <span class="nx">noise3D</span><span class="p">(</span><span class="nx">warpX</span><span class="p">,</span> <span class="nx">warpY</span><span class="p">,</span> <span class="nx">warpZ</span><span class="p">,</span> <span class="nx">frequency</span><span class="p">);</span>
</code></pre></div></div>

<p>Domain warping creates the flowing, organic base terrain that mimics natural geology (like rivers through mountains). <strong>Fractal Brownian Motion</strong> builds on this by layering multiple octaves of noise at different frequencies, adding realistic detail at multiple scales (like large mountains with smaller hills and tiny surface textures).</p>

<div class="language-javascript highlighter-rouge"><div class="highlight"><pre class="highlight"><code><span class="kd">const</span> <span class="nx">fbm</span> <span class="o">=</span> <span class="p">(</span><span class="nx">x</span><span class="p">,</span> <span class="nx">y</span><span class="p">,</span> <span class="nx">z</span><span class="p">,</span> <span class="nx">octaves</span><span class="p">,</span> <span class="nx">frequency</span><span class="p">,</span> <span class="nx">lacunarity</span><span class="p">,</span> <span class="nx">persistence</span><span class="p">)</span> <span class="o">=&gt;</span> <span class="p">{</span>
  <span class="kd">let</span> <span class="nx">value</span> <span class="o">=</span> <span class="mi">0</span><span class="p">;</span>
  <span class="kd">let</span> <span class="nx">amplitude</span> <span class="o">=</span> <span class="mi">1</span><span class="p">;</span>
  <span class="kd">let</span> <span class="nx">totalAmplitude</span> <span class="o">=</span> <span class="mi">0</span><span class="p">;</span>
  <span class="kd">let</span> <span class="nx">freq</span> <span class="o">=</span> <span class="nx">frequency</span><span class="p">;</span>

  <span class="k">for</span> <span class="p">(</span><span class="kd">let</span> <span class="nx">i</span> <span class="o">=</span> <span class="mi">0</span><span class="p">;</span> <span class="nx">i</span> <span class="o">&lt;</span> <span class="nx">octaves</span><span class="p">;</span> <span class="nx">i</span><span class="o">++</span><span class="p">)</span> <span class="p">{</span>
    <span class="nx">value</span> <span class="o">+=</span> <span class="nx">noise3D</span><span class="p">(</span><span class="nx">x</span><span class="p">,</span> <span class="nx">y</span><span class="p">,</span> <span class="nx">z</span><span class="p">,</span> <span class="nx">freq</span><span class="p">)</span> <span class="o">*</span> <span class="nx">amplitude</span><span class="p">;</span>
    <span class="nx">totalAmplitude</span> <span class="o">+=</span> <span class="nx">amplitude</span><span class="p">;</span>
    <span class="nx">amplitude</span> <span class="o">*=</span> <span class="nx">persistence</span><span class="p">;</span>
    <span class="nx">freq</span> <span class="o">*=</span> <span class="nx">lacunarity</span><span class="p">;</span>
  <span class="p">}</span>

  <span class="k">return</span> <span class="nx">value</span> <span class="o">/</span> <span class="nx">totalAmplitude</span><span class="p">;</span>
<span class="p">};</span>
</code></pre></div></div>

<p>Finally, <strong>fractal cracks</strong> use inverted noise to make features like valleys, canyons, and fault lines with natural-looking branching patterns:</p>

<div class="language-glsl highlighter-rouge"><div class="highlight"><pre class="highlight"><code><span class="kt">float</span> <span class="nf">cracks</span><span class="p">(</span><span class="kt">vec3</span> <span class="n">p</span><span class="p">,</span> <span class="kt">float</span> <span class="n">scale</span><span class="p">)</span> <span class="p">{</span>
  <span class="kt">vec3</span> <span class="n">scaledP</span> <span class="o">=</span> <span class="n">p</span> <span class="o">*</span> <span class="n">scale</span><span class="p">;</span>

  <span class="c1">// fractal noise</span>
  <span class="kt">float</span> <span class="n">noise1</span> <span class="o">=</span> <span class="n">abs</span><span class="p">(</span><span class="n">fbm</span><span class="p">(</span><span class="n">scaledP</span><span class="p">,</span> <span class="mi">3</span><span class="p">.</span><span class="mi">0</span><span class="p">,</span> <span class="mi">2</span><span class="p">.</span><span class="mi">0</span><span class="p">,</span> <span class="mi">2</span><span class="p">.</span><span class="mi">1</span><span class="p">,</span> <span class="mi">0</span><span class="p">.</span><span class="mi">6</span><span class="p">));</span>        <span class="c1">// Large branching </span>
  <span class="kt">float</span> <span class="n">noise2</span> <span class="o">=</span> <span class="n">abs</span><span class="p">(</span><span class="n">fbm</span><span class="p">(</span><span class="n">scaledP</span> <span class="o">*</span> <span class="mi">2</span><span class="p">.</span><span class="mi">3</span> <span class="o">+</span> <span class="n">offset</span><span class="p">,</span> <span class="mi">2</span><span class="p">.</span><span class="mi">0</span><span class="p">,</span> <span class="cm">/*...*/</span><span class="p">));</span> <span class="c1">// Medium</span>
  <span class="kt">float</span> <span class="n">noise3</span> <span class="o">=</span> <span class="n">abs</span><span class="p">(</span><span class="n">fbm</span><span class="p">(</span><span class="n">scaledP</span> <span class="o">*</span> <span class="mi">4</span><span class="p">.</span><span class="mi">7</span> <span class="o">+</span> <span class="n">offset</span><span class="p">,</span> <span class="mi">1</span><span class="p">.</span><span class="mi">0</span><span class="p">,</span> <span class="cm">/*...*/</span><span class="p">));</span> <span class="c1">// Fine details</span>

  <span class="kt">float</span> <span class="n">cracks</span> <span class="o">=</span> <span class="n">min</span><span class="p">(</span><span class="n">min</span><span class="p">(</span><span class="mi">1</span><span class="p">.</span><span class="mi">0</span> <span class="o">-</span> <span class="n">noise1</span><span class="p">,</span> <span class="mi">1</span><span class="p">.</span><span class="mi">0</span> <span class="o">-</span> <span class="n">noise2</span><span class="p">),</span> <span class="mi">1</span><span class="p">.</span><span class="mi">0</span> <span class="o">-</span> <span class="n">noise3</span><span class="p">);</span>
  <span class="k">return</span> <span class="mi">1</span><span class="p">.</span><span class="mi">0</span> <span class="o">-</span> <span class="n">smoothstep</span><span class="p">(</span><span class="mi">0</span><span class="p">.</span><span class="mi">75</span><span class="p">,</span> <span class="mi">0</span><span class="p">.</span><span class="mi">9</span><span class="p">,</span> <span class="n">cracks</span><span class="p">);</span>
<span class="p">}</span>
</code></pre></div></div>

<p>These noise functions combine to create planets that feel more natural but also allow each world to have its own character!</p>

<h3 id="level-of-detail-lod-system">Level of Detail (LOD) System</h3>

<p>LOD is a dynamic rendering technique that improves performance by rendering varying levels of detail based on the user’s viewpoint. If you’re far away from a planet, it will just look like a simple sphere (there’s no point in rendering all the planet’s details if it’s only a tiny pixel on your screen). If a planet is <em>really</em> far, then it’s culled (aka not rendered).</p>

<p><em>(That’s why it can be a bit hard to find planets — if you’re too far away, then you can’t really see them.)</em></p>

<p>I use some basic spatial streaming logic to selectively pull planets from the DB based on where you are in the galaxy. This is known as <strong>spatial indexing</strong>: efficiently organizing and querying objects based on their positions in space. More complex systems will use data structures like Octree/Quadtrees (divides 3D/2D space into hierarchical regions), spatial hashes, or R-trees (group nearby planets into bounding boxes).</p>

<div class="language-javascript highlighter-rouge"><div class="highlight"><pre class="highlight"><code><span class="kd">const</span> <span class="nx">lodLevel</span> <span class="o">=</span> <span class="nx">useMemo</span><span class="p">(()</span> <span class="o">=&gt;</span> <span class="p">{</span>
  <span class="kd">const</span> <span class="p">{</span> <span class="nx">HIGH</span><span class="p">,</span> <span class="nx">MEDIUM</span><span class="p">,</span> <span class="nx">LOW</span><span class="p">,</span> <span class="nx">ULTRA_LOW</span> <span class="p">}</span> <span class="o">=</span> <span class="nx">GALAXY_CONFIG</span><span class="p">.</span><span class="nx">LOADING</span><span class="p">.</span><span class="nx">LOD</span><span class="p">;</span>
  <span class="k">if</span> <span class="p">(</span><span class="nx">distance</span> <span class="o">&lt;</span> <span class="nx">HIGH</span><span class="p">)</span> <span class="k">return</span> <span class="dl">'</span><span class="s1">high</span><span class="dl">'</span><span class="p">;</span>      <span class="c1">// Full detail</span>
  <span class="k">if</span> <span class="p">(</span><span class="nx">distance</span> <span class="o">&lt;</span> <span class="nx">MEDIUM</span><span class="p">)</span> <span class="k">return</span> <span class="dl">'</span><span class="s1">medium</span><span class="dl">'</span><span class="p">;</span>  <span class="c1">// Reduced complexity</span>
  <span class="k">if</span> <span class="p">(</span><span class="nx">distance</span> <span class="o">&lt;</span> <span class="nx">LOW</span><span class="p">)</span> <span class="k">return</span> <span class="dl">'</span><span class="s1">low</span><span class="dl">'</span><span class="p">;</span>        <span class="c1">// Simple sphere</span>
  <span class="k">if</span> <span class="p">(</span><span class="nx">distance</span> <span class="o">&lt;</span> <span class="nx">ULTRA_LOW</span><span class="p">)</span> <span class="k">return</span> <span class="dl">'</span><span class="s1">ultra_low</span><span class="dl">'</span><span class="p">;</span> <span class="c1">// A dot</span>
  <span class="k">return</span> <span class="dl">'</span><span class="s1">culled</span><span class="dl">'</span><span class="p">;</span>                         <span class="c1">// Not rendered</span>
<span class="p">},</span> <span class="p">[</span><span class="nx">distance</span><span class="p">]);</span>
</code></pre></div></div>

<p>**</p>

<p>Obviously this is nowhere near being able to step into the world of Arcane or a fully immersive, generative world, but it’s been a fun exploration of procedural generation in the browser :-)</p>

<p><strong>Footnotes</strong></p>

<p>[1] I particularly took interest in a world crafted by the unknown ancient Greek novelist Longus in his Hellenistic romance novel <em>Daphnis and Chloe</em>. Inspired by a painting Longus encountered in a “sacred grove of the Nymphs”, the story explores love as experienced through the eyes of children. I was very fascinated by how Longus essentially acted as a translator between the visual and written worlds of the pastoral.</p>

<p>[2] <a href="https://en.wikipedia.org/wiki/Worldbuilding">https://en.wikipedia.org/wiki/Worldbuilding</a></p>

<p>[3] I initially explored <a href="https://en.wikipedia.org/wiki/Signed_distance_function">Signed Distance Functions</a> but found that noise-based displacement was more practical for real-time rendering. My ex-coworker showed me <a href="https://iquilezles.org/articles/distfunctions/">this guide on 3D SDFs</a> by Inigo Quilez a while ago. This guy has a bunch of cool posts/videos at the intersection of graphics and math (like <a href="https://www.youtube.com/watch?v=-pdSjBPH3zM&amp;t=5011s">live coding a Greek temple!</a>).</p>]]></content><author><name></name></author><summary type="html"><![CDATA[I’m very excited about immersive worlds. Worldbuilding is the “process of constructing an imaginary world or setting.”]]></summary></entry><entry><title type="html">Crypto for the uninitiated</title><link href="https://kayleegeorge.github.io/blog/crypto-uninitiated/" rel="alternate" type="text/html" title="Crypto for the uninitiated" /><published>2025-09-23T00:00:00+00:00</published><updated>2025-09-23T00:00:00+00:00</updated><id>https://kayleegeorge.github.io/blog/crypto</id><content type="html" xml:base="https://kayleegeorge.github.io/blog/crypto-uninitiated/"><![CDATA[<p><em>Rough notes on interesting crypto stuff (mostly for the uninitiated since it’s pretty high-level), in no particular order.</em></p>

<h3 id="1-dats-the-microstrategy-playbook">1. DATs: The MicroStrategy Playbook</h3>

<p>A Digital Asset Treasury (DAT) company is a publicly traded company that holds a lot of crypto, effectively acting as an on-chain crypto treasury. Buying stock in DATs offers investors indirect exposure to the digital asset market.</p>

<p>MicroStrategy is one of these DATs — one of the largest corporate holders of Bitcoin (638,460 BTC as of mid-Sept 2025). Owning MSTR stock offers investors highly leveraged Bitcoin exposure through traditional brokerage accounts. Before spot Bitcoin ETFs launched in January 2024, the company was basically “Wall Street’s bitcoin proxy.”</p>

<p>But the company didn’t start off as a DAT; it initially sold business intelligence software. During the dot-com boom, co-founder Michael Saylor was a paper billionaire after MicroStrategy went public. This was short-lived though; in 2000, the SEC went after the company for accounting fraud (which ended in a settlement) that left the company nearly bankrupt. Stock crashed from $333 to $120 per share on March 20 and to $33 the next month. Saylor’s net worth fell $6 billion. Despite the scandal, Salyor somehow remained CEO and a major shareholder while the company went into recovery mode, taking a $125 million “death spiral” investment.</p>

<p>For 20 years, MicroStrategy was a zombie company – that is, until it’s $250 million investment into Bitcoin. Saylor orchestrated a massive narrative shift: MicroStrategy was now a Bitcoin holding company.</p>

<p>MicroStrategy markets their Bitcoin investment strategy as <em>intelligent leverage</em>. The mechanism works as follows:</p>

<p>(1) Issue new shares/debt at a premium <br />
(2) Use proceeds to buy Bitcoin <br />
(3) Calculate “Bitcoin-per-share” (divide total Bitcoin by total shares to show an increase) <br />
(4) Repeat</p>

<p>This cycle simultaneously runs up the price of BTC and the price of MSTR: sell shares at a premium and buy Bitcoin –&gt; this increases BTC asset value –&gt; premium expands, sell more shares.</p>

<p>For investors, the mechanism <em>supposedly</em> goes something like this: Let’s say X company has 100 Bitcoin and 1,000 shares = 0.1 Bitcoin-per-share. Then, X issues 100 new shares but charges premium prices (enough to buy 60 Bitcoin). Now X has 160 Bitcoin and 1,100 = 0.145 Bitcoin-per-share. The narrative becomes <em>we increased Bitcoin per share by 45%</em>.</p>

<p>But this framing obscures the fact that MicroStrategy is a “perpetual dilution machine.” Because MSTR trades at a massive premium (often 2-3x the actual value of BTC), new investors increase the Bitcoin-per-share for existing holders but get diluted ownership.</p>

<p>Continuing the example above: The 100 new shares funded 60 BTC worth but those shares are only worth 100 * 0.145 = 14.5 BTC worth. In other words, new investors funded 37.5% (60/160 BTC) of the total Bitcoin holdings but only received 9.1% (14.5/160) ownership while the rest goes to existing shareholders for free.</p>

<p>If you think this sounds like a house-of-cards, you’re right.</p>

<p>But the strategy has worked so far because it <em>does</em> makes the numbers go up as long as (a) MSTR trades at a premium (so that more Bitcoin can be bought than shares issued), (b) there’s fresh capital flowing in, (c) Bitcoin price direction is generally up, which attracts the new investors.</p>

<p>And remember, before Bitcoin ETFs, MSTR was one of the only way for many institutional and retail investors to long Bitcoin using regular stock trading accounts. Now, Bitcoin ETFs are a threat because investors can get direct exposure to BTC with only a 0.25% fee vs. a massive premium (but people still buy MSTR for various reasons like leverage and the Michael Saylor cult).</p>

<p>A huge reason why the MicroStrategy playbook was able to be run up so much is Michael Saylor’s ability to build a narrative. People seem to have forgetten his past as a sketchy fniancial fraud guy since he’s gained so much mindshare as a Bitcoin maxi.</p>

<p>Zooming out, this means that Bitcoin as an asset has succeeded but the chain becomes a ghost chain. You can start to see some of this phenomena in Ethereum too: ETH the asset is increasingly priced as an institutional store of value as opposed to a reflection of the chain itself.</p>

<h3 id="2-hyperliquid">2. Hyperliquid</h3>

<p>Hyperliquid is a decentralized perpetual futures exchange founded by this guy named <a href="https://x.com/chameleon_jeff">Jeff</a>. With only an 11-person team, Hyperliquid has $6.5 billion TVL (as of today Sept 22, 2025).</p>

<p>Perps are a derivative contract that allows you to speculate on the price of an asset without having to actually own the underlying asset itself. You can open long positions or short positions with leverage and no expiration date.</p>

<p>The ability to leverage is high risk and high reward. It’s high risk because you can get entirely liquidated even prices move a bit (depending on your collateral) but also amplify returns on successful trades.</p>

<p>A concrete example: Let’s say Bitcoin is at $50,000 and you open a long with $1,000 collateral at 10x leverage (controlling $10,000 worth). If Bitcoin goes to $55,000 (10% increase), your position gains $1,000. If Bitcoin drops to $45,000 (10% decrease), you lose $1,000 (your entire collateral).</p>

<p>Perpetual futures match the spot price of an asset as closely as possible. In traditional futures contracts, prices converge naturally as the contract approaches its expiration date — but since perps have no expiration date, a more elegant mechanism is required to keep the prices aligned over time: funding rates. Every 8 hours, longs pay shorts if perpetual trades above spot price (to incentivize shorting, which brings price down) or vice versa. This funding rate changes based on the delta between the perp and the spot prices. (alignment is also done via arbitrade and market makers)</p>

<p>So in the above example (remember you have a long position), if the funding rate is positive, you have pay fees to shorts and if negative, you earn fees from the shorts.</p>

<p>Perps are essentially a bet on price direction without needing to hold the actual asset. Since they don’t expire, traders can enter and exit positions more flexibly. You can also use perps to hedge against short-term price flucuations (e.g. if you hold a ton of Bitcoin and are long the asset but suspect there will be a dip soon).</p>

<p>Other things that make Hyperliquid bullish are hip-3 (anyone can launch perps if you stake $20 million worth of $HYPE), USDH (Hyperliquid’s stablecoin), and integrations with Phantom’s perps. There’s still a lot of room for interesting things to be built on Hyperliquid.</p>

<p><em>So what?</em> Binance was always the dominant exchange in crypto but Hyperliquid was able to slowly climb the ranks. This is a feat in itself — perps are a lucrative market and Hyperliquid captures most of this value. This made CZ mad so Binance launched its own Hyperliquid competitor called Aster, which is doing pretty well since launch (still not as good as Hyperliquid though).</p>

<h3 id="3-prediction-markets">3. Prediction Markets</h3>

<p>The Kalshi vs. Polymarket PvP has been all rage recently. (Unclear who will “win” - I think Polymarket is more popular with the crypto heads right now but I think Kalshi is better suited to dominate everyday consumer mindshare)</p>

<p>The most crypto-y thing that my non-crypto friends do is sports betting. They use platforms like PrizePicks and Underdog to make casual bets. It’s a pretty big market: sports betting market revenue is estimated around $10-20 billion in 2025.</p>

<p>An even bigger market than sports betting? Blind boxes.</p>

<p>My friend John Wang wrote <a href="https://x.com/j0hnwang/status/1950949285375128036">this piece</a> about the subtle emergence of <em>softcore gambling</em> (forms like mystery item unboxings) and how it is dominated by women. Just look at the numbers: Pop Mart (the company behind Labubus) has a market cap of $355 billion HKD ($45B USD) with 75% of buyers being women (with a 50% repurchase rate!).</p>

<p>These are both signals of emerging behavioral phenomena: <strong>more people are gambling</strong>. The people are addicted to the dopamine hit from playing the game of chance, and it’s becoming more and more normalized.</p>

<p>And it’s not <em>totally</em> obvious either…it’s not a casino or pachinko, it’s a parlay that your favorite player is going to drop at least 20 tonight or that you are going to get that <em>one</em> Labubu. Whatever form it’s in, prediction markets can surely capitalize on this shift. It’s the natural evolution of gambling.</p>

<h3 id="4-stablecoin-l1s">4. Stablecoin L1s</h3>

<p>Stablecoins have always made sense (e.g. cheaper for cross-border payments, etc.) but it’s hard to make crypto payments “a thing” isolated outside of traditional payment rails. Outside of the US, stables are an extremely popular way for countries with volatile local currencies to access the U.S. dollar — historically, Tron has abslutely dominated this market with USDT.</p>

<p>Earlier this month, Stripe and Paradigm announced an incubated stablecoin L1 called <a href="https://tempo.xyz/">Tempo</a> an EVM-compatible blockchain purpose-built for real-world payments. Circle’s stablecoin L1, Arc, was also recently announced.</p>

<p>I think stablecoins work much better as a “crypto trojan horse into tradfi” (so to speak) as opposed to “look at this entirely new way of sending money, now go switch over to it!”, which to me, makes Stripe’s participation particularly exciting. This also seems like the right time given regulatory clarity (GENIUS act in July 2025), proven demand - especially overseas (e.g. SpaceX uses stablecoins for Starlink payments in South America, many Argentinians hold stablecoins for payments using apps like Lemon, cross-border payments in Asia), and tech maturity (Tempo is built on open-source Foundry &amp; Reth, spearheaded by the one and only Georgios Konstantopoulos).</p>

<p>Stablecoin L1s allow companies to capture more value in the global payments market by controlling the underlying infrastructure. Instead of using underlying payment networks like Visa and Mastercard, Stripe simply use Tempo as their payment rail – allowing Stripe to earn the entire profit margin instead of just the smaller percentage on top of network fees. Stripe’s massive payment volume (trillions of dollars) means Tempo will earn tons of revenue in transaction fees.</p>

<p><em>On top of that, Stripe has now built an end-to-end crypto porfolio: they own the end-user wallet (Privy), the on/off ramp (Bridge), and the underlying transaction ledger itself (Tempo). This is quite powerful.</em></p>

<p>Yes this means that stablecoins are becoming more widely adopted, which is exciting for the future of international transfers, faster payments, etc. but this is also indicative of a much needed <em>vibe shift</em> in crypto.</p>

<p>The crypto industry has long lived in dysfuntional extremes: either ideological la dee da land OR degenerate gambling land. Lots of smart people have been nerd-sniped by interesting cryptography problems but oftentimes this work doesn’t necessarily compounding into widely adopted, value-additive products. On the other hand, lots of crypto products that do have “PMF” or make a lot of money simply take advantage of degeneracy (e.g. memecoins, etc.).</p>

<p>The fact that stablecoins are <em>actually</em> being adopted for <em>what they were made for</em> is really exciting! I don’t think people realize how big of a deal this is. Yes, this is “boring payments infra” but that’s exactly where the <em>real-world value</em> is. The fact that Bridge quietly built a <em>great</em> product (I can attest, my old company used to use them) outside of all the usual crypto shenanigans shows just how divorced the industry had become from building actual utility.</p>

<p>**</p>

<p><em>Readings</em></p>
<ul>
  <li><a href="https://daimo.com/blog/three-ethereums">Three Ethereums</a> by DC</li>
  <li><a href="https://tscsw.substack.com/p/dont-buy-microstrategy-inc-mathematically">Don’t Buy Microstrategy</a> by The Small Cap Strategist</li>
  <li><a href="https://liamhorne.com/stablecoins">Making Sense of Tether</a> by Liam Horne</li>
  <li><a href="https://x.com/Baheet_/article/1967186769356488828">Overview of prediction markets today</a></li>
</ul>]]></content><author><name></name></author><summary type="html"><![CDATA[Rough notes on interesting crypto stuff (mostly for the uninitiated since it’s pretty high-level), in no particular order.]]></summary></entry><entry><title type="html">A Short Intro to JAX</title><link href="https://kayleegeorge.github.io/blog/jax-intro/" rel="alternate" type="text/html" title="A Short Intro to JAX" /><published>2025-09-11T00:00:00+00:00</published><updated>2025-09-11T00:00:00+00:00</updated><id>https://kayleegeorge.github.io/blog/jax-intro</id><content type="html" xml:base="https://kayleegeorge.github.io/blog/jax-intro/"><![CDATA[<p><em>This piece serves as a short pre-read to JAX for my <a href="/blog/jax-ray-tracer">Ray Tracer in JAX</a>.</em></p>

<h1 id="jax-an-introduction">JAX: An Introduction</h1>

<p>JAX is a Python library developed by Google that treats functions as mathematical objects that can be transformed, analyzed, and optimized.</p>

<h3 id="pure-functions">Pure Functions</h3>

<p>JAX only works with pure functions — functions where the same input always produces the same output with no side effects like print statements or global state mutations. This is what enables JAX to reason about code mathematically.</p>

<pre><code class="language-Python"># ❌ This breaks JIT compilation
counter = 0
def impure_function(x):
    global counter
    counter += 1  # Side effect - changes every call
    return x * counter

# First call: jitted_fn(5.0) might return 5.0
# Second call: jitted_fn(5.0) should return 10.0, but JIT cached the first result
jitted_fn = jax.jit(impure_function)

# ✅ This works with JIT
def pure_function(x):
    return x ** 2 + 3 * x

# JAX can safely compile this (same input always gives same output)
jitted_pure = jax.jit(pure_function)
</code></pre>

<p>When JAX applies transformations like <code class="language-plaintext highlighter-rouge">jit</code>, <code class="language-plaintext highlighter-rouge">vmap</code>, or <code class="language-plaintext highlighter-rouge">grad</code>, it needs to understand your function’s mathematical behavior completely. The JIT compiler traces your function once and generates optimized machine code. If the function could behave differently on subsequent calls due to hidden state, the compiled version would be incorrect.</p>

<p>Function purity enables three key transformations:</p>

<ul>
  <li><strong><code class="language-plaintext highlighter-rouge">jit</code></strong> can aggressively optimize because the function’s behavior is guaranteed to be invariant</li>
  <li><strong><code class="language-plaintext highlighter-rouge">vmap</code></strong> can safely vectorize operations because there are no hidden dependencies between iterations</li>
  <li><strong><code class="language-plaintext highlighter-rouge">grad</code></strong> produces mathematically correct gradients because the computation graph is well-defined</li>
</ul>

<h3 id="xla">XLA</h3>

<p>Traditional GPU acceleration requires rewriting code in CUDA. JAX compiles to XLA (Accelerated Linear Algebra), Google’s domain-specific compiler that optimizes across device boundaries.</p>

<p>XLA’s fusion optimization combines multiple operations into single kernels, eliminating intermediate memory transfers. This allows JAX code to automatically become optimal low-level implementations:</p>

<ul>
  <li>CPU: Vectorized x86 assembly with SIMD instructions</li>
  <li>GPU: Memory-coalesced CUDA kernels</li>
  <li>TPU: Systolic array-optimized operations</li>
</ul>

<h3 id="automatic-differentiation">Automatic Differentiation</h3>

<p>Most frameworks use operator overloading for automatic differentiation by intercepting operations to build computational graphs:</p>

<div class="language-python highlighter-rouge"><div class="highlight"><pre class="highlight"><code><span class="c1"># Traditional framework approach
</span><span class="n">x</span> <span class="o">=</span> <span class="n">torch</span><span class="p">.</span><span class="n">tensor</span><span class="p">([</span><span class="mf">1.0</span><span class="p">],</span> <span class="n">requires_grad</span><span class="o">=</span><span class="bp">True</span><span class="p">)</span>
<span class="n">y</span> <span class="o">=</span> <span class="n">x</span> <span class="o">**</span> <span class="mi">2</span> <span class="o">+</span> <span class="mi">3</span> <span class="o">*</span> <span class="n">x</span>  <span class="c1"># Framework records: pow, mul, add
</span><span class="n">y</span><span class="p">.</span><span class="n">backward</span><span class="p">()</span>        <span class="c1"># Traverse graph backwards
</span></code></pre></div></div>

<p>JAX’s <code class="language-plaintext highlighter-rouge">grad</code> returns a new function that computes gradients. Since gradients are functions, you can differentiate them again for higher-order derivatives. JAX automatically selects forward-mode or reverse-mode differentiation based on your computation’s mathematical structure.</p>

<pre><code class="language-Python"># JAX approach
def f(x):
    return x ** 2 + 3 * x

grad_f = jax.grad(f)  # Returns a new function
</code></pre>

<h3 id="spmd">SPMD</h3>

<p>JAX’s SPMD (Single Program, Multiple Data) model runs identical computations on different data shards across devices. You specify how to split your data; JAX automatically distributes the computation. This enables seamless scaling from single-device prototypes to multi-device production.</p>

<h3 id="why-this-matters">Why This Matters</h3>

<p>Traditional scientific computing forces a choice: readable Python (slow) or optimized C++/CUDA (fast but hard to iterate). JAX eliminates this tradeoff by making transformations orthogonal to your core logic.</p>

<p>This composability enables research directions that would be prohibitively complex in other frameworks: differentiable physics simulations, inverse rendering, neural radiance fields. JAX makes combining optimization, vectorization, and differentiation trivial, removing barriers between domain expertise and high-performance computing.</p>

<p><em>Read the full JAX documentation <a href="https://docs.jax.dev/en/latest/index.html">here</a>.</em></p>

<p>**</p>

<h2 id="a-quick-note-on-tpus">A Quick Note on TPUs</h2>

<p>While GPUs evolved from graphics rendering with thousands of flexible cores running Single Instruction, Multiple Thread (SIMT), TPUs were purpose-built for one thing: <em>matrix multiplication</em> at massive scale.</p>

<p>TPUs use a systolic array architecture: a grid of simple processing elements where data flows in waves, creating highly efficient pipelines for ML workloads.</p>

<p>TPUs started as inference-only chips powering Google Search in 2015, processing billions of queries daily. Google’s had both the hardware expertise and the massive-scale ML workloads to justify custom silicon, which enabled iterative improvements battled-tested on production systems before external release.</p>

<p>This creates a competitive moat. While NVIDIA’s GPUs serve broad markets, TPUs focus solely on ML. Google optimizes the entire stack: TPU hardware, XLA compiler, JAX framework, and cloud infrastructure. This vertical integration enables optimizations impossible with commodity hardware. Making TPUs accessible through Colab, Kaggle, and Google Cloud also builds ecosystem lock-in — researchers prototyping on free TPUs naturally scale on Google Cloud’s paid infrastructure.</p>

<p>This hardware-software co-design is why JAX can achieve such dramatic performance gains on Google’s infrastructure.</p>]]></content><author><name></name></author><summary type="html"><![CDATA[This piece serves as a short pre-read to JAX for my Ray Tracer in JAX.]]></summary></entry><entry><title type="html">Ray Tracing in JAX</title><link href="https://kayleegeorge.github.io/blog/jax-ray-tracer/" rel="alternate" type="text/html" title="Ray Tracing in JAX" /><published>2025-09-11T00:00:00+00:00</published><updated>2025-09-11T00:00:00+00:00</updated><id>https://kayleegeorge.github.io/blog/jax-ray-tracing</id><content type="html" xml:base="https://kayleegeorge.github.io/blog/jax-ray-tracer/"><![CDATA[<div class="align-center">
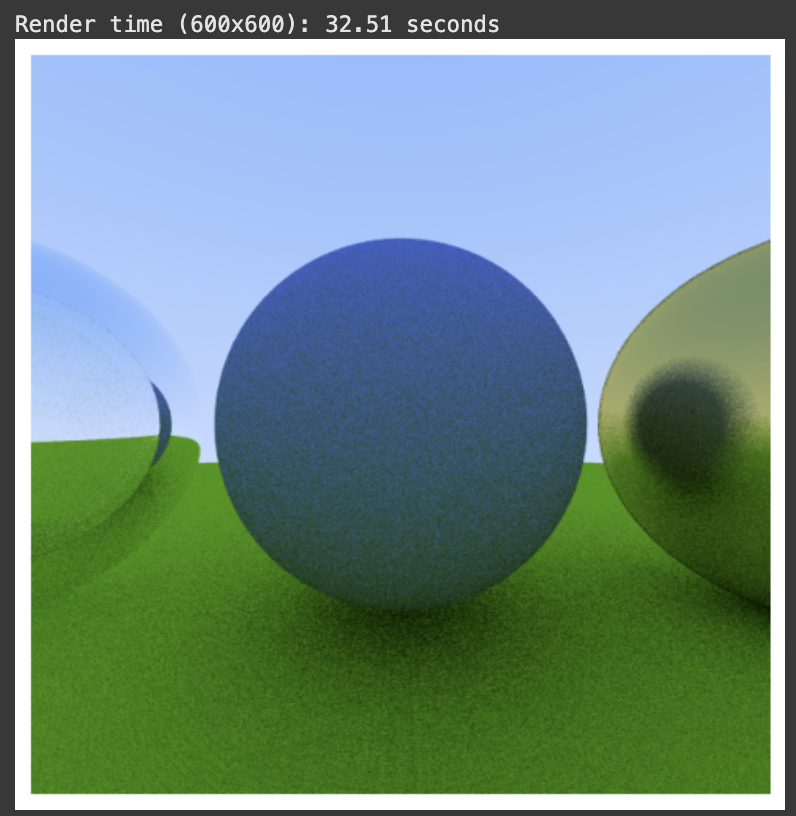
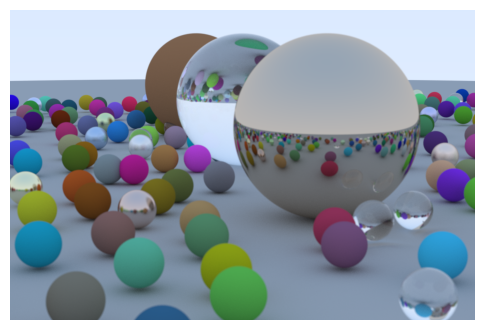
    <img src="/public/jax/gamma.png" width="600px" />
</div>

<p>Last year, I implemented the <a href="https://raytracing.github.io/books/RayTracingInOneWeekend.html">Ray Tracing in One Weekend tutorial</a> in <a href="https://github.com/kayleegeorge/ray-tracer">Rust</a> but the rendering was painfully slow on my machine. Instead of adding parallelization to my Rust code, I decided to rewrite my ray tracer again in JAX to get really good performance gains without too much effort.</p>

<p>Ray tracing is an ideal JAX application: it’s computationally intensive but parallel (each pixel is independent), mathematically heavy (lots of vector operations and intersections), and benefits enormously from differentiation for techniques like inverse rendering and neural radiance fields. The pure function nature of ray tracing algorithms (i.e. given a ray and scene, it always produces the same color) also aligns well with JAX’s constraints.</p>

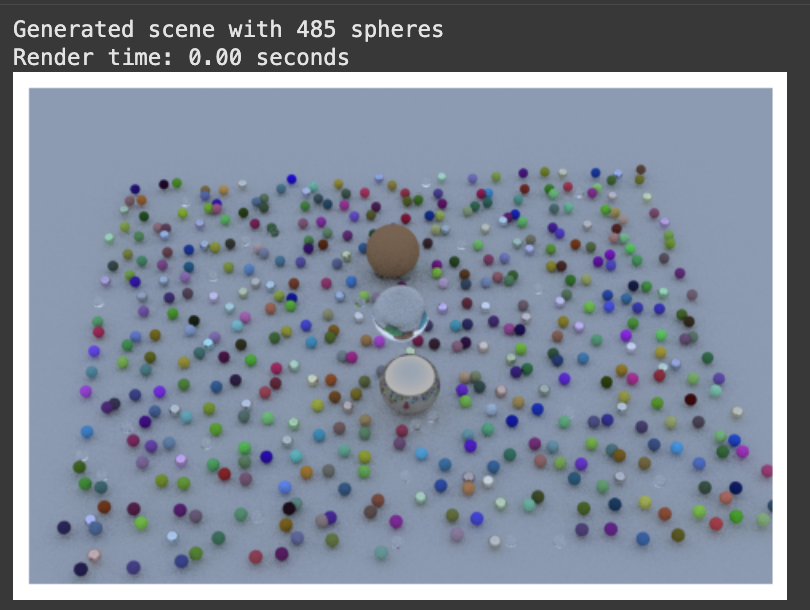
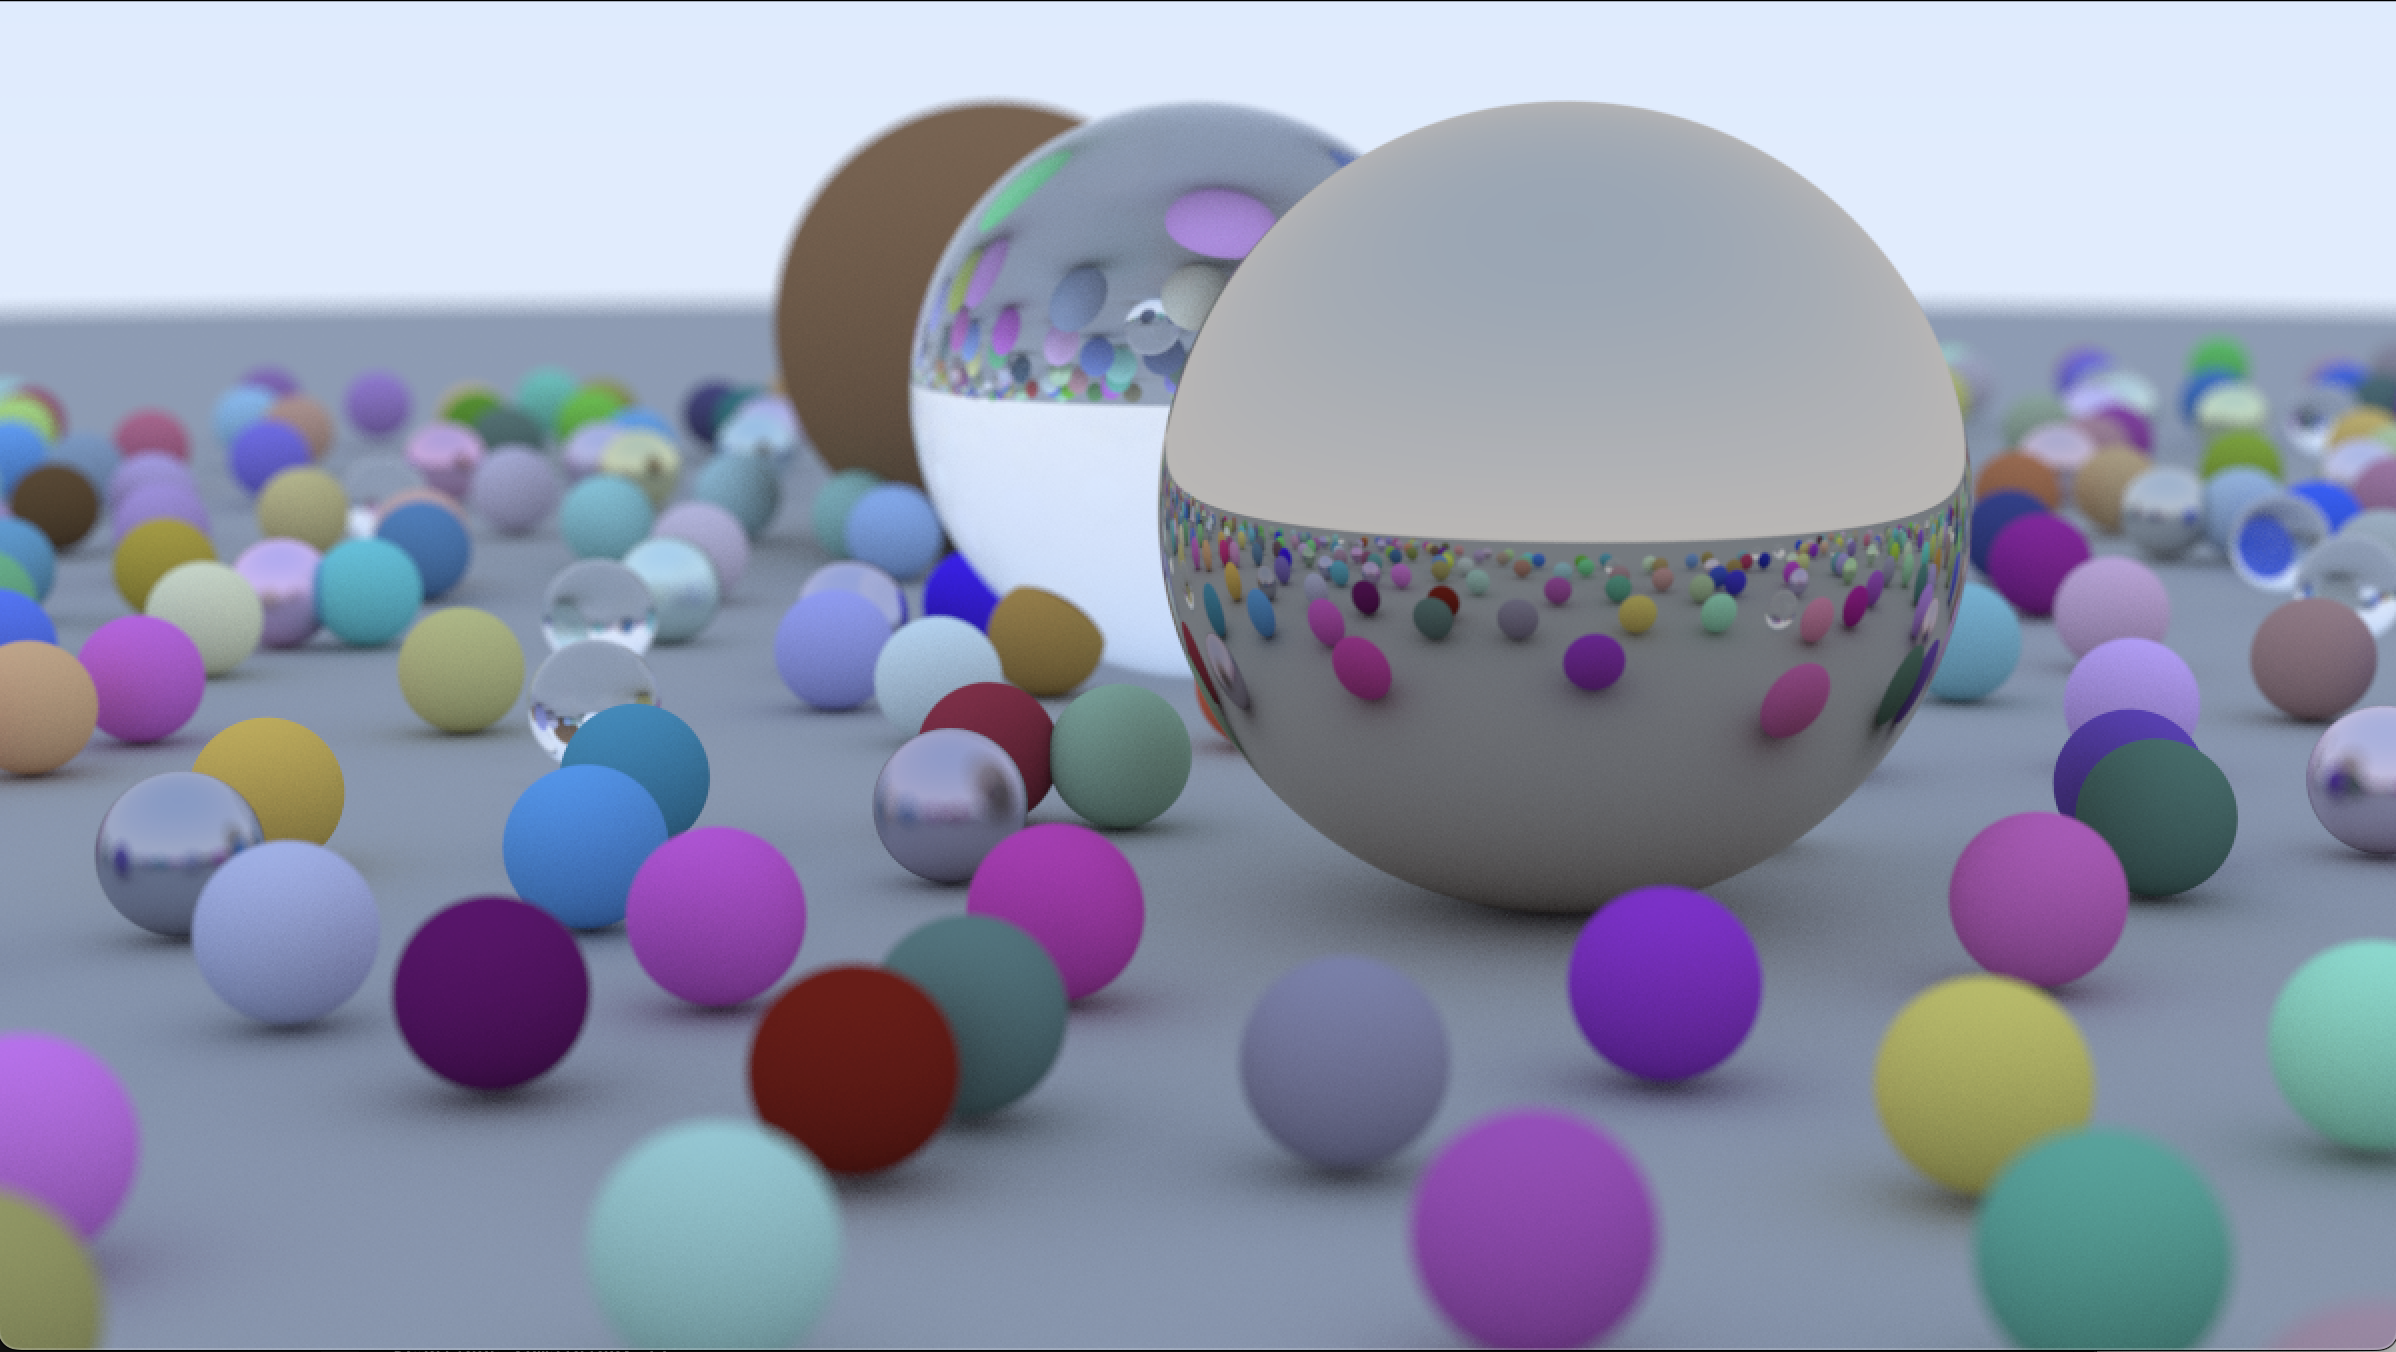
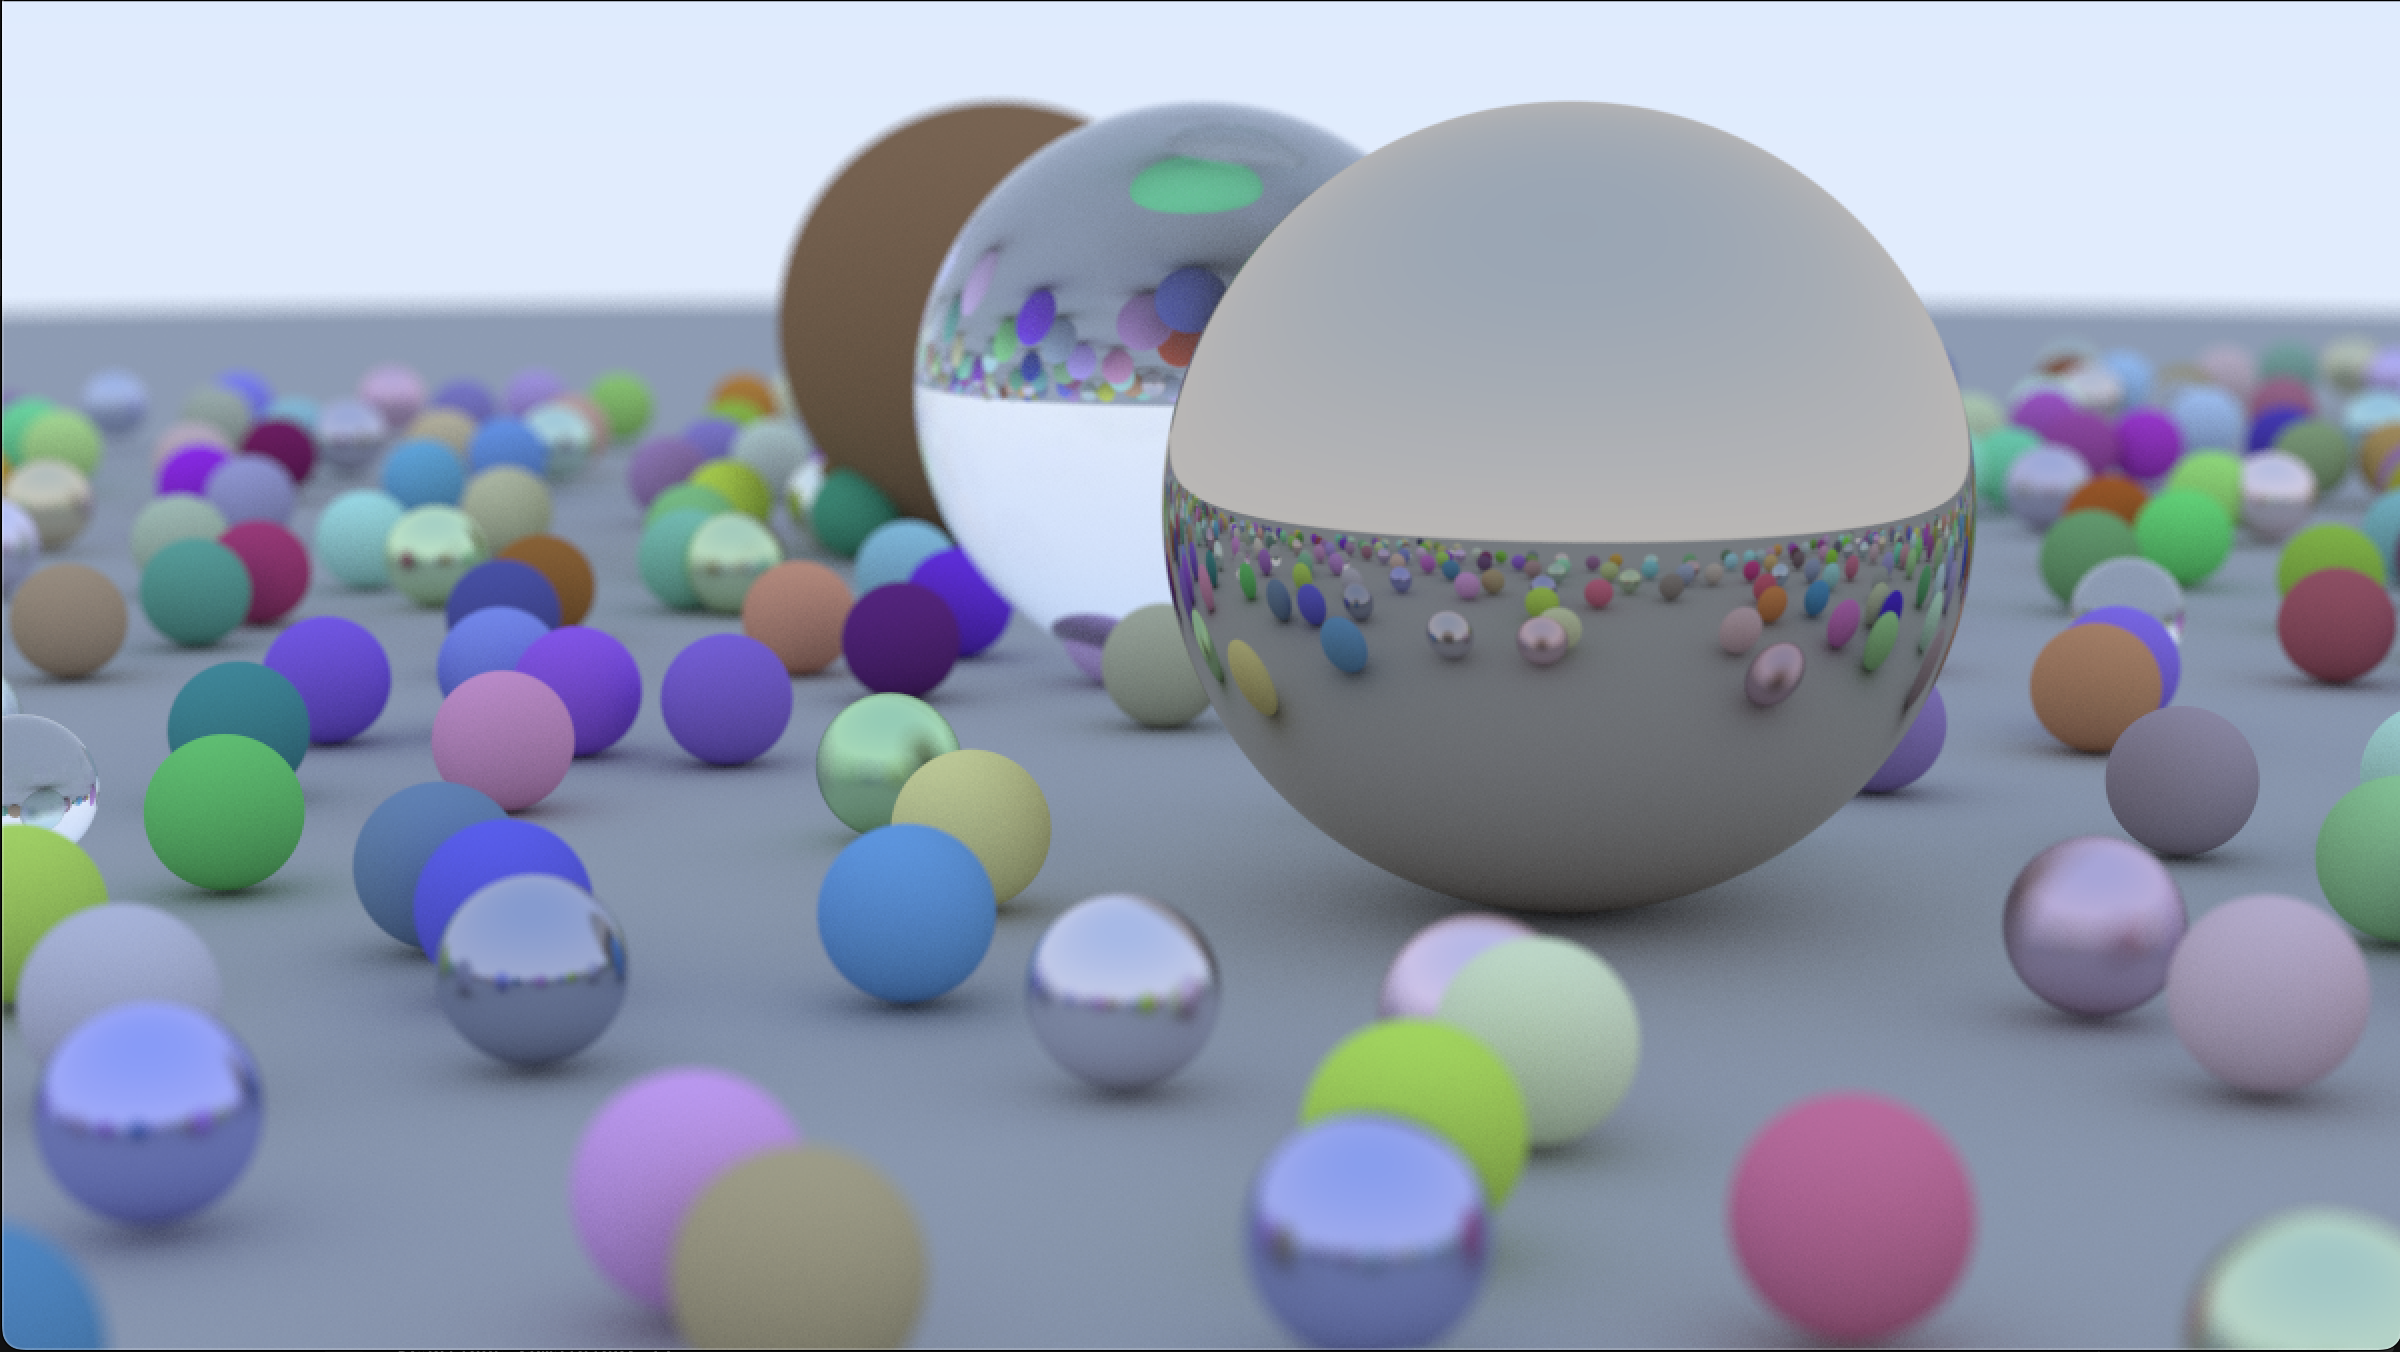
<p>This guide has four parts and ultimately builds up to the iconic Ray Tracer image you see above. I didn’t go <em>super</em> in-depth into all the math/intuition behind each function because it’s all covered in the OG Ray Tracing tutorial, but I tried to map which chapters map to what section. If you want to follow along with runnable code (or make any modifications/extensions), I put it all in this <a href="https://colab.research.google.com/drive/1A5afhu5yGbXSaUFWWFPHotGMWy6Ao1DN?usp=sharing">Colab</a>.</p>

<p><em>*Note: There are some parts in this post where I skip over going through certain redundant code snippets — particularly whenever I need to make a slightly different <code class="language-plaintext highlighter-rouge">trace_pixel</code> or <code class="language-plaintext highlighter-rouge">render</code> function. You can see the full implementations in Colab.</em></p>

<p><br /></p>

<h2 id="part-1-jax-basics--single-sphere">Part 1: JAX Basics + Single Sphere</h2>

<p><em>Roughly covers <a href="https://raytracing.github.io/books/RayTracingInOneWeekend.html#thevec3class">Ch. 3: Color rendering</a>; <a href="https://raytracing.github.io/books/RayTracingInOneWeekend.html#rays,asimplecamera,andbackground">Ch. 4: Rays, a Simple Camera, and Background</a>; <a href="https://raytracing.github.io/books/RayTracingInOneWeekend.html#addingasphere">Ch. 5: Adding a Sphere</a>; and the start of <a href="https://raytracing.github.io/books/RayTracingInOneWeekend.html#surfacenormalsandmultipleobjects">Ch. 6: Surface Normals</a>.</em></p>

<p>Imports and setup:</p>

<div class="language-bash highlighter-rouge"><div class="highlight"><pre class="highlight"><code><span class="o">!</span>pip <span class="nb">install</span> <span class="s2">"jax[cuda12]"</span>
</code></pre></div></div>

<div class="language-python highlighter-rouge"><div class="highlight"><pre class="highlight"><code><span class="kn">import</span> <span class="nn">jax</span>
<span class="kn">import</span> <span class="nn">jax.numpy</span> <span class="k">as</span> <span class="n">jnp</span>
<span class="kn">import</span> <span class="nn">numpy</span> <span class="k">as</span> <span class="n">np</span>
<span class="kn">import</span> <span class="nn">matplotlib.pyplot</span> <span class="k">as</span> <span class="n">plt</span>
<span class="kn">from</span> <span class="nn">jax</span> <span class="kn">import</span> <span class="n">jit</span><span class="p">,</span> <span class="n">vmap</span><span class="p">,</span> <span class="n">grad</span>
<span class="kn">import</span> <span class="nn">time</span>

<span class="k">print</span><span class="p">(</span><span class="s">"JAX devices:"</span><span class="p">,</span> <span class="n">jax</span><span class="p">.</span><span class="n">devices</span><span class="p">())</span>
</code></pre></div></div>

<p><br /></p>

<h3 id="ray-definition">Ray Definition</h3>

<p>A ray is defined by an origin and a direction: <code class="language-plaintext highlighter-rouge">P(t) = A + tb</code>. All ray tracers have a notion of a ray (usually a ray class) and color computation along a ray.</p>

<p>In Rust, we would define Ray as a struct:</p>
<div class="language-rust highlighter-rouge"><div class="highlight"><pre class="highlight"><code><span class="k">pub</span> <span class="k">struct</span> <span class="n">Ray</span> <span class="p">{</span>
    <span class="n">origin</span><span class="p">:</span> <span class="n">Vec3</span><span class="p">,</span>
    <span class="n">direction</span><span class="p">:</span> <span class="n">Vec3</span>
<span class="p">}</span>
</code></pre></div></div>

<p>However, JAX works best with functional programming and pure functions. Objects with methods can interfere with JAX’s transformations like <code class="language-plaintext highlighter-rouge">jit</code>, <code class="language-plaintext highlighter-rouge">vmap</code>, and <code class="language-plaintext highlighter-rouge">grad</code>. For optimal performance in JAX, we’ll represent rays using separate arrays to pass into functions:</p>

<div class="language-python highlighter-rouge"><div class="highlight"><pre class="highlight"><code><span class="n">ray_origin</span> <span class="o">=</span> <span class="n">jnp</span><span class="p">.</span><span class="n">array</span><span class="p">([</span><span class="mf">0.0</span><span class="p">,</span> <span class="mf">0.0</span><span class="p">,</span> <span class="mf">0.0</span><span class="p">])</span>
<span class="n">ray_direction</span> <span class="o">=</span> <span class="n">jnp</span><span class="p">.</span><span class="n">array</span><span class="p">([</span><span class="mf">0.0</span><span class="p">,</span> <span class="mf">0.0</span><span class="p">,</span> <span class="o">-</span><span class="mf">1.0</span><span class="p">])</span>

<span class="k">def</span> <span class="nf">ray_at</span><span class="p">(</span><span class="n">origin</span><span class="p">,</span> <span class="n">direction</span><span class="p">,</span> <span class="n">t</span><span class="p">):</span>
    <span class="s">"""Returns the point at parameter t along the ray"""</span>
    <span class="k">return</span> <span class="n">origin</span> <span class="o">+</span> <span class="n">t</span> <span class="o">*</span> <span class="n">direction</span>
</code></pre></div></div>

<p><br /></p>

<h3 id="ray-sphere-intersection">Ray-sphere intersection</h3>

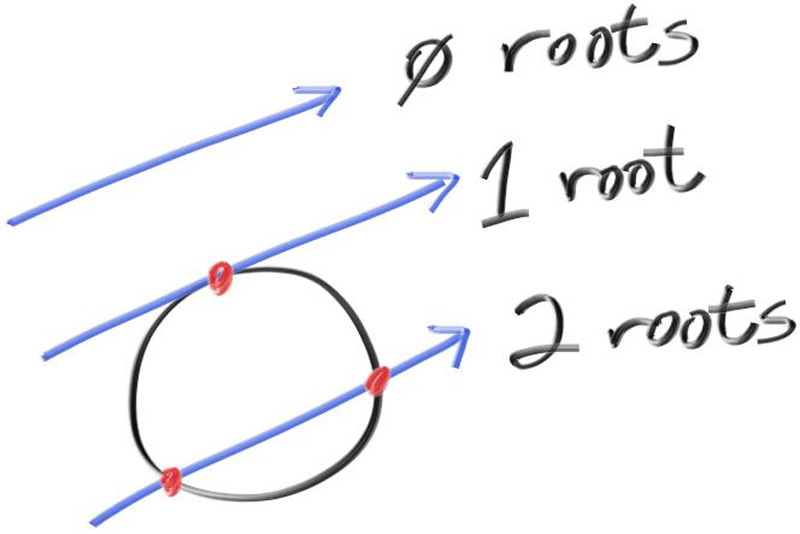
<p>This function returns whether the ray intersects the sphere and where, solving for t in the ray equation: <code class="language-plaintext highlighter-rouge">r(t) = origin + t * direction</code>.</p>

<p>In the Rust <code class="language-plaintext highlighter-rouge">hit</code> function, we simply early return if there’s no intersection:</p>
<div class="language-rust highlighter-rouge"><div class="highlight"><pre class="highlight"><code><span class="k">let</span> <span class="n">discriminant</span> <span class="o">=</span> <span class="n">h</span> <span class="o">*</span> <span class="n">h</span> <span class="o">-</span> <span class="n">a</span> <span class="o">*</span> <span class="n">c</span><span class="p">;</span>
<span class="k">if</span> <span class="n">discriminant</span> <span class="o">&lt;</span> <span class="mf">0.0</span> <span class="p">{</span>
    <span class="k">return</span> <span class="k">false</span><span class="p">;</span>
<span class="p">}</span>
</code></pre></div></div>

<p>But JAX needs to trace through your entire function to understand the computation graph. Early returns create <em>dynamic control flow</em> that depend on runtime, which JAX can’t compile efficiently or differentiate through. Thus, we always do computation but use <code class="language-plaintext highlighter-rouge">jnp.where()</code> to mask the results based on the <code class="language-plaintext highlighter-rouge">hit</code> condition. <em>*Note: The calculations for the quadratic equation coefficients in the code implementation are simplified: math <a href="https://raytracing.github.io/books/RayTracingInOneWeekend.html#surfacenormalsandmultipleobjects/simplifyingtheray-sphereintersectioncode">here</a>.</em></p>

<p>Another example of this <code class="language-plaintext highlighter-rouge">jnp.where()</code> JAX hack is root calculation, e.g. the orignal Rust implementation:</p>

<div class="language-rust highlighter-rouge"><div class="highlight"><pre class="highlight"><code><span class="c1">// Find the nearest root that lies in the acceptable range</span>
<span class="k">let</span> <span class="k">mut</span> <span class="n">root</span> <span class="o">=</span> <span class="p">(</span><span class="n">h</span> <span class="o">-</span> <span class="n">sqrt_d</span><span class="p">)</span> <span class="o">/</span> <span class="n">a</span><span class="p">;</span> <span class="c1">// near root</span>
<span class="k">if</span> <span class="o">!</span><span class="n">ray_t</span><span class="nf">.surrounds</span><span class="p">(</span><span class="n">root</span><span class="p">)</span> <span class="p">{</span>
    <span class="n">root</span> <span class="o">=</span> <span class="p">(</span><span class="n">h</span> <span class="o">+</span> <span class="n">sqrt_d</span><span class="p">)</span> <span class="o">/</span> <span class="n">a</span><span class="p">;</span> <span class="c1">// far root</span>
    <span class="k">if</span> <span class="o">!</span><span class="n">ray_t</span><span class="nf">.surrounds</span><span class="p">(</span><span class="n">root</span><span class="p">)</span> <span class="p">{</span>
        <span class="k">return</span> <span class="k">false</span><span class="p">;</span>
    <span class="p">}</span>
<span class="p">}</span>
</code></pre></div></div>

<p>The far root is often used for implementing refractions (like glass), which needs both entry and exit points – the near and far roots, respectively. <em>(Most of the time, we only use the near root so I was considering just simplifying this code by ignoring the far root completely but I decided that I wanted materials like glass in the final product.)</em></p>

<div class="align-center">
    <img src="/public/jax/roots.jpeg" width="300px" />
</div>

<div class="language-python highlighter-rouge"><div class="highlight"><pre class="highlight"><code><span class="k">def</span> <span class="nf">ray_sphere_intersect</span><span class="p">(</span><span class="n">ray_origin</span><span class="p">,</span> <span class="n">ray_direction</span><span class="p">,</span> <span class="n">sphere_center</span><span class="p">,</span> <span class="n">radius</span><span class="p">):</span>
  <span class="s">"""If and where a ray hits a sphere"""</span>

  <span class="c1"># vector from ray origin to sphere center
</span>  <span class="n">oc</span> <span class="o">=</span> <span class="n">sphere_center</span> <span class="o">-</span> <span class="n">ray_origin</span>

  <span class="c1"># quadratic equation coeffs
</span>  <span class="n">a</span> <span class="o">=</span> <span class="n">jnp</span><span class="p">.</span><span class="n">dot</span><span class="p">(</span><span class="n">ray_direction</span><span class="p">,</span> <span class="n">ray_direction</span><span class="p">)</span>
  <span class="n">h</span> <span class="o">=</span> <span class="n">jnp</span><span class="p">.</span><span class="n">dot</span><span class="p">(</span><span class="n">ray_direction</span><span class="p">,</span> <span class="n">oc</span><span class="p">)</span>
  <span class="n">c</span> <span class="o">=</span> <span class="n">jnp</span><span class="p">.</span><span class="n">dot</span><span class="p">(</span><span class="n">oc</span><span class="p">,</span> <span class="n">oc</span><span class="p">)</span> <span class="o">-</span> <span class="n">radius</span> <span class="o">*</span> <span class="n">radius</span>

  <span class="n">discriminant</span> <span class="o">=</span> <span class="n">h</span> <span class="o">*</span> <span class="n">h</span> <span class="o">-</span> <span class="n">a</span> <span class="o">*</span> <span class="n">c</span>

  <span class="c1"># instead of early return, compute everything but mask results
</span>  <span class="n">hit</span> <span class="o">=</span> <span class="n">discriminant</span> <span class="o">&gt;=</span> <span class="mi">0</span>

  <span class="n">sqrt_d</span> <span class="o">=</span> <span class="n">jnp</span><span class="p">.</span><span class="n">sqrt</span><span class="p">(</span><span class="n">jnp</span><span class="p">.</span><span class="n">maximum</span><span class="p">(</span><span class="n">discriminant</span><span class="p">,</span> <span class="mi">0</span><span class="p">))</span>
  <span class="n">root_near</span> <span class="o">=</span> <span class="p">(</span><span class="n">h</span> <span class="o">-</span> <span class="n">sqrt_d</span><span class="p">)</span> <span class="o">/</span> <span class="n">a</span>
  <span class="n">root_far</span> <span class="o">=</span> <span class="p">(</span><span class="n">h</span> <span class="o">+</span> <span class="n">sqrt_d</span><span class="p">)</span> <span class="o">/</span> <span class="n">a</span>

  <span class="c1"># Choose the closest positive root
</span>  <span class="n">t</span> <span class="o">=</span> <span class="n">jnp</span><span class="p">.</span><span class="n">where</span><span class="p">(</span>
      <span class="n">root_near</span> <span class="o">&gt;</span> <span class="mi">0</span><span class="p">,</span> 
      <span class="n">root_near</span><span class="p">,</span>
      <span class="n">jnp</span><span class="p">.</span><span class="n">where</span><span class="p">(</span><span class="n">root_far</span> <span class="o">&gt;</span> <span class="mi">0</span><span class="p">,</span> <span class="n">root_far</span><span class="p">,</span> <span class="n">jnp</span><span class="p">.</span><span class="n">inf</span><span class="p">)</span>
  <span class="p">)</span>

  <span class="n">t</span> <span class="o">=</span> <span class="n">jnp</span><span class="p">.</span><span class="n">where</span><span class="p">(</span><span class="n">hit</span><span class="p">,</span> <span class="n">t</span><span class="p">,</span> <span class="n">jnp</span><span class="p">.</span><span class="n">inf</span><span class="p">)</span>
  <span class="n">p</span> <span class="o">=</span> <span class="n">ray_at</span><span class="p">(</span><span class="n">ray_origin</span><span class="p">,</span> <span class="n">ray_direction</span><span class="p">,</span> <span class="n">t</span><span class="p">)</span> <span class="c1"># hit point
</span>  <span class="n">outward_normal</span> <span class="o">=</span> <span class="p">(</span><span class="n">p</span> <span class="o">-</span> <span class="n">sphere_center</span><span class="p">)</span> <span class="o">/</span> <span class="n">radius</span>
  <span class="n">normal</span> <span class="o">=</span> <span class="n">jnp</span><span class="p">.</span><span class="n">where</span><span class="p">(</span><span class="n">hit</span><span class="p">,</span> <span class="n">outward_normal</span><span class="p">,</span> <span class="n">jnp</span><span class="p">.</span><span class="n">zeros</span><span class="p">(</span><span class="mi">3</span><span class="p">))</span>

  <span class="k">return</span> <span class="n">hit</span><span class="p">,</span> <span class="n">t</span><span class="p">,</span> <span class="n">p</span><span class="p">,</span> <span class="n">normal</span>
</code></pre></div></div>

<p><br /></p>

<h3 id="simple-camera">Simple Camera</h3>

<p>JAX’s functional programming paradigm means no <code class="language-plaintext highlighter-rouge">self</code> or global state. Instead of initializing camera properties once (as you would in Rust’s <code class="language-plaintext highlighter-rouge">Camera::new()</code>), we recalculate these “camera constants” each time in <code class="language-plaintext highlighter-rouge">camera_get_ray()</code>. While this might seem inefficient, JAX’s JIT compiler is smart enough to optimize these repeated calculations.</p>

<p>Function signatures can sometimes get pretty length in JAX since many individual parameters are passed instead of a single camera struct. This is pretty clunky compared to Rust’s <code class="language-plaintext highlighter-rouge">&amp;self</code>, but JAX’s JIT compiler optimizes much better when it sees individual arrays rather than nested Python dictionaries or objects.</p>

<p>The camera viewport represents the 3D plane we’re projecting our 2D image onto. Our goal is transforming pixel coordinates (ranging from 0 to width-1, 0 to height-1) into world space coordinates on this viewport plane.</p>

<div class="language-python highlighter-rouge"><div class="highlight"><pre class="highlight"><code><span class="k">def</span> <span class="nf">create_camera</span><span class="p">(</span><span class="n">image_width</span><span class="p">,</span> <span class="n">image_height</span><span class="p">):</span>
  <span class="s">"""Setup a simple camera"""</span>
  <span class="n">aspect_ratio</span> <span class="o">=</span> <span class="n">image_width</span> <span class="o">/</span> <span class="n">image_height</span>
  
  <span class="c1"># viewport dimensions 
</span>  <span class="n">focal_length</span> <span class="o">=</span> <span class="mf">1.0</span>
  <span class="n">viewport_height</span> <span class="o">=</span> <span class="mf">2.0</span>
  <span class="n">viewport_width</span> <span class="o">=</span> <span class="n">viewport_height</span> <span class="o">*</span> <span class="p">(</span><span class="n">image_width</span> <span class="o">/</span> <span class="n">image_height</span><span class="p">)</span>
  <span class="n">camera_center</span> <span class="o">=</span> <span class="n">jnp</span><span class="p">.</span><span class="n">array</span><span class="p">([</span><span class="mf">0.0</span><span class="p">,</span> <span class="mf">0.0</span><span class="p">,</span> <span class="mf">0.0</span><span class="p">])</span>
  
  <span class="c1"># viewport vectors
</span>  <span class="n">viewport_u</span> <span class="o">=</span> <span class="n">jnp</span><span class="p">.</span><span class="n">array</span><span class="p">([</span><span class="n">viewport_width</span><span class="p">,</span> <span class="mi">0</span><span class="p">,</span> <span class="mi">0</span><span class="p">])</span> <span class="c1"># right edge
</span>  <span class="n">viewport_v</span> <span class="o">=</span> <span class="n">jnp</span><span class="p">.</span><span class="n">array</span><span class="p">([</span><span class="mi">0</span><span class="p">,</span> <span class="o">-</span><span class="n">viewport_height</span><span class="p">,</span> <span class="mi">0</span><span class="p">])</span> <span class="c1"># down edge
</span>  
  <span class="c1"># delta vectors from pixel to pixel
</span>  <span class="n">pixel_delta_u</span> <span class="o">=</span> <span class="n">viewport_u</span> <span class="o">/</span> <span class="n">image_width</span>
  <span class="n">pixel_delta_v</span> <span class="o">=</span> <span class="n">viewport_v</span> <span class="o">/</span> <span class="n">image_height</span>
  
  <span class="c1"># upper left and center pixels
</span>  <span class="n">viewport_upper_left</span> <span class="o">=</span> <span class="p">(</span><span class="n">camera_center</span> <span class="o">-</span> 
                        <span class="n">jnp</span><span class="p">.</span><span class="n">array</span><span class="p">([</span><span class="mi">0</span><span class="p">,</span> <span class="mi">0</span><span class="p">,</span> <span class="n">focal_length</span><span class="p">])</span> <span class="o">-</span> 
                        <span class="n">viewport_u</span><span class="o">/</span><span class="mi">2</span> <span class="o">-</span> <span class="n">viewport_v</span><span class="o">/</span><span class="mi">2</span><span class="p">)</span>
  <span class="n">pixel00_loc</span> <span class="o">=</span> <span class="n">viewport_upper_left</span> <span class="o">+</span> <span class="mf">0.5</span> <span class="o">*</span> <span class="p">(</span><span class="n">pixel_delta_u</span> <span class="o">+</span> <span class="n">pixel_delta_v</span><span class="p">)</span>
  
  <span class="k">return</span> <span class="n">image_width</span><span class="p">,</span> <span class="n">image_height</span><span class="p">,</span> <span class="n">aspect_ratio</span><span class="p">,</span> <span class="n">camera_center</span><span class="p">,</span> <span class="n">pixel00_loc</span><span class="p">,</span> <span class="n">pixel_delta_u</span><span class="p">,</span> <span class="n">pixel_delta_v</span>
</code></pre></div></div>

<div class="language-python highlighter-rouge"><div class="highlight"><pre class="highlight"><code><span class="k">def</span> <span class="nf">camera_get_ray</span><span class="p">(</span><span class="n">i</span><span class="p">,</span> <span class="n">j</span><span class="p">,</span> <span class="n">image_width</span><span class="p">,</span> <span class="n">image_height</span><span class="p">):</span>
  <span class="s">"""Generate a ray from camera through pixel (i,j)"""</span>
  <span class="n">_</span><span class="p">,</span> <span class="n">_</span><span class="p">,</span> <span class="n">_</span><span class="p">,</span> <span class="n">camera_center</span><span class="p">,</span> <span class="n">pixel00_loc</span><span class="p">,</span> <span class="n">pixel_delta_u</span><span class="p">,</span> <span class="n">pixel_delta_v</span> <span class="o">=</span> <span class="n">create_camera</span><span class="p">(</span><span class="n">image_width</span><span class="p">,</span> <span class="n">image_height</span><span class="p">)</span>

  <span class="n">pixel_center</span> <span class="o">=</span> <span class="n">pixel00_loc</span> <span class="o">+</span> <span class="p">(</span><span class="n">i</span> <span class="o">*</span> <span class="n">pixel_delta_u</span><span class="p">)</span> <span class="o">+</span> <span class="p">(</span><span class="n">j</span> <span class="o">*</span> <span class="n">pixel_delta_v</span><span class="p">)</span>
  <span class="n">ray_direction</span> <span class="o">=</span> <span class="n">normalize</span><span class="p">(</span><span class="n">pixel_center</span> <span class="o">-</span> <span class="n">camera_center</span><span class="p">)</span>

  <span class="k">return</span> <span class="n">camera_center</span><span class="p">,</span> <span class="n">ray_direction</span>
</code></pre></div></div>

<p><br /></p>

<h3 id="simple-shading">Simple Shading</h3>

<p>This <code class="language-plaintext highlighter-rouge">ray_color</code> function handles two cases: sphere hits get colored based on their surface normal (creating a nice gradient effect), while misses render a blue-to-white sky gradient based on the ray’s Y direction.</p>

<p>The key JAX win here is the vectorized <code class="language-plaintext highlighter-rouge">jnp.where(hit, sphere_color, sky_color)</code> - when we <code class="language-plaintext highlighter-rouge">vmap</code> this over thousands of rays, it efficiently computes both colors in parallel and selects the right one for each ray.</p>

<div class="language-python highlighter-rouge"><div class="highlight"><pre class="highlight"><code><span class="k">def</span> <span class="nf">ray_color</span><span class="p">(</span><span class="n">ray_origin</span><span class="p">,</span> <span class="n">ray_direction</span><span class="p">,</span> <span class="n">sphere_center</span><span class="p">,</span> <span class="n">radius</span><span class="p">):</span>
  <span class="n">hit</span><span class="p">,</span> <span class="n">t</span><span class="p">,</span> <span class="n">p</span><span class="p">,</span> <span class="n">normal</span> <span class="o">=</span> <span class="n">ray_sphere_intersect</span><span class="p">(</span><span class="n">ray_origin</span><span class="p">,</span> <span class="n">ray_direction</span><span class="p">,</span> <span class="n">sphere_center</span><span class="p">,</span> <span class="n">radius</span><span class="p">)</span>

  <span class="c1"># hit color
</span>  <span class="n">sphere_color</span> <span class="o">=</span> <span class="mf">0.5</span> <span class="o">*</span> <span class="n">normal</span> <span class="o">+</span> <span class="n">jnp</span><span class="p">.</span><span class="n">array</span><span class="p">([</span><span class="mf">1.0</span><span class="p">,</span> <span class="mf">1.0</span><span class="p">,</span> <span class="mf">1.0</span><span class="p">])</span>

  <span class="c1"># sky color
</span>  <span class="n">unit_direction</span> <span class="o">=</span> <span class="n">normalize</span><span class="p">(</span><span class="n">ray_direction</span><span class="p">)</span>
  <span class="n">a</span> <span class="o">=</span> <span class="mf">0.5</span> <span class="o">*</span> <span class="p">(</span><span class="n">unit_direction</span><span class="p">[</span><span class="mi">1</span><span class="p">]</span> <span class="o">+</span> <span class="mf">1.0</span><span class="p">)</span> <span class="c1"># y component for dir
</span>
  <span class="n">sphere_color</span> <span class="o">=</span> <span class="n">jnp</span><span class="p">.</span><span class="n">clip</span><span class="p">(</span><span class="n">sphere_color</span><span class="p">,</span> <span class="mf">0.0</span><span class="p">,</span> <span class="mf">1.0</span><span class="p">)</span> <span class="c1"># nit: clamp to [0,1]
</span>
  <span class="n">sky_color</span> <span class="o">=</span> <span class="p">(</span><span class="mf">1.0</span> <span class="o">-</span> <span class="n">a</span><span class="p">)</span> <span class="o">*</span> <span class="n">jnp</span><span class="p">.</span><span class="n">array</span><span class="p">([</span><span class="mf">1.0</span><span class="p">,</span> <span class="mf">1.0</span><span class="p">,</span> <span class="mf">1.0</span><span class="p">])</span> <span class="o">+</span> <span class="n">a</span> <span class="o">*</span> <span class="n">jnp</span><span class="p">.</span><span class="n">array</span><span class="p">([</span><span class="mf">0.5</span><span class="p">,</span> <span class="mf">0.7</span><span class="p">,</span> <span class="mf">1.0</span><span class="p">])</span>

  <span class="k">return</span> <span class="n">jnp</span><span class="p">.</span><span class="n">where</span><span class="p">(</span><span class="n">hit</span><span class="p">,</span> <span class="n">sphere_color</span><span class="p">,</span> <span class="n">sky_color</span><span class="p">)</span>
</code></pre></div></div>

<p><br /></p>

<h3 id="rendering">Rendering</h3>

<p>Now that we have all our basics in place, let’s start rendering!</p>

<p>When JIT compiling <code class="language-plaintext highlighter-rouge">trace_pixel()</code>, we use <code class="language-plaintext highlighter-rouge">static_argnums</code> to tell JAX’s JIT compiler which arguments will stay constant across calls. Here, the image width and height don’t change during rendering so we can mark them as “static.” Without marking as static, JAX would recompile the function every time width/height changes – but with static args, JAX compiles once per unique (width, height) pair and reuses the optimized code.</p>

<p>Static arguments get “baked into” the compiled function – but for ray tracing, this is perfect because we typically render entire images at a fixed resolution, so the compiler can optimize knowing exactly what the image dimensions are.</p>

<div class="language-python highlighter-rouge"><div class="highlight"><pre class="highlight"><code><span class="k">def</span> <span class="nf">trace_pixel</span><span class="p">(</span><span class="n">i</span><span class="p">,</span> <span class="n">j</span><span class="p">,</span> <span class="n">image_width</span><span class="p">,</span> <span class="n">image_height</span><span class="p">,</span> <span class="n">sphere_center</span><span class="p">,</span> <span class="n">sphere_radius</span><span class="p">):</span>
  <span class="s">"""Cast a ray through pixel (i,j) and return its color"""</span>
  <span class="n">ray_origin</span><span class="p">,</span> <span class="n">ray_direction</span> <span class="o">=</span> <span class="n">camera_get_ray</span><span class="p">(</span><span class="n">i</span><span class="p">,</span> <span class="n">j</span><span class="p">,</span> <span class="n">image_width</span><span class="p">,</span> <span class="n">image_height</span><span class="p">)</span>
  <span class="k">return</span> <span class="n">ray_color</span><span class="p">(</span><span class="n">ray_origin</span><span class="p">,</span> <span class="n">ray_direction</span><span class="p">,</span> <span class="n">sphere_center</span><span class="p">,</span> <span class="n">sphere_radius</span><span class="p">)</span>

<span class="n">trace_pixel_jit</span> <span class="o">=</span> <span class="n">jit</span><span class="p">(</span><span class="n">trace_pixel</span><span class="p">,</span> <span class="n">static_argnums</span><span class="o">=</span><span class="p">(</span><span class="mi">2</span><span class="p">,</span> <span class="mi">3</span><span class="p">))</span>  <span class="c1"># width/height are static
</span></code></pre></div></div>

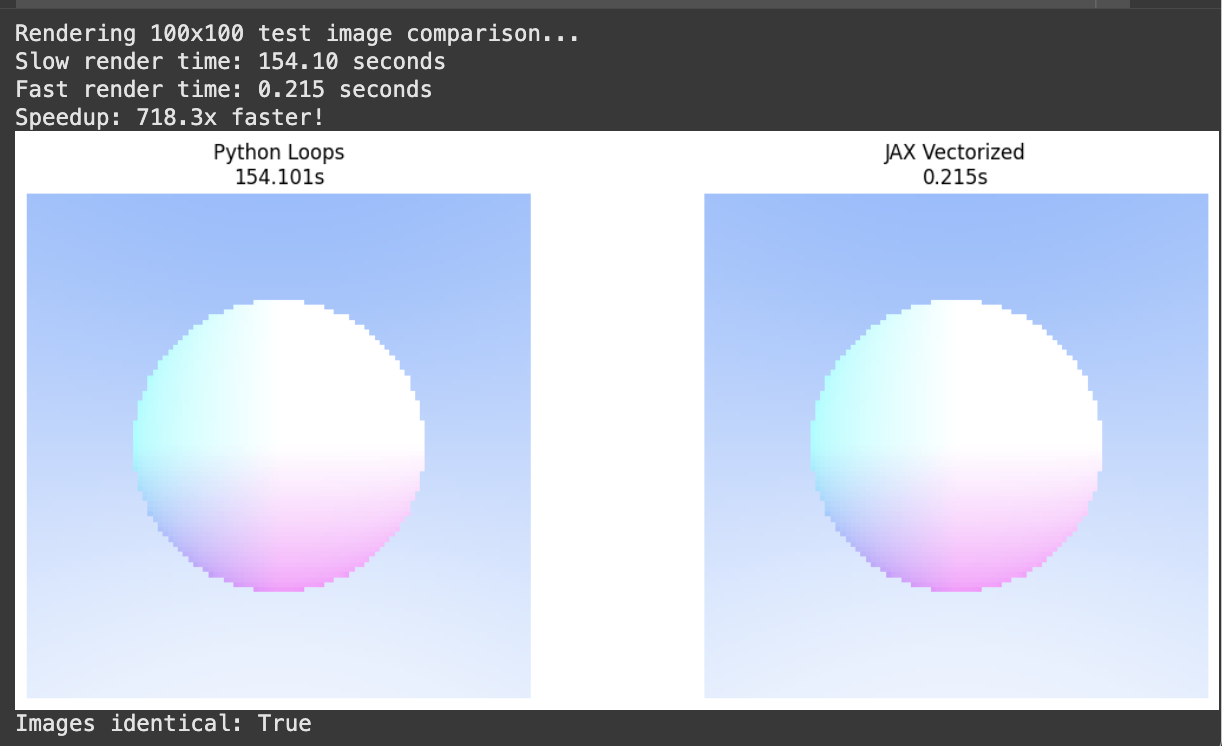
<p>This is the main image rendering function that handles the <code class="language-plaintext highlighter-rouge">vmap</code> vectorization and the subsequent <code class="language-plaintext highlighter-rouge">jit</code> compilation. I also implemented <code class="language-plaintext highlighter-rouge">render_image_slow()</code>, which is the original ray tracing tutorial approach for speed comparison.</p>

<div class="language-python highlighter-rouge"><div class="highlight"><pre class="highlight"><code><span class="k">def</span> <span class="nf">render_image</span><span class="p">(</span><span class="n">width</span><span class="p">,</span> <span class="n">height</span><span class="p">,</span> <span class="n">sphere_centers</span><span class="p">,</span> <span class="n">sphere_radii</span><span class="p">):</span>
  <span class="s">"""Fast version with vectorization to render all pixels at once"""</span>
  <span class="c1"># Create coordinate grids for all pixels
</span>  <span class="n">x_coords</span><span class="p">,</span> <span class="n">y_coords</span> <span class="o">=</span> <span class="n">jnp</span><span class="p">.</span><span class="n">meshgrid</span><span class="p">(</span><span class="n">jnp</span><span class="p">.</span><span class="n">arange</span><span class="p">(</span><span class="n">width</span><span class="p">),</span> <span class="n">jnp</span><span class="p">.</span><span class="n">arange</span><span class="p">(</span><span class="n">height</span><span class="p">))</span>

  <span class="c1"># Vectorize over all pixels at once
</span>  <span class="n">trace_all_pixels</span> <span class="o">=</span> <span class="n">vmap</span><span class="p">(</span><span class="n">trace_pixel_jit</span><span class="p">,</span> <span class="n">in_axes</span><span class="o">=</span><span class="p">(</span><span class="mi">0</span><span class="p">,</span> <span class="mi">0</span><span class="p">,</span> <span class="bp">None</span><span class="p">,</span> <span class="bp">None</span><span class="p">,</span> <span class="bp">None</span><span class="p">,</span> <span class="bp">None</span><span class="p">))</span>
  <span class="n">colors_flat</span> <span class="o">=</span> <span class="n">trace_all_pixels</span><span class="p">(</span><span class="n">x_coords</span><span class="p">.</span><span class="n">flatten</span><span class="p">(),</span> <span class="n">y_coords</span><span class="p">.</span><span class="n">flatten</span><span class="p">(),</span> 
                                  <span class="n">width</span><span class="p">,</span> <span class="n">height</span><span class="p">,</span> <span class="n">sphere_center</span><span class="p">,</span> <span class="n">sphere_radius</span><span class="p">)</span>
  
  <span class="k">return</span> <span class="n">colors_flat</span><span class="p">.</span><span class="n">reshape</span><span class="p">(</span><span class="n">height</span><span class="p">,</span> <span class="n">width</span><span class="p">,</span> <span class="mi">3</span><span class="p">)</span>

<span class="c1"># JIT the entire render pipeline
</span><span class="n">render_image_jit</span> <span class="o">=</span> <span class="n">jit</span><span class="p">(</span><span class="n">render_image</span><span class="p">,</span> <span class="n">static_argnums</span><span class="o">=</span><span class="p">(</span><span class="mi">0</span><span class="p">,</span> <span class="mi">1</span><span class="p">))</span>

<span class="k">def</span> <span class="nf">render_image_slow</span><span class="p">(</span><span class="n">width</span><span class="p">,</span> <span class="n">height</span><span class="p">,</span> <span class="n">sphere_center</span><span class="p">,</span> <span class="n">sphere_radius</span><span class="p">):</span>
  <span class="s">"""Slow verison with loops to render each pixel (like in the Raytracing tutorial)"""</span>
  <span class="n">image</span> <span class="o">=</span> <span class="n">np</span><span class="p">.</span><span class="n">zeros</span><span class="p">((</span><span class="n">height</span><span class="p">,</span> <span class="n">width</span><span class="p">,</span> <span class="mi">3</span><span class="p">))</span>

  <span class="k">for</span> <span class="n">y</span> <span class="ow">in</span> <span class="nb">range</span><span class="p">(</span><span class="n">height</span><span class="p">):</span>
      <span class="k">for</span> <span class="n">x</span> <span class="ow">in</span> <span class="nb">range</span><span class="p">(</span><span class="n">width</span><span class="p">):</span>
          <span class="n">color</span> <span class="o">=</span> <span class="n">trace_pixel</span><span class="p">(</span><span class="n">x</span><span class="p">,</span> <span class="n">y</span><span class="p">,</span> <span class="n">width</span><span class="p">,</span> <span class="n">height</span><span class="p">,</span> <span class="n">sphere_center</span><span class="p">,</span> <span class="n">sphere_radius</span><span class="p">)</span>
          <span class="n">image</span><span class="p">[</span><span class="n">y</span><span class="p">,</span> <span class="n">x</span><span class="p">]</span> <span class="o">=</span> <span class="n">color</span>

  <span class="k">return</span> <span class="n">image</span>
</code></pre></div></div>

<p>As you can see, JAX is much more efficient than Python loops. The slow version treats each pixel as a separate Python function call whereas the fast version lets JAX see the entire computation at once, enabling vectorization across all pixels simultaneously by leverage <code class="language-plaintext highlighter-rouge">vmap</code>. Even if you beef up the dimensions, JAX is still very fast.</p>

<div style="display: grid; grid-template-columns: 3fr 2fr; gap: 10px; max-width: 800px; margin: 20px auto;">
  <div style="text-align: center;">
    <img src="/public/jax/side-by-side.png" alt="JAX vs Python loop comparison" style="width: 100%; height: auto; border-radius: 8px;" />
  </div>
  <div style="text-align: center;">
    <img src="/public/jax/more-dimens.png" alt="JAX rendering with increased dimensions" style="width: 100%; height: auto; border-radius: 8px;" />
  </div>
</div>

<p><br /></p>

<h2 id="part-2-multiple-spheres--diffuse">Part 2: Multiple Spheres &amp; Diffuse</h2>

<p><em>Roughly covers the rest of Ch. 6: Multiple Objects and <a href="https://raytracing.github.io/books/RayTracingInOneWeekend.html#diffusematerials">Ch. 9: Diffuse materials</a></em></p>

<h3 id="multiple-objects">Multiple Objects</h3>

<p>Now we need to extend our one-sphere-wonder ray tracer to handle a scene with multiple spheres.</p>

<p>Traditional ray tracers loop through each sphere sequentially (i.e. test sphere 1, then sphere 2, then sphere 3) until you find the closest hit. However, JAX offers massive speedups by testing all spheres simultaneously with <code class="language-plaintext highlighter-rouge">vmap</code>, then find the minimum distance. Whether you have 5 spheres or 500, it’s still just one parallel operation — meaning the performance difference is quite noticeable as scenes get more complex.</p>

<div class="language-python highlighter-rouge"><div class="highlight"><pre class="highlight"><code><span class="k">def</span> <span class="nf">scene_intersect</span><span class="p">(</span><span class="n">ray_origin</span><span class="p">,</span> <span class="n">ray_direction</span><span class="p">,</span> <span class="n">centers</span><span class="p">,</span> <span class="n">radii</span><span class="p">,</span> <span class="n">material_ids</span><span class="p">):</span>
  <span class="s">"""Test ray against ALL spheres simultaneously"""</span>
  <span class="n">intersect_all</span> <span class="o">=</span> <span class="n">vmap</span><span class="p">(</span><span class="n">ray_sphere_intersect</span><span class="p">,</span> <span class="n">in_axes</span><span class="o">=</span><span class="p">(</span><span class="bp">None</span><span class="p">,</span> <span class="bp">None</span><span class="p">,</span> <span class="mi">0</span><span class="p">,</span> <span class="mi">0</span><span class="p">))</span>
  <span class="n">hits</span><span class="p">,</span> <span class="n">ts</span><span class="p">,</span> <span class="n">hit_points</span><span class="p">,</span> <span class="n">normals</span> <span class="o">=</span> <span class="n">intersect_all</span><span class="p">(</span>
      <span class="n">ray_origin</span><span class="p">,</span> <span class="n">ray_direction</span><span class="p">,</span>
      <span class="n">centers</span><span class="p">,</span> <span class="n">radii</span>
  <span class="p">)</span>

  <span class="c1"># Find closest valid hit (smallest positive t value)
</span>  <span class="n">valid_ts</span> <span class="o">=</span> <span class="n">jnp</span><span class="p">.</span><span class="n">where</span><span class="p">(</span><span class="n">hits</span><span class="p">,</span> <span class="n">ts</span><span class="p">,</span> <span class="n">jnp</span><span class="p">.</span><span class="n">inf</span><span class="p">)</span>
  <span class="n">closest_idx</span> <span class="o">=</span> <span class="n">jnp</span><span class="p">.</span><span class="n">argmin</span><span class="p">(</span><span class="n">valid_ts</span><span class="p">)</span> <span class="c1"># index of closest sphere
</span>
  <span class="n">t</span> <span class="o">=</span> <span class="n">valid_ts</span><span class="p">[</span><span class="n">closest_idx</span><span class="p">]</span>
  <span class="n">p</span> <span class="o">=</span> <span class="n">hit_points</span><span class="p">[</span><span class="n">closest_idx</span><span class="p">]</span>
  <span class="n">normal</span> <span class="o">=</span> <span class="n">normals</span><span class="p">[</span><span class="n">closest_idx</span><span class="p">]</span>
  <span class="n">material_id</span> <span class="o">=</span> <span class="n">material_ids</span><span class="p">[</span><span class="n">closest_idx</span><span class="p">]</span>
  <span class="n">hit</span> <span class="o">=</span> <span class="n">jnp</span><span class="p">.</span><span class="n">isfinite</span><span class="p">(</span><span class="n">t</span><span class="p">)</span>

  <span class="k">return</span> <span class="n">hit</span><span class="p">,</span> <span class="n">t</span><span class="p">,</span> <span class="n">p</span><span class="p">,</span> <span class="n">normal</span><span class="p">,</span> <span class="n">material_id</span>
</code></pre></div></div>

<p><br /></p>

<h3 id="diffuse-materials">Diffuse Materials</h3>

<p>When light hits a diffuse surface, rays scatter randomly in all directions - this creates the soft, natural lighting you see in real life. Thus, to implement diffuse surfaces (i.e. matte) we have to implement the ability to generate arbitrary random vectors.</p>

<p>In Rust, random number generation is simple, and NumPy natively supports PNRG using the <code class="language-plaintext highlighter-rouge">numpy.random</code> module, which is based on a global <code class="language-plaintext highlighter-rouge">state</code> and can be seeded deterministically.</p>

<p>However, JAX has more constraints. The desired PRNG properties are (1) reproducibility, (2) parallelizability, and (3) vectorizability.</p>

<p>NumPy’s PNRG is not parallelizable or vectorizable – but it doesn’t matter because NumPy always evaluates code in the order defined by the Python interpreter. However, JAX’s efficient execution relies on the JIT compiler’s ability to freely reorder, elide, and fuse operations in our functions. In multi-device environments, we also want to avoid needing to synchronize global state.</p>

<p>JAX uses <em>explicit random state</em> via a random <code class="language-plaintext highlighter-rouge">key</code>:</p>

<div class="language-python highlighter-rouge"><div class="highlight"><pre class="highlight"><code><span class="kn">from</span> <span class="nn">jax</span> <span class="kn">import</span> <span class="n">random</span>
<span class="n">key</span> <span class="o">=</span> <span class="n">random</span><span class="p">.</span><span class="n">key</span><span class="p">(</span><span class="mi">42</span><span class="p">)</span>
</code></pre></div></div>

<p>The caveat here is that random functions consume the key but don’t modify it: if you use the same key, you will get the same sample output. If you want randomness in JAX,  <strong>never re-use keys!</strong></p>

<p>Additionally:</p>

<blockquote>
  <p>“JAX uses a modern <a href="https://github.com/jax-ml/jax/blob/main/docs/jep/263-prng.md">Threefry counter-based PRNG</a> that’s splittable. That is, its design allows us to fork the PRNG state into new PRNGs for use with parallel stochastic generation. In order to generate different and independent samples, you must split() the key explicitly before passing it to a random function. jax.random.split() is a deterministic function that converts one key into several independent (in the pseudorandomness sense) keys.” <em>Read more <a href="https://docs.jax.dev/en/latest/random-numbers.html">here</a>.</em></p>
</blockquote>

<p>We use <code class="language-plaintext highlighter-rouge">jax.random.split</code> to ensure reproducible results while maintaining the mathematical purity that enables vectorization. Traditional imperative random number generators would break JAX’s ability to parallelize across pixels.</p>

<div class="language-python highlighter-rouge"><div class="highlight"><pre class="highlight"><code><span class="k">def</span> <span class="nf">random_unit_vector_jax</span><span class="p">(</span><span class="n">rng_key</span><span class="p">):</span>
    <span class="s">"""Generate random unit vector for diffuse scattering"""</span>
    <span class="c1"># Random point in unit sphere, then normalize
</span>    <span class="n">key1</span><span class="p">,</span> <span class="n">key2</span><span class="p">,</span> <span class="n">key3</span> <span class="o">=</span> <span class="n">jax</span><span class="p">.</span><span class="n">random</span><span class="p">.</span><span class="n">split</span><span class="p">(</span><span class="n">rng_key</span><span class="p">,</span> <span class="mi">3</span><span class="p">)</span>
    <span class="n">x</span> <span class="o">=</span> <span class="n">jax</span><span class="p">.</span><span class="n">random</span><span class="p">.</span><span class="n">normal</span><span class="p">(</span><span class="n">key1</span><span class="p">)</span>
    <span class="n">y</span> <span class="o">=</span> <span class="n">jax</span><span class="p">.</span><span class="n">random</span><span class="p">.</span><span class="n">normal</span><span class="p">(</span><span class="n">key2</span><span class="p">)</span> 
    <span class="n">z</span> <span class="o">=</span> <span class="n">jax</span><span class="p">.</span><span class="n">random</span><span class="p">.</span><span class="n">normal</span><span class="p">(</span><span class="n">key3</span><span class="p">)</span>
    <span class="n">vec</span> <span class="o">=</span> <span class="n">jnp</span><span class="p">.</span><span class="n">array</span><span class="p">([</span><span class="n">x</span><span class="p">,</span> <span class="n">y</span><span class="p">,</span> <span class="n">z</span><span class="p">])</span>
    <span class="k">return</span> <span class="n">normalize</span><span class="p">(</span><span class="n">vec</span><span class="p">)</span>
</code></pre></div></div>

<p>Now we can implement recursive ray coloring with diffuse material.</p>

<p>Albedo is the material’s intrinsic color — how much of each color channel (red, green, blue) the surface reflects. An albedo of <code class="language-plaintext highlighter-rouge">[0.7, 0.3, 0.3]</code> means the material reflects 70% of red light but only 30% of green and blue, making it appear reddish.</p>

<p>When a ray hits a diffuse surface, it scatters in a random direction. The final color is the material’s albedo multiplied by the color of light coming from that random direction, which requires tracing another ray recursively. This is what creates realistic indirect lighting where surfaces illuminate each other.</p>

<div class="language-python highlighter-rouge"><div class="highlight"><pre class="highlight"><code><span class="k">def</span> <span class="nf">trace_pixel_scene</span><span class="p">(</span><span class="n">i</span><span class="p">,</span> <span class="n">j</span><span class="p">,</span> <span class="n">image_width</span><span class="p">,</span> <span class="n">image_height</span><span class="p">,</span> <span class="n">centers</span><span class="p">,</span> <span class="n">radii</span><span class="p">,</span> <span class="n">material_ids</span><span class="p">,</span> <span class="n">material_albedos</span><span class="p">,</span> <span class="n">rng_key</span><span class="p">):</span>
  <span class="s">"""Cast a ray through pixel (i,j) and return its color using diffuse materials"""</span>  
  <span class="n">ray_origin</span><span class="p">,</span> <span class="n">ray_direction</span> <span class="o">=</span> <span class="n">camera_get_ray</span><span class="p">(</span><span class="n">i</span><span class="p">,</span> <span class="n">j</span><span class="p">,</span> <span class="n">image_width</span><span class="p">,</span> <span class="n">image_height</span><span class="p">)</span>
  <span class="k">return</span> <span class="n">ray_color_diffuse</span><span class="p">(</span><span class="n">ray_origin</span><span class="p">,</span> <span class="n">ray_direction</span><span class="p">,</span> <span class="n">centers</span><span class="p">,</span> <span class="n">radii</span><span class="p">,</span> <span class="n">material_ids</span><span class="p">,</span> <span class="n">material_albedos</span><span class="p">,</span> <span class="n">rng_key</span><span class="p">)</span>

<span class="n">trace_pixel_scene_jit</span> <span class="o">=</span> <span class="n">jit</span><span class="p">(</span><span class="n">trace_pixel_scene</span><span class="p">,</span> <span class="n">static_argnums</span><span class="o">=</span><span class="p">(</span><span class="mi">2</span><span class="p">,</span> <span class="mi">3</span><span class="p">))</span>

<span class="k">def</span> <span class="nf">ray_color_diffuse</span><span class="p">(</span><span class="n">ray_origin</span><span class="p">,</span> <span class="n">ray_direction</span><span class="p">,</span> <span class="n">centers</span><span class="p">,</span> <span class="n">radii</span><span class="p">,</span> <span class="n">material_ids</span><span class="p">,</span> <span class="n">material_albedos</span><span class="p">,</span> <span class="n">rng_key</span><span class="p">,</span> <span class="n">depth</span><span class="o">=</span><span class="mi">0</span><span class="p">,</span> <span class="n">max_depth</span><span class="o">=</span><span class="mi">8</span><span class="p">):</span>
  <span class="s">"""Recursively trace rays with Lambertian (diffuse) material scattering"""</span>
  <span class="k">if</span> <span class="n">depth</span> <span class="o">&gt;=</span> <span class="n">max_depth</span><span class="p">:</span>
        <span class="k">return</span> <span class="n">jnp</span><span class="p">.</span><span class="n">array</span><span class="p">([</span><span class="mf">0.0</span><span class="p">,</span> <span class="mf">0.0</span><span class="p">,</span> <span class="mf">0.0</span><span class="p">])</span>
  
  <span class="n">hit</span><span class="p">,</span> <span class="n">t</span><span class="p">,</span> <span class="n">p</span><span class="p">,</span> <span class="n">normal</span><span class="p">,</span> <span class="n">material_id</span> <span class="o">=</span> <span class="n">scene_intersect</span><span class="p">(</span><span class="n">ray_origin</span><span class="p">,</span> <span class="n">ray_direction</span><span class="p">,</span> <span class="n">centers</span><span class="p">,</span> <span class="n">radii</span><span class="p">,</span> <span class="n">material_ids</span><span class="p">)</span>
  <span class="n">albedo</span> <span class="o">=</span> <span class="n">material_albedos</span><span class="p">[</span><span class="n">material_id</span><span class="p">]</span>
  
  <span class="c1"># Lambertian scattering
</span>  <span class="n">key1</span><span class="p">,</span> <span class="n">key2</span> <span class="o">=</span> <span class="n">jax</span><span class="p">.</span><span class="n">random</span><span class="p">.</span><span class="n">split</span><span class="p">(</span><span class="n">rng_key</span><span class="p">)</span>
  <span class="n">scatter_direction</span> <span class="o">=</span> <span class="n">normalize</span><span class="p">(</span><span class="n">normal</span> <span class="o">+</span> <span class="n">random_unit_vector_jax</span><span class="p">(</span><span class="n">key1</span><span class="p">))</span> 

  <span class="c1"># Recursive bounce
</span>  <span class="n">bounced_color</span> <span class="o">=</span> <span class="n">ray_color_diffuse</span><span class="p">(</span>
      <span class="n">p</span> <span class="o">+</span> <span class="mf">0.001</span> <span class="o">*</span> <span class="n">normal</span><span class="p">,</span> <span class="n">scatter_direction</span><span class="p">,</span> <span class="n">centers</span><span class="p">,</span> <span class="n">radii</span><span class="p">,</span> <span class="n">material_ids</span><span class="p">,</span> <span class="n">material_albedos</span><span class="p">,</span> <span class="n">key2</span><span class="p">,</span> <span class="n">depth</span> <span class="o">+</span> <span class="mi">1</span><span class="p">,</span> <span class="n">max_depth</span>
  <span class="p">)</span>
  
  <span class="c1"># Sky color
</span>  <span class="n">unit_direction</span> <span class="o">=</span> <span class="n">normalize</span><span class="p">(</span><span class="n">ray_direction</span><span class="p">)</span>
  <span class="n">a</span> <span class="o">=</span> <span class="mf">0.5</span> <span class="o">*</span> <span class="p">(</span><span class="n">unit_direction</span><span class="p">[</span><span class="mi">1</span><span class="p">]</span> <span class="o">+</span> <span class="mf">1.0</span><span class="p">)</span>
  <span class="n">sky_color</span> <span class="o">=</span> <span class="p">(</span><span class="mf">1.0</span> <span class="o">-</span> <span class="n">a</span><span class="p">)</span> <span class="o">*</span> <span class="n">jnp</span><span class="p">.</span><span class="n">array</span><span class="p">([</span><span class="mf">1.0</span><span class="p">,</span> <span class="mf">1.0</span><span class="p">,</span> <span class="mf">1.0</span><span class="p">])</span> <span class="o">+</span> <span class="n">a</span> <span class="o">*</span> <span class="n">jnp</span><span class="p">.</span><span class="n">array</span><span class="p">([</span><span class="mf">0.5</span><span class="p">,</span> <span class="mf">0.7</span><span class="p">,</span> <span class="mf">1.0</span><span class="p">])</span>
  
  <span class="n">sphere_color</span> <span class="o">=</span> <span class="n">albedo</span> <span class="o">*</span> <span class="n">bounced_color</span>
  <span class="k">return</span> <span class="n">jnp</span><span class="p">.</span><span class="n">where</span><span class="p">(</span><span class="n">hit</span><span class="p">,</span> <span class="n">sphere_color</span><span class="p">,</span> <span class="n">sky_color</span><span class="p">)</span>
</code></pre></div></div>

<p>I rewrote the <code class="language-plaintext highlighter-rouge">render_image()</code> function and made a <code class="language-plaintext highlighter-rouge">create_diffuse_scene()</code> which resulted in:</p>

<div class="align-center">
    <img src="/public/jax/diffuse.png" width="450px" />
</div>

<p><br /></p>

<h2 id="part-3-advanced-camera-and-smoothing">Part 3: Advanced Camera and Smoothing</h2>

<p><em>Covers <a href="https://raytracing.github.io/books/RayTracingInOneWeekend.html#positionablecamera">Ch. 12: Positionable Camera</a>, <a href="https://raytracing.github.io/books/RayTracingInOneWeekend.html#defocusblur">Ch. 13: Defocus Blur</a>, and <a href="https://raytracing.github.io/books/RayTracingInOneWeekend.html#antialiasing">Ch. 8: Antialiasing</a></em></p>

<h3 id="positional-camera--defocus-blur">Positional Camera &amp; Defocus Blur</h3>

<p>Now we can start to add some more flexibility with our camera:</p>

<ol>
  <li>
    <p><strong>Positionable POV</strong>: Instead of rays starting from a single point, we can position our camera anywhere in 3D space and point it in any direction. This lets us create more interesting viewpoints (e.g. looking up at spheres, angled shots, placing the camera inside the scene). We</p>
  </li>
  <li>
    <p><strong>Defocus Blur (Depth of Field)</strong>: Real cameras have lenses with finite apertures, creating depth of field effects where objects at the focal distance are sharp while nearer/farther objects appear blurry. We simulate this by randomly sampling ray origins from a small disk (the aperture) rather than a single point, then focusing all rays toward the same point on the focal plane.</p>
  </li>
</ol>

<p>Both of these features are just some added ray calculations and additional sampling per pixel in our main camera function such as <code class="language-plaintext highlighter-rouge">vfov</code> is adjustable field of view, <code class="language-plaintext highlighter-rouge">lookfrom</code> is camera at origin, and <code class="language-plaintext highlighter-rouge">lookat</code> is looking down negative Z axis.</p>

<div class="language-python highlighter-rouge"><div class="highlight"><pre class="highlight"><code><span class="k">def</span> <span class="nf">create_positionable_camera</span><span class="p">(</span><span class="n">image_width</span><span class="p">,</span> <span class="n">image_height</span><span class="p">,</span> <span class="n">vfov</span><span class="p">,</span> <span class="n">lookfrom</span><span class="p">,</span> <span class="n">lookat</span><span class="p">,</span> <span class="n">vup</span><span class="p">,</span> <span class="n">defocus_angle</span><span class="p">,</span> <span class="n">focus_dist</span><span class="p">):</span>
  <span class="n">aspect_ratio</span> <span class="o">=</span> <span class="n">image_width</span> <span class="o">/</span> <span class="n">image_height</span>
  
  <span class="n">focal_length</span> <span class="o">=</span> <span class="nb">len</span><span class="p">(</span><span class="n">lookfrom</span> <span class="o">-</span> <span class="n">lookat</span><span class="p">)</span>
  <span class="n">theta</span> <span class="o">=</span> <span class="n">jnp</span><span class="p">.</span><span class="n">deg2rad</span><span class="p">(</span><span class="n">vfov</span><span class="p">)</span> 
  <span class="n">h</span> <span class="o">=</span> <span class="n">jnp</span><span class="p">.</span><span class="n">tan</span><span class="p">(</span><span class="n">theta</span><span class="o">/</span><span class="mi">2</span><span class="p">)</span>
  <span class="n">viewport_height</span> <span class="o">=</span> <span class="mf">2.0</span> <span class="o">*</span> <span class="n">h</span> <span class="o">*</span> <span class="n">focus_dist</span>
  <span class="n">viewport_width</span> <span class="o">=</span> <span class="n">viewport_height</span> <span class="o">*</span> <span class="p">(</span><span class="n">image_width</span> <span class="o">/</span> <span class="n">image_height</span><span class="p">)</span>

  <span class="n">camera_center</span> <span class="o">=</span> <span class="n">lookfrom</span>

  <span class="n">w</span> <span class="o">=</span> <span class="n">normalize</span><span class="p">(</span><span class="n">lookfrom</span> <span class="o">-</span> <span class="n">lookat</span><span class="p">)</span>
  <span class="n">u</span> <span class="o">=</span> <span class="n">normalize</span><span class="p">(</span><span class="n">jnp</span><span class="p">.</span><span class="n">cross</span><span class="p">(</span><span class="n">vup</span><span class="p">,</span> <span class="n">w</span><span class="p">))</span>
  <span class="n">v</span> <span class="o">=</span> <span class="n">jnp</span><span class="p">.</span><span class="n">cross</span><span class="p">(</span><span class="n">w</span><span class="p">,</span> <span class="n">u</span><span class="p">)</span>
  
  <span class="n">viewport_u</span> <span class="o">=</span> <span class="n">viewport_width</span> <span class="o">*</span> <span class="n">u</span>
  <span class="n">viewport_v</span> <span class="o">=</span> <span class="n">viewport_height</span> <span class="o">*</span> <span class="o">-</span><span class="n">v</span>
  
  <span class="n">pixel_delta_u</span> <span class="o">=</span> <span class="n">viewport_u</span> <span class="o">/</span> <span class="n">image_width</span>
  <span class="n">pixel_delta_v</span> <span class="o">=</span> <span class="n">viewport_v</span> <span class="o">/</span> <span class="n">image_height</span>
  
  <span class="n">viewport_upper_left</span> <span class="o">=</span> <span class="p">(</span><span class="n">camera_center</span> <span class="o">-</span> 
                        <span class="n">focus_dist</span> <span class="o">*</span> <span class="n">w</span> <span class="o">-</span> 
                        <span class="n">viewport_u</span><span class="o">/</span><span class="mi">2</span> <span class="o">-</span> <span class="n">viewport_v</span><span class="o">/</span><span class="mi">2</span><span class="p">)</span>
  <span class="n">pixel00_loc</span> <span class="o">=</span> <span class="n">viewport_upper_left</span> <span class="o">+</span> <span class="mf">0.5</span> <span class="o">*</span> <span class="p">(</span><span class="n">pixel_delta_u</span> <span class="o">+</span> <span class="n">pixel_delta_v</span><span class="p">)</span>

  <span class="c1"># calculate camera defocus disk basis vectors
</span>  <span class="n">defocus_radius</span> <span class="o">=</span> <span class="n">focus_dist</span> <span class="o">*</span> <span class="n">jnp</span><span class="p">.</span><span class="n">tan</span><span class="p">(</span><span class="n">jnp</span><span class="p">.</span><span class="n">deg2rad</span><span class="p">(</span><span class="n">defocus_angle</span> <span class="o">/</span> <span class="mi">2</span><span class="p">))</span>
  <span class="n">defocus_disk_u</span> <span class="o">=</span> <span class="n">u</span> <span class="o">*</span> <span class="n">defocus_radius</span>
  <span class="n">defocus_disk_v</span> <span class="o">=</span> <span class="n">v</span> <span class="o">*</span> <span class="n">defocus_radius</span>
  
  <span class="k">return</span> <span class="n">image_width</span><span class="p">,</span> <span class="n">image_height</span><span class="p">,</span> <span class="n">aspect_ratio</span><span class="p">,</span> <span class="n">camera_center</span><span class="p">,</span> <span class="n">pixel00_loc</span><span class="p">,</span> <span class="n">pixel_delta_u</span><span class="p">,</span> <span class="n">pixel_delta_v</span><span class="p">,</span> <span class="n">defocus_disk_u</span><span class="p">,</span> <span class="n">defocus_disk_v</span>
</code></pre></div></div>

<div class="language-python highlighter-rouge"><div class="highlight"><pre class="highlight"><code><span class="k">def</span> <span class="nf">random_in_unit_disk_jax</span><span class="p">(</span><span class="n">key</span><span class="p">):</span>
     <span class="s">"""Fixed random point in unit disk"""</span>
    <span class="c1"># Generate random angle and radius
</span>    <span class="n">key1</span><span class="p">,</span> <span class="n">key2</span> <span class="o">=</span> <span class="n">jax</span><span class="p">.</span><span class="n">random</span><span class="p">.</span><span class="n">split</span><span class="p">(</span><span class="n">key</span><span class="p">,</span> <span class="mi">2</span><span class="p">)</span>
    <span class="n">angle</span> <span class="o">=</span> <span class="n">jax</span><span class="p">.</span><span class="n">random</span><span class="p">.</span><span class="n">uniform</span><span class="p">(</span><span class="n">key1</span><span class="p">,</span> <span class="n">minval</span><span class="o">=</span><span class="mf">0.0</span><span class="p">,</span> <span class="n">maxval</span><span class="o">=</span><span class="mf">2.0</span> <span class="o">*</span> <span class="n">jnp</span><span class="p">.</span><span class="n">pi</span><span class="p">)</span>
    <span class="n">r</span> <span class="o">=</span> <span class="n">jnp</span><span class="p">.</span><span class="n">sqrt</span><span class="p">(</span><span class="n">jax</span><span class="p">.</span><span class="n">random</span><span class="p">.</span><span class="n">uniform</span><span class="p">(</span><span class="n">key2</span><span class="p">,</span> <span class="n">minval</span><span class="o">=</span><span class="mf">0.0</span><span class="p">,</span> <span class="n">maxval</span><span class="o">=</span><span class="mf">1.0</span><span class="p">))</span>  <span class="c1"># sqrt for uniform distribution
</span>    
    <span class="c1"># Convert to cartesian
</span>    <span class="n">x</span> <span class="o">=</span> <span class="n">r</span> <span class="o">*</span> <span class="n">jnp</span><span class="p">.</span><span class="n">cos</span><span class="p">(</span><span class="n">angle</span><span class="p">)</span>
    <span class="n">y</span> <span class="o">=</span> <span class="n">r</span> <span class="o">*</span> <span class="n">jnp</span><span class="p">.</span><span class="n">sin</span><span class="p">(</span><span class="n">angle</span><span class="p">)</span>
    <span class="k">return</span> <span class="n">jnp</span><span class="p">.</span><span class="n">array</span><span class="p">([</span><span class="n">x</span><span class="p">,</span> <span class="n">y</span><span class="p">,</span> <span class="mf">0.0</span><span class="p">])</span> 

<span class="k">def</span> <span class="nf">defocus_disk_sample</span><span class="p">(</span><span class="n">key</span><span class="p">,</span> <span class="n">camera_center</span><span class="p">,</span> <span class="n">defocus_disk_u</span><span class="p">,</span> <span class="n">defocus_disk_v</span><span class="p">):</span>
    <span class="s">"""Returns a random point in the camera defocus disk"""</span>
    <span class="n">p</span> <span class="o">=</span> <span class="n">random_in_unit_disk_jax</span><span class="p">(</span><span class="n">key</span><span class="p">)</span>
    <span class="k">return</span> <span class="n">camera_center</span> <span class="o">+</span> <span class="n">p</span><span class="p">[</span><span class="mi">0</span><span class="p">]</span> <span class="o">*</span> <span class="n">defocus_disk_u</span> <span class="o">+</span> <span class="n">p</span><span class="p">[</span><span class="mi">1</span><span class="p">]</span> <span class="o">*</span> <span class="n">defocus_disk_v</span>
</code></pre></div></div>

<p><br /></p>

<h3 id="anti-aliasing">Anti-aliasing</h3>

<p>Anti-aliasing smooths out the jagged “staircase” edges you get when rendering 3D scenes onto a pixel grid.</p>

<p>Basic ray tracing shoots one ray through each pixel’s center: the pixel is either fully “sphere” or fully “sky” with no middle ground. This creates harsh, blocky edges where objects meet the background.</p>

<p>Instead of one ray per pixel, we shoot multiple rays at random positions within each pixel and average their colors. If 3 out of 4 sample rays hit the sphere, that pixel becomes 75% sphere color + 25% sky color, creating smooth gradients along edges.</p>

<p>Anti-aliasing dramatically increases the computational load — instead of 360k rays for a 600x600 image, you might need 3.6 million rays (10 samples per pixel). However, JAX’s vectorization handles this explosion of parallel computation naturally so we can still achieve smooth renders without taking massive performance hits.</p>

<div class="language-python highlighter-rouge"><div class="highlight"><pre class="highlight"><code><span class="k">def</span> <span class="nf">camera_get_ray_antialiased</span><span class="p">(</span><span class="n">i</span><span class="p">,</span> <span class="n">j</span><span class="p">,</span> <span class="n">image_width</span><span class="p">,</span> <span class="n">image_height</span><span class="p">,</span> <span class="n">vfov</span><span class="p">,</span> <span class="n">lookfrom</span><span class="p">,</span> <span class="n">lookat</span><span class="p">,</span> <span class="n">vup</span><span class="p">,</span> <span class="n">defocus_angle</span><span class="p">,</span> <span class="n">focus_dist</span><span class="p">,</span> <span class="n">rng_key</span><span class="p">):</span>
    <span class="s">"""Generate a ray with random sampling within the pixel for anti-aliasing"""</span>
    <span class="c1"># Construct a camera ray originating from the defocus disk and directed at a randomly sampled point around the pixel location i, j.
</span>    <span class="n">_</span><span class="p">,</span> <span class="n">_</span><span class="p">,</span> <span class="n">_</span><span class="p">,</span> <span class="n">camera_center</span><span class="p">,</span> <span class="n">pixel00_loc</span><span class="p">,</span> <span class="n">pixel_delta_u</span><span class="p">,</span> <span class="n">pixel_delta_v</span><span class="p">,</span> <span class="n">defocus_disk_u</span><span class="p">,</span> <span class="n">defocus_disk_v</span> <span class="o">=</span> <span class="n">create_positionable_camera</span><span class="p">(</span><span class="n">image_width</span><span class="p">,</span> <span class="n">image_height</span><span class="p">,</span> <span class="n">vfov</span><span class="p">,</span> <span class="n">lookfrom</span><span class="p">,</span> <span class="n">lookat</span><span class="p">,</span> <span class="n">vup</span><span class="p">,</span> <span class="n">defocus_angle</span><span class="p">,</span> <span class="n">focus_dist</span><span class="p">)</span>
    
    <span class="n">key1</span><span class="p">,</span> <span class="n">key2</span><span class="p">,</span> <span class="n">key3</span> <span class="o">=</span> <span class="n">jax</span><span class="p">.</span><span class="n">random</span><span class="p">.</span><span class="n">split</span><span class="p">(</span><span class="n">rng_key</span><span class="p">,</span> <span class="mi">3</span><span class="p">)</span>

    <span class="c1"># Add random offset within pixel bounds
</span>    <span class="n">offset_u</span> <span class="o">=</span> <span class="n">jax</span><span class="p">.</span><span class="n">random</span><span class="p">.</span><span class="n">uniform</span><span class="p">(</span><span class="n">key1</span><span class="p">,</span> <span class="n">minval</span><span class="o">=-</span><span class="mf">0.5</span><span class="p">,</span> <span class="n">maxval</span><span class="o">=</span><span class="mf">0.5</span><span class="p">)</span>
    <span class="n">offset_v</span> <span class="o">=</span> <span class="n">jax</span><span class="p">.</span><span class="n">random</span><span class="p">.</span><span class="n">uniform</span><span class="p">(</span><span class="n">key2</span><span class="p">,</span> <span class="n">minval</span><span class="o">=-</span><span class="mf">0.5</span><span class="p">,</span> <span class="n">maxval</span><span class="o">=</span><span class="mf">0.5</span><span class="p">)</span>
    
    <span class="n">pixel_center</span> <span class="o">=</span> <span class="n">pixel00_loc</span> <span class="o">+</span> <span class="p">((</span><span class="n">i</span> <span class="o">+</span> <span class="n">offset_u</span><span class="p">)</span> <span class="o">*</span> <span class="n">pixel_delta_u</span><span class="p">)</span> <span class="o">+</span> <span class="p">((</span><span class="n">j</span> <span class="o">+</span> <span class="n">offset_v</span><span class="p">)</span> <span class="o">*</span> <span class="n">pixel_delta_v</span><span class="p">)</span>

    <span class="n">ray_origin</span> <span class="o">=</span> <span class="n">jnp</span><span class="p">.</span><span class="n">where</span><span class="p">(</span><span class="n">defocus_angle</span> <span class="o">&lt;=</span> <span class="mi">0</span><span class="p">,</span> <span class="n">camera_center</span><span class="p">,</span> <span class="n">defocus_disk_sample</span><span class="p">(</span><span class="n">key3</span><span class="p">,</span> <span class="n">camera_center</span><span class="p">,</span> <span class="n">defocus_disk_u</span><span class="p">,</span> <span class="n">defocus_disk_v</span><span class="p">))</span>
    <span class="n">ray_direction</span> <span class="o">=</span> <span class="n">normalize</span><span class="p">(</span><span class="n">pixel_center</span> <span class="o">-</span> <span class="n">camera_center</span><span class="p">)</span>
    
    <span class="k">return</span> <span class="n">ray_origin</span><span class="p">,</span> <span class="n">ray_direction</span>
</code></pre></div></div>

<p>We update the <code class="language-plaintext highlighter-rouge">trace_pixel()</code> and <code class="language-plaintext highlighter-rouge">render_scene()</code> functions to use <code class="language-plaintext highlighter-rouge">camera_get_ray_antialiased()</code>, e.g.:</p>

<div class="language-python highlighter-rouge"><div class="highlight"><pre class="highlight"><code><span class="k">def</span> <span class="nf">trace_pixel_antialiased</span><span class="p">(</span><span class="n">i</span><span class="p">,</span> <span class="n">j</span><span class="p">,</span> <span class="n">image_width</span><span class="p">,</span> <span class="n">image_height</span><span class="p">,</span> <span class="n">vfov</span><span class="p">,</span> <span class="n">lookfrom</span><span class="p">,</span> <span class="n">lookat</span><span class="p">,</span> <span class="n">vup</span><span class="p">,</span> <span class="n">defocus_angle</span><span class="p">,</span> <span class="n">focus_dist</span><span class="p">,</span> <span class="n">centers</span><span class="p">,</span> <span class="n">radii</span><span class="p">,</span> <span class="n">material_ids</span><span class="p">,</span> <span class="n">material_albedos</span><span class="p">,</span> <span class="n">rng_key</span><span class="p">,</span> <span class="n">samples_per_pixel</span><span class="p">):</span>
  <span class="s">"""Trace a pixel with multiple samples for anti-aliasing"""</span>
  
  <span class="c1"># Generate keys for each sample
</span>  <span class="n">sample_keys</span> <span class="o">=</span> <span class="n">jax</span><span class="p">.</span><span class="n">random</span><span class="p">.</span><span class="n">split</span><span class="p">(</span><span class="n">rng_key</span><span class="p">,</span> <span class="n">samples_per_pixel</span> <span class="o">*</span> <span class="mi">2</span><span class="p">)</span>
  <span class="n">camera_keys</span> <span class="o">=</span> <span class="n">sample_keys</span><span class="p">[:</span><span class="n">samples_per_pixel</span><span class="p">]</span>
  <span class="n">ray_keys</span> <span class="o">=</span> <span class="n">sample_keys</span><span class="p">[</span><span class="n">samples_per_pixel</span><span class="p">:]</span>
  
  <span class="k">def</span> <span class="nf">trace_single_sample</span><span class="p">(</span><span class="n">camera_key</span><span class="p">,</span> <span class="n">ray_key</span><span class="p">):</span>
      <span class="n">ray_origin</span><span class="p">,</span> <span class="n">ray_direction</span> <span class="o">=</span> <span class="n">camera_get_ray_antialiased</span><span class="p">(</span><span class="n">i</span><span class="p">,</span> <span class="n">j</span><span class="p">,</span> <span class="n">image_width</span><span class="p">,</span> <span class="n">image_height</span><span class="p">,</span> <span class="n">vfov</span><span class="p">,</span> <span class="n">lookfrom</span><span class="p">,</span> <span class="n">lookat</span><span class="p">,</span> <span class="n">vup</span><span class="p">,</span> <span class="n">defocus_angle</span><span class="p">,</span> <span class="n">focus_dist</span><span class="p">,</span> <span class="n">camera_key</span><span class="p">)</span>
      <span class="k">return</span> <span class="n">ray_color_diffuse</span><span class="p">(</span><span class="n">ray_origin</span><span class="p">,</span> <span class="n">ray_direction</span><span class="p">,</span> <span class="n">centers</span><span class="p">,</span> <span class="n">radii</span><span class="p">,</span> <span class="n">material_ids</span><span class="p">,</span> <span class="n">material_albedos</span><span class="p">,</span> <span class="n">ray_key</span><span class="p">)</span>
  
  <span class="c1"># Vectorize over all samples
</span>  <span class="n">trace_samples</span> <span class="o">=</span> <span class="n">vmap</span><span class="p">(</span><span class="n">trace_single_sample</span><span class="p">)</span>
  <span class="n">sample_colors</span> <span class="o">=</span> <span class="n">trace_samples</span><span class="p">(</span><span class="n">camera_keys</span><span class="p">,</span> <span class="n">ray_keys</span><span class="p">)</span>
  
  <span class="c1"># Average the samples
</span>  <span class="k">return</span> <span class="n">jnp</span><span class="p">.</span><span class="n">mean</span><span class="p">(</span><span class="n">sample_colors</span><span class="p">,</span> <span class="n">axis</span><span class="o">=</span><span class="mi">0</span><span class="p">)</span>
</code></pre></div></div>

<div class="align-center">
    <img src="/public/jax/camera.png" width="700px" />
</div>

<p>If I am up the defocus blur on the zoomed in image, we get:</p>

<div class="align-center">
    <img src="/public/jax/defocus.png" width="700px" />
</div>

<p><br /></p>

<h2 id="part-4-final-render">Part 4: Final Render</h2>

<p><em>Roughly covers <a href="https://raytracing.github.io/books/RayTracingInOneWeekend.html#metal">Ch. 10: Metal</a>, <a href="https://raytracing.github.io/books/RayTracingInOneWeekend.html#dielectrics">Ch. 11: Dielectrics</a>, and <a href="https://raytracing.github.io/books/RayTracingInOneWeekend.html#wherenext?/afinalrender">Ch. 14’s Final Render</a></em>.</p>

<h3 id="metals--dielectrics">Metals &amp; Dielectrics</h3>

<p>Now we add two more materials that interact with light much differently than diffuse surfaces: (1) metal and (2) dielectric.</p>

<p>Metals reflect light in a specific direction rather than scattering randomly. The <code class="language-plaintext highlighter-rouge">reflect</code> function implements perfect mirror reflection using the formula <code class="language-plaintext highlighter-rouge">v - 2(v·n)n</code>, where the incident ray bounces off at the same angle it came in. We add a “fuzz” parameter that slightly randomizes the reflection direction, simulating surface roughness (polished meta has 0 fuzz).</p>

<p>Glass both reflects and refracts light depending on the viewing angle. The <code class="language-plaintext highlighter-rouge">refract</code> function implements Snell’s law to bend light as it passes through the material boundary. The <code class="language-plaintext highlighter-rouge">reflectance</code> function calculates Fresnel reflectance: at shallow angles, glass acts more like a mirror, while at steep angles it’s more transparent. We randomly choose between reflection and refraction based on these physical probabilities.</p>

<div class="language-python highlighter-rouge"><div class="highlight"><pre class="highlight"><code><span class="c1"># Reflected ray direction: v + 2b where b is the vector projection of v onto n
</span><span class="k">def</span> <span class="nf">reflect</span><span class="p">(</span><span class="n">incident</span><span class="p">,</span> <span class="n">normal</span><span class="p">):</span>
  <span class="k">return</span> <span class="n">incident</span> <span class="o">-</span> <span class="mf">2.0</span> <span class="o">*</span> <span class="n">jnp</span><span class="p">.</span><span class="n">dot</span><span class="p">(</span><span class="n">incident</span><span class="p">,</span> <span class="n">normal</span><span class="p">)</span> <span class="o">*</span> <span class="n">normal</span>

<span class="k">def</span> <span class="nf">refract</span><span class="p">(</span><span class="n">uv</span><span class="p">,</span> <span class="n">normal</span><span class="p">,</span> <span class="n">etai_over_etat</span><span class="p">):</span>
  <span class="s">"""Calculate refraction direction using Snell's law"""</span>
  <span class="n">cos_theta</span> <span class="o">=</span> <span class="n">jnp</span><span class="p">.</span><span class="n">minimum</span><span class="p">(</span><span class="o">-</span><span class="n">jnp</span><span class="p">.</span><span class="n">dot</span><span class="p">(</span><span class="n">uv</span><span class="p">,</span> <span class="n">normal</span><span class="p">),</span> <span class="mf">1.0</span><span class="p">)</span>
  <span class="n">r_out_perp</span> <span class="o">=</span> <span class="n">etai_over_etat</span> <span class="o">*</span> <span class="p">(</span><span class="n">uv</span> <span class="o">+</span> <span class="n">cos_theta</span> <span class="o">*</span> <span class="n">normal</span><span class="p">)</span>
  <span class="n">r_out_parallel</span> <span class="o">=</span> <span class="o">-</span><span class="n">jnp</span><span class="p">.</span><span class="n">sqrt</span><span class="p">(</span><span class="n">jnp</span><span class="p">.</span><span class="nb">abs</span><span class="p">(</span><span class="mf">1.0</span> <span class="o">-</span> <span class="n">jnp</span><span class="p">.</span><span class="n">dot</span><span class="p">(</span><span class="n">r_out_perp</span><span class="p">,</span> <span class="n">r_out_perp</span><span class="p">)))</span> <span class="o">*</span> <span class="n">normal</span>
  <span class="k">return</span> <span class="n">r_out_perp</span> <span class="o">+</span> <span class="n">r_out_parallel</span>

<span class="k">def</span> <span class="nf">reflectance</span><span class="p">(</span><span class="n">cosine</span><span class="p">,</span> <span class="n">ref_idx</span><span class="p">):</span>
  <span class="n">r0</span> <span class="o">=</span> <span class="p">(</span><span class="mf">1.0</span> <span class="o">-</span> <span class="n">ref_idx</span><span class="p">)</span> <span class="o">/</span> <span class="p">(</span><span class="mf">1.0</span> <span class="o">+</span> <span class="n">ref_idx</span><span class="p">)</span>
  <span class="n">r0</span> <span class="o">=</span> <span class="n">r0</span> <span class="o">*</span> <span class="n">r0</span>
  <span class="k">return</span> <span class="n">r0</span> <span class="o">+</span> <span class="p">(</span><span class="mf">1.0</span> <span class="o">-</span> <span class="n">r0</span><span class="p">)</span> <span class="o">*</span> <span class="n">jnp</span><span class="p">.</span><span class="n">power</span><span class="p">(</span><span class="mf">1.0</span> <span class="o">-</span> <span class="n">cosine</span><span class="p">,</span> <span class="mf">5.0</span><span class="p">)</span>
</code></pre></div></div>

<p>Each material type requires different physics calculations, random decisions, and careful normal vector handling (especially for glass, where rays can enter or exit the material).</p>

<p>Unfortunately, JAX’s constraints for dynamic control flow means the <code class="language-plaintext highlighter-rouge">jnp.where</code> conditionals get a bit gnarly in terms of readability (not to mention the PNRG key mangement)…</p>

<div class="language-python highlighter-rouge"><div class="highlight"><pre class="highlight"><code><span class="k">def</span> <span class="nf">ray_color_materials</span><span class="p">(</span><span class="n">ray_origin</span><span class="p">,</span> <span class="n">ray_direction</span><span class="p">,</span> <span class="n">centers</span><span class="p">,</span> <span class="n">radii</span><span class="p">,</span> <span class="n">material_ids</span><span class="p">,</span> <span class="n">material_data</span><span class="p">,</span> <span class="n">rng_key</span><span class="p">,</span> <span class="n">depth</span><span class="o">=</span><span class="mi">0</span><span class="p">,</span> <span class="n">max_depth</span><span class="o">=</span><span class="mi">10</span><span class="p">):</span>
  <span class="s">"""Ray tracing with diffuse, metal, and glass materials"""</span>
  <span class="k">if</span> <span class="n">depth</span> <span class="o">&gt;=</span> <span class="n">max_depth</span><span class="p">:</span>
      <span class="k">return</span> <span class="n">jnp</span><span class="p">.</span><span class="n">array</span><span class="p">([</span><span class="mf">0.0</span><span class="p">,</span> <span class="mf">0.0</span><span class="p">,</span> <span class="mf">0.0</span><span class="p">])</span>
  
  <span class="n">hit</span><span class="p">,</span> <span class="n">t</span><span class="p">,</span> <span class="n">p</span><span class="p">,</span> <span class="n">normal</span><span class="p">,</span> <span class="n">material_id</span> <span class="o">=</span> <span class="n">scene_intersect</span><span class="p">(</span><span class="n">ray_origin</span><span class="p">,</span> <span class="n">ray_direction</span><span class="p">,</span> <span class="n">centers</span><span class="p">,</span> <span class="n">radii</span><span class="p">,</span> <span class="n">material_ids</span><span class="p">)</span>
  
  <span class="n">material_type</span> <span class="o">=</span> <span class="n">material_data</span><span class="p">[</span><span class="s">'types'</span><span class="p">][</span><span class="n">material_id</span><span class="p">]</span>
  <span class="n">albedo</span> <span class="o">=</span> <span class="n">material_data</span><span class="p">[</span><span class="s">'albedos'</span><span class="p">][</span><span class="n">material_id</span><span class="p">]</span>
  <span class="n">fuzz</span> <span class="o">=</span> <span class="n">material_data</span><span class="p">[</span><span class="s">'fuzz'</span><span class="p">][</span><span class="n">material_id</span><span class="p">]</span>
  <span class="n">refractive_index</span> <span class="o">=</span> <span class="n">material_data</span><span class="p">[</span><span class="s">'refractive_indices'</span><span class="p">][</span><span class="n">material_id</span><span class="p">]</span>
  
  <span class="c1"># Split into many keys to avoid reuse 
</span>  <span class="n">key_diffuse</span><span class="p">,</span> <span class="n">key_metal</span><span class="p">,</span> <span class="n">key_glass_reflect</span><span class="p">,</span> <span class="n">key_glass_random</span><span class="p">,</span> <span class="n">key_recursive</span> <span class="o">=</span> <span class="n">jax</span><span class="p">.</span><span class="n">random</span><span class="p">.</span><span class="n">split</span><span class="p">(</span><span class="n">rng_key</span><span class="p">,</span> <span class="mi">5</span><span class="p">)</span>
  
  <span class="c1"># Diffuse scattering 
</span>  <span class="n">diffuse_scatter</span> <span class="o">=</span> <span class="n">normal</span> <span class="o">+</span> <span class="n">random_unit_vector_jax</span><span class="p">(</span><span class="n">key_diffuse</span><span class="p">)</span>
  <span class="n">near_zero</span> <span class="o">=</span> <span class="n">jnp</span><span class="p">.</span><span class="n">linalg</span><span class="p">.</span><span class="n">norm</span><span class="p">(</span><span class="n">diffuse_scatter</span><span class="p">)</span> <span class="o">&lt;</span> <span class="mf">1e-8</span>
  <span class="n">diffuse_scatter</span> <span class="o">=</span> <span class="n">jnp</span><span class="p">.</span><span class="n">where</span><span class="p">(</span><span class="n">near_zero</span><span class="p">,</span> <span class="n">normal</span><span class="p">,</span> <span class="n">diffuse_scatter</span><span class="p">)</span>
  
  <span class="c1"># Metal reflection 
</span>  <span class="n">reflected</span> <span class="o">=</span> <span class="n">reflect</span><span class="p">(</span><span class="n">normalize</span><span class="p">(</span><span class="n">ray_direction</span><span class="p">),</span> <span class="n">normal</span><span class="p">)</span>
  <span class="n">metal_scatter</span> <span class="o">=</span> <span class="n">reflected</span> <span class="o">+</span> <span class="n">fuzz</span> <span class="o">*</span> <span class="n">random_unit_vector_jax</span><span class="p">(</span><span class="n">key_metal</span><span class="p">)</span>
  
  <span class="c1"># Glass refraction/reflection
</span>  <span class="n">front_face</span> <span class="o">=</span> <span class="n">jnp</span><span class="p">.</span><span class="n">dot</span><span class="p">(</span><span class="n">ray_direction</span><span class="p">,</span> <span class="n">normal</span><span class="p">)</span> <span class="o">&lt;</span> <span class="mi">0</span>
  <span class="n">outward_normal</span> <span class="o">=</span> <span class="n">jnp</span><span class="p">.</span><span class="n">where</span><span class="p">(</span><span class="n">front_face</span><span class="p">,</span> <span class="n">normal</span><span class="p">,</span> <span class="o">-</span><span class="n">normal</span><span class="p">)</span>
  <span class="n">eta_ratio</span> <span class="o">=</span> <span class="n">jnp</span><span class="p">.</span><span class="n">where</span><span class="p">(</span><span class="n">front_face</span><span class="p">,</span> <span class="mf">1.0</span> <span class="o">/</span> <span class="n">refractive_index</span><span class="p">,</span> <span class="n">refractive_index</span><span class="p">)</span>
  
  <span class="n">unit_direction</span> <span class="o">=</span> <span class="n">normalize</span><span class="p">(</span><span class="n">ray_direction</span><span class="p">)</span>
  <span class="n">cos_theta</span> <span class="o">=</span> <span class="n">jnp</span><span class="p">.</span><span class="n">minimum</span><span class="p">(</span><span class="o">-</span><span class="n">jnp</span><span class="p">.</span><span class="n">dot</span><span class="p">(</span><span class="n">unit_direction</span><span class="p">,</span> <span class="n">outward_normal</span><span class="p">),</span> <span class="mf">1.0</span><span class="p">)</span>
  <span class="n">sin_theta</span> <span class="o">=</span> <span class="n">jnp</span><span class="p">.</span><span class="n">sqrt</span><span class="p">(</span><span class="mf">1.0</span> <span class="o">-</span> <span class="n">cos_theta</span> <span class="o">*</span> <span class="n">cos_theta</span><span class="p">)</span>
  
  <span class="n">cannot_refract</span> <span class="o">=</span> <span class="n">eta_ratio</span> <span class="o">*</span> <span class="n">sin_theta</span> <span class="o">&gt;</span> <span class="mf">1.0</span>
  
  <span class="n">should_reflect</span> <span class="o">=</span> <span class="n">cannot_refract</span> <span class="o">|</span> <span class="p">(</span><span class="n">jax</span><span class="p">.</span><span class="n">random</span><span class="p">.</span><span class="n">uniform</span><span class="p">(</span><span class="n">key_glass_random</span><span class="p">)</span> <span class="o">&lt;</span> <span class="n">reflectance</span><span class="p">(</span><span class="n">cos_theta</span><span class="p">,</span> <span class="n">eta_ratio</span><span class="p">))</span>
  
  <span class="n">refracted_direction</span> <span class="o">=</span> <span class="n">refract</span><span class="p">(</span><span class="n">unit_direction</span><span class="p">,</span> <span class="n">outward_normal</span><span class="p">,</span> <span class="n">eta_ratio</span><span class="p">)</span>
  <span class="n">reflected_direction</span> <span class="o">=</span> <span class="n">reflect</span><span class="p">(</span><span class="n">unit_direction</span><span class="p">,</span> <span class="n">outward_normal</span><span class="p">)</span>
  
  <span class="n">glass_scatter</span> <span class="o">=</span> <span class="n">jnp</span><span class="p">.</span><span class="n">where</span><span class="p">(</span><span class="n">should_reflect</span><span class="p">,</span> <span class="n">reflected_direction</span><span class="p">,</span> <span class="n">refracted_direction</span><span class="p">)</span>
  
  <span class="c1"># Choose scatter direction based on material type
</span>  <span class="n">scatter_direction</span> <span class="o">=</span> <span class="n">jnp</span><span class="p">.</span><span class="n">where</span><span class="p">(</span>
      <span class="n">material_type</span> <span class="o">==</span> <span class="mi">0</span><span class="p">,</span> <span class="n">diffuse_scatter</span><span class="p">,</span>
      <span class="n">jnp</span><span class="p">.</span><span class="n">where</span><span class="p">(</span><span class="n">material_type</span> <span class="o">==</span> <span class="mi">1</span><span class="p">,</span> <span class="n">metal_scatter</span><span class="p">,</span> <span class="n">glass_scatter</span><span class="p">)</span>
  <span class="p">)</span>
  
  <span class="n">metal_absorbed</span> <span class="o">=</span> <span class="p">(</span><span class="n">material_type</span> <span class="o">==</span> <span class="mi">1</span><span class="p">)</span> <span class="o">&amp;</span> <span class="p">(</span><span class="n">jnp</span><span class="p">.</span><span class="n">dot</span><span class="p">(</span><span class="n">metal_scatter</span><span class="p">,</span> <span class="n">normal</span><span class="p">)</span> <span class="o">&lt;=</span> <span class="mi">0</span><span class="p">)</span>
  
  <span class="n">ray_offset_normal</span> <span class="o">=</span> <span class="n">jnp</span><span class="p">.</span><span class="n">where</span><span class="p">(</span>
      <span class="p">(</span><span class="n">material_type</span> <span class="o">==</span> <span class="mi">2</span><span class="p">)</span> <span class="o">&amp;</span> <span class="o">~</span><span class="n">should_reflect</span><span class="p">,</span>  <span class="c1"># Glass refraction
</span>      <span class="o">-</span><span class="n">outward_normal</span><span class="p">,</span>  <span class="c1"># Offset into the material
</span>      <span class="n">outward_normal</span>    <span class="c1"># Offset away from surface
</span>  <span class="p">)</span>

  <span class="n">bounced_color</span> <span class="o">=</span> <span class="n">ray_color_materials</span><span class="p">(</span>
      <span class="n">p</span> <span class="o">+</span> <span class="mf">0.001</span> <span class="o">*</span> <span class="n">ray_offset_normal</span><span class="p">,</span> <span class="n">scatter_direction</span><span class="p">,</span>
      <span class="n">centers</span><span class="p">,</span> <span class="n">radii</span><span class="p">,</span> <span class="n">material_ids</span><span class="p">,</span> <span class="n">material_data</span><span class="p">,</span>
      <span class="n">key_recursive</span><span class="p">,</span> <span class="n">depth</span> <span class="o">+</span> <span class="mi">1</span><span class="p">,</span> <span class="n">max_depth</span>
  <span class="p">)</span>
  
  <span class="c1"># sky
</span>  <span class="n">unit_direction_sky</span> <span class="o">=</span> <span class="n">normalize</span><span class="p">(</span><span class="n">ray_direction</span><span class="p">)</span>
  <span class="n">a</span> <span class="o">=</span> <span class="mf">0.5</span> <span class="o">*</span> <span class="p">(</span><span class="n">unit_direction_sky</span><span class="p">[</span><span class="mi">1</span><span class="p">]</span> <span class="o">+</span> <span class="mf">1.0</span><span class="p">)</span>
  <span class="n">sky_color</span> <span class="o">=</span> <span class="p">(</span><span class="mf">1.0</span> <span class="o">-</span> <span class="n">a</span><span class="p">)</span> <span class="o">*</span> <span class="n">jnp</span><span class="p">.</span><span class="n">array</span><span class="p">([</span><span class="mf">1.0</span><span class="p">,</span> <span class="mf">1.0</span><span class="p">,</span> <span class="mf">1.0</span><span class="p">])</span> <span class="o">+</span> <span class="n">a</span> <span class="o">*</span> <span class="n">jnp</span><span class="p">.</span><span class="n">array</span><span class="p">([</span><span class="mf">0.5</span><span class="p">,</span> <span class="mf">0.7</span><span class="p">,</span> <span class="mf">1.0</span><span class="p">])</span>
  
  <span class="n">material_albedo</span> <span class="o">=</span> <span class="n">jnp</span><span class="p">.</span><span class="n">where</span><span class="p">(</span><span class="n">material_type</span> <span class="o">==</span> <span class="mi">2</span><span class="p">,</span> <span class="n">jnp</span><span class="p">.</span><span class="n">array</span><span class="p">([</span><span class="mf">1.0</span><span class="p">,</span> <span class="mf">1.0</span><span class="p">,</span> <span class="mf">1.0</span><span class="p">]),</span> <span class="n">albedo</span><span class="p">)</span>
  <span class="n">sphere_color</span> <span class="o">=</span> <span class="n">material_albedo</span> <span class="o">*</span> <span class="n">bounced_color</span>
  
  <span class="c1"># metal absorption
</span>  <span class="n">sphere_color</span> <span class="o">=</span> <span class="n">jnp</span><span class="p">.</span><span class="n">where</span><span class="p">(</span><span class="n">metal_absorbed</span><span class="p">,</span> <span class="n">jnp</span><span class="p">.</span><span class="n">array</span><span class="p">([</span><span class="mf">0.0</span><span class="p">,</span> <span class="mf">0.0</span><span class="p">,</span> <span class="mf">0.0</span><span class="p">]),</span> <span class="n">sphere_color</span><span class="p">)</span>
  
  <span class="k">return</span> <span class="n">jnp</span><span class="p">.</span><span class="n">where</span><span class="p">(</span><span class="n">hit</span><span class="p">,</span> <span class="n">sphere_color</span><span class="p">,</span> <span class="n">sky_color</span><span class="p">)</span>
</code></pre></div></div>

<p>Now we can render a four-sphere scene (three balls + the ground) with all different materials. The left glass sphere is an air bubble, the middle is a diffuse sphere, and the right is a metal sphere – just like the Ray Tracer tutorial.</p>

<div class="language-python highlighter-rouge"><div class="highlight"><pre class="highlight"><code><span class="k">def</span> <span class="nf">create_all_materials_scene</span><span class="p">():</span>
  <span class="n">centers</span> <span class="o">=</span> <span class="n">jnp</span><span class="p">.</span><span class="n">array</span><span class="p">([</span>
      <span class="p">[</span><span class="o">-</span><span class="mf">1.1</span><span class="p">,</span> <span class="mf">0.0</span><span class="p">,</span> <span class="o">-</span><span class="mf">1.0</span><span class="p">],</span>     <span class="c1"># Left glass sphere
</span>      <span class="p">[</span><span class="mf">0.0</span><span class="p">,</span> <span class="o">-</span><span class="mf">0.</span><span class="p">,</span> <span class="o">-</span><span class="mf">1.0</span><span class="p">],</span>      <span class="c1"># Center diffuse sphere
</span>      <span class="p">[</span><span class="mf">1.1</span><span class="p">,</span> <span class="mf">0.0</span><span class="p">,</span> <span class="o">-</span><span class="mf">1.0</span><span class="p">],</span>      <span class="c1"># Right metal sphere
</span>      <span class="p">[</span><span class="mf">0.0</span><span class="p">,</span> <span class="o">-</span><span class="mf">100.5</span><span class="p">,</span> <span class="o">-</span><span class="mf">1.0</span><span class="p">],</span>   <span class="c1"># Ground
</span>  <span class="p">])</span>
  
  <span class="n">radii</span> <span class="o">=</span> <span class="n">jnp</span><span class="p">.</span><span class="n">array</span><span class="p">([</span><span class="mf">0.5</span><span class="p">,</span> <span class="mf">0.45</span><span class="p">,</span> <span class="mf">0.5</span><span class="p">,</span> <span class="mf">100.0</span><span class="p">])</span>
  <span class="n">material_ids</span> <span class="o">=</span> <span class="n">jnp</span><span class="p">.</span><span class="n">array</span><span class="p">([</span><span class="mi">0</span><span class="p">,</span> <span class="mi">1</span><span class="p">,</span> <span class="mi">2</span><span class="p">,</span> <span class="mi">3</span><span class="p">])</span>
  
  <span class="n">material_data</span> <span class="o">=</span> <span class="p">{</span>
      <span class="s">'types'</span><span class="p">:</span> <span class="n">jnp</span><span class="p">.</span><span class="n">array</span><span class="p">([</span><span class="mi">2</span><span class="p">,</span> <span class="mi">0</span><span class="p">,</span> <span class="mi">1</span><span class="p">,</span> <span class="mi">0</span><span class="p">]),</span>  <span class="c1"># glass, diffuse, metal, diffuse
</span>      <span class="s">'albedos'</span><span class="p">:</span> <span class="n">jnp</span><span class="p">.</span><span class="n">array</span><span class="p">([</span>
          <span class="p">[</span><span class="mf">1.0</span><span class="p">,</span> <span class="mf">1.0</span><span class="p">,</span> <span class="mf">1.0</span><span class="p">],</span>   <span class="c1"># Glass (no attenuation)
</span>          <span class="p">[</span><span class="mf">0.4</span><span class="p">,</span> <span class="mf">0.5</span><span class="p">,</span> <span class="mf">0.8</span><span class="p">],</span>   <span class="c1"># Blue diffuse sphere
</span>          <span class="p">[</span><span class="mf">0.9</span><span class="p">,</span> <span class="mf">0.8</span><span class="p">,</span> <span class="mf">0.4</span><span class="p">],</span>   <span class="c1"># Gold metal sphere
</span>          <span class="p">[</span><span class="mf">0.5</span><span class="p">,</span> <span class="mf">0.8</span><span class="p">,</span> <span class="mf">0.0</span><span class="p">],</span>   <span class="c1"># Green ground
</span>      <span class="p">]),</span>
      <span class="s">'fuzz'</span><span class="p">:</span> <span class="n">jnp</span><span class="p">.</span><span class="n">array</span><span class="p">([</span><span class="mf">0.0</span><span class="p">,</span> <span class="mf">0.0</span><span class="p">,</span> <span class="mf">0.2</span><span class="p">,</span> <span class="mf">0.0</span><span class="p">]),</span>  <span class="c1"># Some fuzz on metal
</span>      <span class="s">'refractive_indices'</span><span class="p">:</span> <span class="n">jnp</span><span class="p">.</span><span class="n">array</span><span class="p">([</span><span class="mf">1.0</span><span class="o">/</span><span class="mf">1.33</span><span class="p">,</span> <span class="mf">1.0</span><span class="p">,</span> <span class="mf">1.0</span><span class="p">,</span> <span class="mf">1.0</span><span class="p">])</span>
  <span class="p">}</span>
  
  <span class="k">return</span> <span class="n">centers</span><span class="p">,</span> <span class="n">radii</span><span class="p">,</span> <span class="n">material_ids</span><span class="p">,</span> <span class="n">material_data</span>
</code></pre></div></div>

<p>JAX lets us naturally compose two levels of parallelization. First, we <code class="language-plaintext highlighter-rouge">vmap </code>over multiple samples per pixel (for anti-aliasing), then <code class="language-plaintext highlighter-rouge">vmap</code> over all pixels in the image.</p>

<p>The JIT compiler creates highly optimized parallel code that can be scaled across CPU cores or GPU threads automatically. For a 600x600 image with 16 samples per pixel, we’re processing 5.76 million rays simultaneously.</p>

<p>After making some new <code class="language-plaintext highlighter-rouge">trace_pixel()</code> and <code class="language-plaintext highlighter-rouge">render()</code> wrapper functions, we get:</p>

<div class="align-center">
    <img src="/public/jax/materials.png" width="650px" />
</div>

<p><br /></p>

<h3 id="a-final-render">A Final Render</h3>

<p>Now it’s time create the iconic final scene from the tutorial with lots and lots of spheres!! <em>(The details of <code class="language-plaintext highlighter-rouge">create_hella_balls_scene()</code> aren’t really relevant – the main point is that there are lots of balls with lots of different materials. I also had to implement some batching to get around the memory constraints.)</em></p>

<p>I added some simple gamma correction (gamma = 2.2, so we take square root for approximate 2.0) to the rendering pipeline for better coloring, which can be done using this line: <code class="language-plaintext highlighter-rouge">jnp.sqrt(jnp.clip(linear_color, 0.0, 1.0))</code>. With <code class="language-plaintext highlighter-rouge">max_depth = 10</code> and <code class="language-plaintext highlighter-rouge">samples_per_pixel = 12</code>, here’s a comparison of before and after gamma correction:</p>

<div class="align-center">
    <img src="/public/jax/compare.png" width="400px" />
</div>

<p>With <code class="language-plaintext highlighter-rouge">max_depth = 10</code> and <code class="language-plaintext highlighter-rouge">samples_per_pixel = 500</code> after gamma correction… VOILA!!</p>

<div class="align-center">
    <img src="/public/jax/gamma.png" width="600px" />
</div>

<p>Subsequent renders are fast because JAX caches the JIT-compiled functions. As long as you keep the same image dimensions (static arguments), changing camera position, materials, or scene geometry doesn’t trigger recompilation - JAX reuses the optimized machine code.</p>

<div style="display: grid; grid-template-columns: 1fr 1fr; gap: 10px; max-width: 800px; margin: 20px auto;">
  <div style="text-align: center;">
    <img src="/public/jax/v1.png" style="width: 100%; height: auto; border-radius: 8px;" />
  </div>
  <div style="text-align: center;">
    <img src="/public/jax/v2.png" style="width: 100%; height: auto; border-radius: 8px;" />
  </div>
  <div style="text-align: center;">
    <img src="/public/jax/v3.png" style="width: 100%; height: auto; border-radius: 8px;" />
  </div>
  <div style="text-align: center;">
    <img src="/public/jax/v4.png" style="width: 100%; height: auto; border-radius: 8px;" />
  </div>
</div>

<p>Speed comes from: (a) no recompilation for non-static argument changes, (b) vectorized operations processing millions of rays in parallel, and (c) XLA optimizations like operation fusion and memory layout optimization.</p>

<p>For reference, these image generated in Rust on my machine took 1244.58 seconds (a little over 20 minutes) and 1236.66 seconds. The first had <code class="language-plaintext highlighter-rouge">max_depth=20</code> and the second was <code class="language-plaintext highlighter-rouge">max_depth=10</code> (both <code class="language-plaintext highlighter-rouge">samples_per_pixel = 500</code>). (<em>The Rust version looks slightly different, maybe a bit more “high quality”, but I think it’s just due to some small implementation details like PNRG and different epsilon calculations</em>.)</p>

<div style="display: grid; grid-template-columns: 1fr 1fr; gap: 10px; max-width: 800px; margin: 20px auto;">
  <div style="text-align: center;">
    <img src="/public/jax/rust.png" style="width: 100%; height: auto; border-radius: 8px;" />
  </div>
  <div style="text-align: center;">
    <img src="/public/jax/rust2.png" style="width: 100%; height: auto; border-radius: 8px;" />
  </div>
</div>

<p><em>Again if you want to play around for yourself, <a href="https://colab.research.google.com/drive/1A5afhu5yGbXSaUFWWFPHotGMWy6Ao1DN?usp=sharing">here</a> is the Colab!</em></p>]]></content><author><name></name></author><summary type="html"><![CDATA[]]></summary></entry><entry><title type="html">Prediction Markets</title><link href="https://kayleegeorge.github.io/blog/2025-09-10-prediction-markets/" rel="alternate" type="text/html" title="Prediction Markets" /><published>2025-09-10T00:00:00+00:00</published><updated>2025-09-10T00:00:00+00:00</updated><id>https://kayleegeorge.github.io/blog/prediction-markets</id><content type="html" xml:base="https://kayleegeorge.github.io/blog/2025-09-10-prediction-markets/"><![CDATA[]]></content><author><name></name></author><summary type="html"><![CDATA[]]></summary></entry><entry><title type="html">Labubus &amp;amp; AI Editors</title><link href="https://kayleegeorge.github.io/blog/ai-editors/" rel="alternate" type="text/html" title="Labubus &amp;amp; AI Editors" /><published>2025-09-08T00:00:00+00:00</published><updated>2025-09-08T00:00:00+00:00</updated><id>https://kayleegeorge.github.io/blog/ai-editors</id><content type="html" xml:base="https://kayleegeorge.github.io/blog/ai-editors/"><![CDATA[<p>AI editor interfaces usually fall into one of two buckets: (1) back-and-forth chat, or (2) drag-and-drop canvases. That’s why I wanted to explore building a different AI generation interface at the first Gemini Nano Banana hackathon (and won 4th place!).</p>

<p>We built a novel consumer app for brands to rapidly experiment and iterate on new assets or product lines. Nano Banana uniquely enables apps &amp; interfaces like this because of its style consistency (both between input &amp; output images and across multiple calls) and generation speed.</p>

<video src="/public/ai-editor/labubus2.mp4" controls="" style="max-width: 800px; width: 100%; height: auto;"></video>

<p>A project is a unified brand or style. The user uploads a few images as the “style guide” for all sets that are within that project. Sets are collections of things that align with that style, generated all at once from a text prompt (e.g. “Jansport backpacks”, “hightop sneakers”, “letters of the alphabet”). When a set is generated, the platform first generates a diverse set of text prompts using Gemini 2.5 Flash. Then, we feed those prompts into Nano Banana with the style guide — these calls are parallelized.</p>

<p>The [one style –&gt; one product –&gt; N generated variations] pipeline is great for experimentation or creating a lot of background assets within a particular “universe” (aka brand).</p>

<p>Labubus are an amazing example of a brand that is taking the world by storm and should continue to try to occupy as much mindshare as possible to increase their bottom line. Our platform makes it really easy to launch one-time campaigns (e.g. backpack partnerships for back-to-school season) and visually experiment with new products to guage initial consumer interest without investing too many internal company resources (e.g. design, manufacturing, etc.).</p>

<div style="text-align: center;">
    <img src="/public/ai-editor/home.png" alt="home" style="width: 100%; height: auto; border-radius: 8px;" />
</div>

<p>LABUBU-IFY EVERYTHING MWAHAHA!!</p>

<div style="display: grid; grid-template-columns: 1fr 1fr; gap: 10px; max-width: 1000px; margin: 20px auto;">
  <div style="text-align: center;">
    <img src="/public/ai-editor/backpack.png" alt="Backpack" style="width: 100%; height: auto; border-radius: 8px;" />
  </div>
  <div>
    <div style="text-align: center;">
        <img src="/public/ai-editor/sneakers.png" alt="Sneakers" style="width: 100%; height: auto; border-radius: 8px;" />
    </div>
  </div>
  <div style="text-align: center;">
    <img src="/public/ai-editor/stickers.png" alt="stickers" style="width: 100%; height: auto; border-radius: 8px;" />
  </div>
  <div style="text-align: center;">
    <img src="/public/ai-editor/rocket.png" alt="rocket" style="width: 100%; height: auto; border-radius: 8px;" />
  </div>
  <div style="text-align: center;">
    <img src="/public/ai-editor/font.png" alt="font" style="width: 100%; height: auto; border-radius: 8px;" />
  </div>
  <div style="text-align: center;">
    <img src="/public/ai-editor/bees.png" alt="bees" style="width: 100%; height: auto; border-radius: 8px;" />
  </div>
</div>

<p>If you’re an indie 2D game developer and are bottlenecked by art (e.g. creating pixel art assets), you can use generate a bunch of sets that all match the style of your game universe. For example, for Stardew Valley, I made sets of plants, animals, and houses:</p>

<div style="text-align: center;">
    <img src="/public/ai-editor/plants.png" alt="plants" style="width: 100%; height: auto; border-radius: 8px;" />
</div>

<p>If you’re a creative and need inspiration for character design or need a bunch of “NPCs”, you might generate different sets of characters — like new grass pokemon or background characters for South Park.</p>

<div style="text-align: center;">
    <img src="/public/ai-editor/grass.png" alt="grass" style="width: 100%; height: auto; border-radius: 8px;" />
</div>

<div style="text-align: center;">
    <img src="/public/ai-editor/southpark.png" alt="South park" style="width: 100%; height: auto; border-radius: 8px;" />
</div>

<p>**</p>

<p>One thing I really disliked about <a href="https://aistudio.google.com/prompts/new_chat">Google AI Studio</a> is how slow the turn-taking chat interface is. This is a great pattern for when you are iterating on <em>one</em> thing, but horrible for iterating on <em>many</em> things under <em>one</em> theme. It’s incredibly slow / impossible to parallelize work, annoying to repeat prompts / image attachments for each generation, difficult to differentiate style vs. content, and no gallery view for seeing all outputs at once.</p>

<p>Even <a href="https://openai.com/sora/">Sora</a> and <a href="https://www.midjourney.com/">Midjourney</a> haven’t nailed the <em>best</em> flow in my opinion, but I think they are still very good consumer interfaces that have the right pipeline for what they are trying to achieve right now (queues for background generation, social explore gallery, etc.).</p>

<p>As mentioned in an <a href="/blog/ai-manga/">earlier post</a>, I really like Midjourney’s separation of image, style, and omni in their prompt editor. It makes it easier to specify what components the image model should focus on for what purpose – which sets user expectations and guides the model better for more reliable outputs:</p>

<div style="text-align: center;">
    <img src="/public/ai-manga/prompt.png" alt="South park" style="width: 100%; height: auto; border-radius: 8px;" />
</div>

<p>Lots of these AI image editors are still in the “toy” stage, but we’re entering an era where the human-AI interface will determine winners and losers. As models commoditize, the interface becomes the differentiator. Building at the Nano Banana hackathon made me think about:</p>

<ul>
  <li><strong>Parallel creativity</strong>: Most AI tools assume single-threaded thinking, but creativity is about exploring multiple directions simultaneously. We need interfaces for creative worlds, not just individual outputs.</li>
  <li><strong>Granular intent</strong>: Interfaces should handle the bulk of reasoning about inputs at the <em>user input</em> layer. Midjourney’s style/image/omni separation is a clearer mental model for users and offers better input guidance for models. These interfaces will probably vary depending on the use case (e.g. make a comic book will have character input stage, plot stage, etc.).</li>
  <li><strong>Sketching speed</strong>: When generation is fast enough, AI becomes a co-collaborator in brainstorming rather than a service you commission. This gets ideas off the ground and lets you iterate faster.</li>
</ul>

<p><em>Here’s the <a href="https://github.com/kayleegeorge/turbo-banana">Github</a> to our hackathon project!</em></p>]]></content><author><name></name></author><summary type="html"><![CDATA[AI editor interfaces usually fall into one of two buckets: (1) back-and-forth chat, or (2) drag-and-drop canvases. That’s why I wanted to explore building a different AI generation interface at the first Gemini Nano Banana hackathon (and won 4th place!).]]></summary></entry><entry><title type="html">Making a manga with AI</title><link href="https://kayleegeorge.github.io/blog/ai-manga/" rel="alternate" type="text/html" title="Making a manga with AI" /><published>2025-09-05T00:00:00+00:00</published><updated>2025-09-05T00:00:00+00:00</updated><id>https://kayleegeorge.github.io/blog/ai-manga</id><content type="html" xml:base="https://kayleegeorge.github.io/blog/ai-manga/"><![CDATA[<p>Google’s latest model, Nano Banana, is promising for use cases like marketing, branding, and storytelling due to its generation speed and consistency across many images.</p>

<p><strong>TLDR</strong></p>
<ul>
  <li>Nano Banana produces consistent results for exact image replication or positional/angular variations of input images. It also reliably writes &amp; edits text.</li>
  <li>I prefer Midjourney for style transfer and “raw” art creativity.</li>
  <li>Sora editor kept crashing 💀</li>
</ul>

<p>**</p>

<p>I started watching the anime <a href="https://en.wikipedia.org/wiki/Dandadan">Dandadan</a> and was blown away by the art style. I wanted to see if I could emulate a Dandadan-like manga scene using Nano Banana.</p>

<p><em>Scenes from Dandadan</em>:</p>

<div style="display: grid; grid-template-columns: 1fr 1fr; gap: 10px; max-width: 650px; margin: 20px auto;">
  <div style="text-align: center;">
    <img src="/public/ai-manga/turbo-granny.png" alt="Turbo Granny" style="width: 100%; height: auto; border-radius: 8px;" />
  </div>
  <div>
    <div style="text-align: center;">
        <img src="/public/ai-manga/aliens.png" alt="Aliens" style="width: 100%; height: auto; border-radius: 8px;" />
    </div>
    <div style="text-align: center;">
        <img src="/public/ai-manga/fight.png" alt="Aliens" style="width: 100%; height: auto; border-radius: 8px;" />
    </div>
  </div>
  <div style="text-align: center;">
    <img src="/public/ai-manga/sumo.png" alt="Sumo" style="width: 100%; height: auto; border-radius: 8px;" />
  </div>
  <div style="text-align: center;">
    <img src="/public/ai-manga/sumo2.png" alt="Sumo 2" style="width: 100%; height: auto; border-radius: 8px;" />
  </div>
</div>

<h3 id="explorations">Explorations</h3>
<p><em>Before trying to one-shot a manga scene, I wanted to take some time to explore the capabilities of Nano Banana (particularly in comparison to Midjourney).</em></p>

<p>First, I messed around with “panel completion” — I took an existing manga page, removed the last panel, and prompt the model to make the last panel with a text description of the scene. The purpose of this was to test how well Nano Banana could do art style transfer.</p>

<p><img src="/public/ai-manga/panel-complete.png" alt="HxH" style="width: 100%; height: auto; border-radius: 8px;" /></p>

<p>Not bad.</p>

<p>I then started messing around with multi-panel panels. Prompt (<em>plus a picture of Killua from HxH as a character reference</em>):</p>

<div class="language-plaintext highlighter-rouge"><div class="highlight"><pre class="highlight"><code>Create a 6-panel manga sequence. Make sure the character and art style is consistent in black and white. 
Panel 1: "Create a young manga protagonist discovering a mysterious artifact" 
Panel 2: "Same character examining the artifact closely - keep character design identical" 
Panel 3: "Wide shot of character being surrounded by ominous magical energy and a glimpse of a massive demon-like alien" 
Panel 4: "Close up of the character's eyes very wide in fear, filled with dread" 
Panel 5: "A front, straight-on view of character running frantically from the alien - same art style"
</code></pre></div></div>

<p><img src="/public/ai-manga/compare.png" alt="Compare" style="width: 100%; height: auto; border-radius: 8px;" /></p>

<p>Midjourney had a more authentic anime art style in my opinion and the panel framing was also very clean, but all the text was gibberish. I didn’t like the art style of Nano Banana as much (it kind of reminds me of those printable black and white coloring pages) but the panels made “more sense” as a sequential scene.</p>

<p>I gave Midjourney the same prompt but this time without the Killua reference image. Again the words were gibberish but the actual art and character design were pretty stunning and creative.</p>

<p><img src="/public/ai-manga/mid.png" alt="Compare" style="width: 100%; height: auto; border-radius: 8px;" />
<img src="/public/ai-manga/mid2.png" alt="Compare" style="width: 100%; height: auto; border-radius: 8px;" /></p>

<p>**</p>

<p>One thing that I really liked about the Midjourney prompt terminal was its separation between Image Prompts, Style Prompts, and Omni Reference. On the other hand, Google’s AI lab wasn’t very reliable at style transfer and would sometimes just return one of the images 1:1 without any edits.</p>

<p><img src="/public/ai-manga/prompt.png" alt="Prompt" style="width: 90%; height: auto; border-radius: 8px;" /></p>

<p>Generally, I think there’s a lot of room for novel AI editor interfaces. Especially in Google AI Studio, it was extremely annoying to (a) try to reference 1 character when there were multiple characters in an image, (b) differentiate which images were for style and which were for character consistency, and (c) rapidly iterate – aka parallelize image generation.</p>

<p>**</p>

<p>I then started experimenting a bit with <strong>character design</strong>. I first gave Nano Banana some images of characters from HxH and Dandadan.</p>

<div class="language-plaintext highlighter-rouge"><div class="highlight"><pre class="highlight"><code>I am writing a manga and need your help to visualize the story. The art style should be consistent, only black-and-white art and no words.
The story has two main characters, a boy and a girl, and is set in Japan. Please design these two characters for me. I've attached some examples of characters that I like in other mangas.
Make a full body character profile of the boy and the girl for me to use throughout the story.
</code></pre></div></div>

<div class="align-center">
<img src="/public/ai-manga/nb_chars.png" alt="chars" style="border-radius: 8px;" width="500px" />
</div>

<p>Using these profiles as a starting point, I wanted to make reference sheets in an attempt to keep characters consistent across scenes. Nano Banana is very good at character consistency – especially variations given an input character. On the other hand, Midjourney is quite bad at this.</p>

<p><img src="/public/ai-manga/compare-chars.png" alt="Compare" style="width: 100%; height: auto; border-radius: 8px;" /></p>

<p>**</p>

<p>I was pretty surprised at Nano Banana’s ability to edit text. While keeping everything else the same, Nano Banana successfully changed “candiat to candid”:</p>

<div class="align-center" style="gap: 10px;">
<img src="/public/ai-manga/ilya_spell_error.jpeg" alt="chars" width="250px" />
<img src="/public/ai-manga/ilya_fixed.jpeg" alt="chars" width="250px" />
</div>

<p>**</p>

<p>After all this fiddling around, I made “The Coup” using a mix of Nano Banana and Midjourney:</p>

<div class="align-center">
<img src="/public/ai-manga/the-coup.png" alt="Compare" style="width: 80%; height: auto; border-radius: 8px;" />
</div>

<p>It’s way shorter than I intended but it was pretty hard to keep character consistency across many scenes in the way I wanted to (notice the style isn’t super consistent either…). I ended up using a combination of Nano Banana for character/style consistency and Midjourney to “seed” the initial style and character design.</p>

<p>**</p>

<p>Interesting directions to explore in the future:</p>
<ul>
  <li>Train a model specifically for style as a Nano Banana post-processing step</li>
  <li>Better AI editors for storytelling (e.g. a storyboard phase that generates reusable context prompts for consistency across scenes)</li>
  <li>Character consistency (e.g. upload characters that are passed into every scene generation’s context window)</li>
  <li>Post-generation editing (e.g. layers, text, etc.)</li>
</ul>]]></content><author><name></name></author><summary type="html"><![CDATA[Google’s latest model, Nano Banana, is promising for use cases like marketing, branding, and storytelling due to its generation speed and consistency across many images.]]></summary></entry><entry><title type="html">A weekend in San Francisco</title><link href="https://kayleegeorge.github.io/blog/sf-recs/" rel="alternate" type="text/html" title="A weekend in San Francisco" /><published>2025-01-02T00:00:00+00:00</published><updated>2025-01-02T00:00:00+00:00</updated><id>https://kayleegeorge.github.io/blog/sf-recs</id><content type="html" xml:base="https://kayleegeorge.github.io/blog/sf-recs/"><![CDATA[<p>I’ve lived in San Francisco for a grand total of 6 months (plus 1 summer) so I know I am <em>truly</em> <strong>the</strong> 
most qualified person to give some city recommendations. But ALAS…</p>

<h4 class="small-title" id="outdoor">Outdoor</h4>

<p>SF is a very naturally beautiful city. The whole Bay Area is generally very pretty.</p>

<ul class="bullets">
   <li>Start at the panhandle, walk through Golden Gate Park, and end at Ocean Beach</li>
   <li>Ocean Beach is also reachable by Muni + you can bonfire at night. Bring a blanket, it's cold</li>
   <li>Hike at Muir Woods or Mt. Tam. You can actually take a bus route to these places (took roughly 1 hr 40 min, so bring a book with you)</li>
   <li>Bike across the Golden Gate Bridge into Sausalito and refuel with some delicious fish &amp; a cold one at <a href="https://www.hookfishco.com/">Hook Fish</a> in Mill Valley. 
   You can also catch the <a href="https://sanfranciscobayferry.com/">ferry</a> there and/or back</li>
   <li>Walk along Lands End, admire the coast</li>
   <li>Explore all of SF by walking the <a href="https://crosstowntrail.org/">Crosstown Trail</a></li>
   <li>Visit Angel Island (can stroll, picnic, or leisurely bike around; accessible by ferry)</li>
   <li>Walk through Fort Mason &amp; the Marina, grab some Philz Coffee, head to Palace of Fine Arts</li>
   <li>Take a lover to Lover's Lane</li>
</ul>

<div class="spacer"></div>

<h4 class="small-title" id="food">Food</h4>

<p>Brunch. (I <em>love</em> breakfast sandwiches.)</p>

<ul class="bullets">
   <li>Breadbelly (really good breakfast sandwich)</li>
   <li>Stable Cafe (great food &amp; vibes, protected outdoor seating)</li>
   <li>Breakfast Little (breakfast burritos + sandwiches)</li>
   <li>Khanfections (no indoor seating, very yummy biscuit egg sandwiches)</li>
   <li>Plow (classic brunch)</li>
   <li>That's My Jam (jam &amp; bread)</li>
   <li>Early to Rise (michelin star Quince chef)</li>
   <li>Cafe Réveille (I like "The Works" breakfast sandwich; generally good place to work)</li>
   <li>Tartine / Tartine Manufactory</li>
   <li>Copra (delicious french toast)</li>
   <li>The Mill</li>
   <li>Lokma (really good Turkish breakfast)</li>
</ul>

<div class="spacer"></div>

<p>Pastries.</p>

<ul class="bullets">
   <li>Arsicault (Kouign Amann is the best; the original Arsicault is in France and the SF ones are opened by the grandson of the French owners. 
      In my opinion, these are the most similar to true French pastries, although these are pretty rich)</li>
   <li>Juniper</li>
   <li>Kantine (almond pastry thing with poppy seed on top)</li>
   <li>Butter &amp; Crumble (more creative flavors if you like that type of thing; no seating, can eat at Washington Square Park)</li>
</ul>

<div class="spacer"></div>

<p>Lunch (honestly don’t have that many recs here because I’m usually a brunch person).</p>

<ul class="bullets">
   <li>Sandwiches: Lucinda's Deli (&amp; eat at Alamo Square), Limoncello</li>
   <li>Get a burrito at La Tacqueria / El Farolito or something from Tartine Bakery &amp; eat at Dolores Park</li>
</ul>

<div class="spacer"></div>

<p>Dinner.</p>

<ul class="bullets">
   <li>Overall Date Night Faves: State Bird Provisions, San Ho Won, Four Kings, Rintaro, Cotogna, Niku Steakhouse</li>
   <li>Chinese: Mister Jiu's, Dumpling Home</li>
   <li>Korean: Daeho, Han Il Kwan, Brothers KBBQ</li>
   <li>Thai: Khao Tiew, Saap Ver Damn Good! Thai street food, Khob Khun Thai, Kin Khao, Nari </li>
</ul>

<div class="spacer"></div>

<p>Drinks.</p>

<ul class="bullets">
   <li>Coffee: The Coffee Movement, CoffeeShop, Grand Coffee Too, Compton's Coffee House, Golden Goat, Saint Frank, Sightglass</li>
   <li>Bars: Moongate Lounge, PCH, Mr. Tipples Jazz Club (dim sum + drinks + live jazz), ABV, True Laurel, Tempest</li>
</ul>

<div class="spacer"></div>

<h4 class="small-title" id="misc">Misc</h4>

<ul class="bullets">
   <li>Ferry Building farmer's market (Tues, Thurs, &amp; Sat morn)</li>
   <li>Emporium (arcade games + drinks)</li>
   <li>City Lights Bookstore</li>
</ul>

<div class="spacer"></div>

<h4 class="small-title" id="outside-sf">Outside SF</h4>

<p>You’ll need a car for these.</p>

<ul class="bullets">
   <li>Plan a trip to a National Park: Big Sur, Yosemite, Redwoods, Lassen, Pinnacles, etc.</li>
   <li>Drink wine in Napa or take a cheese-making class Sonoma</li>
   <li>Tahoe for ski and snowboarding (get IKON pass if you're going multiple times)</li>
</ul>

<div class="spacer"></div>

<p><em>Note: This is an ongoing list that I plan on updating occasionally. Please reach out if you have things to add.</em></p>]]></content><author><name></name></author><summary type="html"><![CDATA[I’ve lived in San Francisco for a grand total of 6 months (plus 1 summer) so I know I am truly the most qualified person to give some city recommendations. But ALAS…]]></summary></entry><entry><title type="html">Keyboard #01</title><link href="https://kayleegeorge.github.io/blog/keyboard-build/" rel="alternate" type="text/html" title="Keyboard #01" /><published>2024-12-30T00:00:00+00:00</published><updated>2024-12-30T00:00:00+00:00</updated><id>https://kayleegeorge.github.io/blog/keyboard-build</id><content type="html" xml:base="https://kayleegeorge.github.io/blog/keyboard-build/"><![CDATA[<p>I’m a casual keyboard hobbyist who got into the craft two and a half years ago. Back when I was an intern at Uniswap, I started nerding out over keyboards with my
co-worker and co-intern and that evolved into a company-wide mechanical keyboard building workshop (led by the Team Clickity Clack trio).</p>

<p>This guide is an adapted version of that workshop. If you want to build your first mechanical keyboard, this is a great place to start because it’s approachable and
you’ll still get a really awesome keyboard out of it.</p>

<h3 id="i-anatomy-of-a-keyboard">I. Anatomy of a Keyboard</h3>

<div class="align-center">
    <img src="/public/keyboard/parts-of-a-keyboard.jpg" width="500px" />
</div>

<p>This is the full stack of a mechanical keyboard. For your first keyboard, it’s nice to choose 
a build pack that includes everything except the switches and the keycaps. This allows you to
go pretty far with customizing how your board looks and feels without too much effort and a reasonable price.</p>

<p>That leaves four main design decisions: (1) size, (2) casing, (3) switches, and (4) keycaps. After that, it’s bonus mods!</p>

<h4 class="small-title" id="size">Size</h4>

<p>The different keyboard layouts are 60%, 65%, and 87%.</p>

<div class="align-center">
    <img src="/public/keyboard/keyboard-size.png" width="500px" />
</div>

<p>I’d say most people prefer the 65 because it’s most similar to your laptop’s built-in keyboard layout.</p>

<p>The main difference between the 60 and the 65 is the arrow keys.<br />
As you can see, the 60 layout doesn’t have arrow keys on layer 0 (i.e. what is written on the keycaps). Instead, you have to access them on layer 1 using the MO(1) key or Fn key. 
If you want to <em>visually</em> see your arrow keys, go with the 65.</p>

<p>Personally, I prefer the 60 layout. If you’re a Vim user like me, the 60 layout is actually really nice because you’re not using your arrow keys anyways so I feel like it’s overall most efficient and compact.</p>

<h4 class="small-title" id="casing">Casing</h4>

<p>Once you’ve chosen a size, it’s time to choose what casing you want. This includes the main case plus things like the gaskets, plate, and PCB.</p>

<p>I use the term “casing” here because you can either choose a build that already has the bulk of this stack or you can choose to get all these
parts separately — it’s up to you. But since this is (most likely) your first keyboard, I’d say choose the former.</p>

<p>I recommend getting a Bakaneko (<a href="https://cannonkeys.com/products/bakeneko-60">Bakaneko60</a>, <a href="https://cannonkeys.com/products/bakeneko65">Bakaneko65</a>). It’s high quality and easy to assemble, making it a fantastic first board build.
These are also nice because while it comes with the bulk of the board stack, you can still change out specific parts if you really want (e.g. using different stabilizers).</p>

<p>The Bakaneko Series come with hotswap PCB, which means you can insert and remove switches without soldering it onto the circuit board inside. Soldered PCB means you have to manually
solder each switch in place, which has benefits like moer reliable electrical connections but is more difficult to assemble and prone to error. 
I’d stick to hotswap for a fun first build.</p>

<p>For an 87, something like the <a href="https://novelkeys.com/products/nk87-aluminum-edition">NK87</a> is a good choice (I don’t really recommend the 87 for most people though, it’s quite bulky).</p>

<p>If you want to remap keys or are getting a 60 layout, make sure to choose a board that is VIA compatible (easy key remapping software).</p>

<h4 class="small-title" id="switches">Switches</h4>

<p>My favorite part of the build… switches! Switches are responsible for the fundamental sound and feel of your board.</p>

<p>There are three types of switches: linear, tactile, and clicky.</p>

<div class="align-center">
    <img src="/public/keyboard/switches.png" width="500px" />
</div>

<p>The reason why the clicky switch has a big X over it is because it’s really noisy. It’s fine if you want this to be your home keyboard but
it’s certainly too loud for an in-office keyboard.</p>

<p>So personally, I think you should choose between linear and tactile. The main difference is their “smoothness” — linear has no resistance on the 
downward stroke vs. tactile has a resistance bump (which offers a more distinct sensory experience). 
The best way to know which switch is right for you is by trying them both 
and seeing which you like. Here’s a helpful <a href="https://www.youtube.com/watch?v=MbL9j06siA0">video</a> comparison.</p>

<p><strong>My recommendations:</strong></p>

<ul class="bullets">
    <li>Tactile: Outemu Silent Sky, Boba u4t (68g is thockier), Zealios, Purple Pandas (<a href="https://www.youtube.com/watch?v=D-qpw4_QTM0">video comparison</a>)</li>
    <li>Linear: Gatreon Milky Yellow Pro (<a href="https://www.youtube.com/watch?v=Z01pisakHDQ&amp;t=5s">video comparison</a>)</li>
</ul>

<h4 class="small-title" id="keycaps">Keycaps</h4>

<p>The keycaps you choose are mainly for aesthetic but there are also different profiles. Each is a different typing feel and experience.</p>

<div class="align-center">
    <img src="/public/keyboard/keycaps.png" width="500px" />
</div>

<p>I’d say sculpting is better than no sculpting (i.e. flat keys like a laptop built-in keyboard). The difference in heights and form feel and look nicer in my opinion.</p>

<p>Cherry and OEM are both cylindrical shape while SA is spherical and high profile. I think SA is a bit too tall for most people but it really depends on your preference (e.g. if you have larger hands for example).
DSA is uniform in height and low profile — which people say is great for gaming. 
Again, it’s a personal choice.</p>

<p>You can buy keycaps anywhere (NovelKeys, aliexpress, etc). Choose ones that look nice to you — hard to go wrong here.</p>

<h3 id="ii-mods">II. Mods</h3>

<p>You can go pretty crazy with mods but I think the highest value optimization is lubing your switches.</p>

<p>To lube your switches, you essentially need to open up each switch, add lube to certain parts, and reassemble. Do this before starting to build the rest of your keyboard.</p>

<p>Steps at a glance:</p>

<ol>
  <li>Open all your switches.</li>
  <li>Take your brush and add a litle bit of lube to it (thin coat, not globs).</li>
  <li>Brush one end of each spring.</li>
  <li>Brush the bottom housing (the two rails and the leaf).</li>
  <li>Put your spring on your bottom housing.</li>
  <li>Add a bit more lube to your brush.</li>
  <li>Lube your stem (swipe each side of the stem twice; do not lube the feet).</li>
  <li>Put the stem on the spring and bottom housing; close with the top housing.</li>
</ol>

<p>Watch this <a href="https://www.youtube.com/watch?v=_BG-8QrA-6c">video</a> for a straightforward tutorial and visuals on where to lube. Here is another comprehensive <a href="https://docs.google.com/document/d/1MXrx8ddxSNVBCHFjNrUMt-8BxNHIVanFtn5v7nriAzg/edit?usp=sharing">guide</a> with pictures (brushing your springs + full-lube method).</p>

<p>Another simple mod you can do is clipping and lubing your stabilizers (<a href="https://www.youtube.com/watch?v=usNx1_d0HbQ">video</a>). <a href="https://www.youtube.com/watch?v=aURfK9qBgmY">Here</a> are some other good mods if you’re up for it (but not necessary for your first build).</p>

<h3 id="iii-assembly">III. Assembly</h3>

<p>Now that you have all the necessary components, it’s time to assemble your board. Different keyboards have different builds but for the sake of example, here is the Bakaneko assembly:</p>

<div class="align-col">
    <img src="/public/keyboard/prep.png" width="550px" />
    <img src="/public/keyboard/daughterboard.png" width="550px" />
    <img src="/public/keyboard/stabilizers.png" width="550px" />
    <img src="/public/keyboard/stabilizers-2.png" width="550px" /> 
</div>

<p>Now that you have your board, you can start adding your switches:</p>

<div class="align-col">
    <img src="/public/keyboard/switches-board.png" width="550px" /> 
    <img src="/public/keyboard/add-switches.png" width="550px" />
    <img src="/public/keyboard/push-switches.png" width="550px" />
    <img src="/public/keyboard/switch-gang.png" width="550px" />
</div>

<p>Next, navigate to <a href="https://usevia.app/#/test">VIA</a>. Go to the key tester
and test all of your switches to make sure they register inputs. You can also use VIA to remap your keys.</p>

<div class="align-col">
 <img src="/public/keyboard/broken.png" width="550px" /> 
 <img src="/public/keyboard/rescrew.png" width="550px" /> 
 <img src="/public/keyboard/keycaps-add.png" width="550px" /> 
 <img src="/public/keyboard/remap.png" width="550px" /> 
 <img src="/public/keyboard/congrats.png" width="550px" /> 
</div>

<h3 id="iv-appendix">IV. Appendix</h3>

<p>If you don’t want to build your own keyboard, check out <a href="https://www.reddit.com/r/mechmarket/">r/mechmarket</a> for people selling their old keyboards. Out-of-the-box keyboards
that I recommend are HHKBs. I really like the compact 60 layout and feel of the topre (see comparison of HHKBs <a href="https://seongminpark.com/hhkbs-compared/">here</a> and <a href="https://materialjournal.com/blog/hhkb-hybrid-review">here</a>). 
These only come in 60 layout though.</p>

<p>Enjoy your keyboard!</p>]]></content><author><name></name></author><summary type="html"><![CDATA[I’m a casual keyboard hobbyist who got into the craft two and a half years ago. Back when I was an intern at Uniswap, I started nerding out over keyboards with my co-worker and co-intern and that evolved into a company-wide mechanical keyboard building workshop (led by the Team Clickity Clack trio).]]></summary></entry><entry><title type="html">AI Prediction Markets</title><link href="https://kayleegeorge.github.io/blog/ai-prediction-markets/" rel="alternate" type="text/html" title="AI Prediction Markets" /><published>2024-10-04T00:00:00+00:00</published><updated>2024-10-04T00:00:00+00:00</updated><id>https://kayleegeorge.github.io/blog/ai-prediction-markets</id><content type="html" xml:base="https://kayleegeorge.github.io/blog/ai-prediction-markets/"><![CDATA[<p>Prediction markets allow participants to bet on outcomes of future events. They are historically <a href="https://www.astralcodexten.com/p/prediction-market-faq">accurate, canonical</a>, and valuable financial instruments when <a href="https://thezvi.wordpress.com/2018/07/26/prediction-markets-when-do-they-work/">constructed well</a>.</p>

<p>Crypto lends itself nicely to prediction markets because decentralization enables global participation and removes the need for trusted intermediaries. Early on-chain prediction markets, like Gnosis in 2017 and <a href="https://en.wikipedia.org/wiki/Augur_(software)">Augur</a> in 2018, failed to gain traction — unclear exactly why but probably because they were too early. Crypto was not widely adopted and infrastructure was still too slow and too expensive to be usable by consumers.</p>

<p>Fast forward to today, the crypto-powered prediction market Polymarket has witnessed explosive growth with all-time trading volumes surpassing $2 billion. A whopping $1.4 billion of that total volume belongs to its single most popular market: the <a href="https://polymarket.com/event/presidential-election-winner-2024/will-donald-trump-win-the-2024-us-presidential-election?tid=1728266145595">2024 U.S. Presidential Winner</a>. This is all the more impressive considering the platform is banned in the U.S. (‘merica loves its politics but politicians do not love crypto markets). It is still unclear whether or not Polymarket will be able to have user retention in the long-run but I see a few big reasons for its success up until now:</p>

<ol>
  <li>
    <p><strong>Timing</strong>. Prediction markets are often popular when they revolve around high-stakes events like presidential elections or crypto price movements.</p>
  </li>
  <li>
    <p><strong>Usability</strong>. Running on Polygon (an EVM L2) is cheap, fast, and generally scalable. Polymarket wouldn’t be able to succeed on Ethereum L1. Markets also depend on a stable currency, USDC.</p>
  </li>
  <li>
    <p><strong>Playing the regulation game well</strong>. Polymarket operates outside the U.S. and their legal fees seem to simply be part of their operational costs.</p>
  </li>
</ol>

<p>It’s an exciting time for prediction markets, but I think the space is entering an even larger era of innovation. We’re at a unique point in time where prediction markets have lots of momentum (thanks to Polymarket) <em>and</em> a new set of tech tools at our disposal to experiment with novel mechanisms and creative form factors.</p>

<p>**</p>

<p>One extremely interesting yet underexplored idea are AI prediction markets. In this world, prediction markets can either be <strong>played by AI</strong> (the traders are replaced) or <strong>judged by AI</strong> (the classic settlement oracle is replaced).</p>

<p>Vitalik has some <a href="https://vitalik.eth.limo/general/2024/01/30/cryptoai.html">creative ideas</a> for the former. Imagine if Twitter implemented a Community Note prediction market played by LLMs that are incentivized via on-chain pricing mechanics. Fact-checking AI prediction markets could be generalized to livestreams, debates, or other social media. These constructions are unique because they take advantage of both the hyperfinancialization of crypto and knowledge-rich AI models.</p>

<div class="align-center">
    <img src="/public/prediction-markets/diagram.png" width="500px" />
</div>

<p>A fun implementation of the ‘judged by AI’ prediction market is <a href="http://tmr.news">tmr.news</a>, a market for the next day’s NY Times front page headline. LLM sentence embeddings are used to measure semantic similarity between predicted headlines to the true headline and users are proportionally rewarded. There are two interesting implementation details that makes tmr.news compelling:</p>

<ol>
  <li>
    <p><strong>Predictions can be non-binary</strong>. Most prediction markets trade on a binary “yes” (X event will happen) or “no” (X event will not happen), or on a multiple choice bet (e.g. X person will be chosen for Y). tmr.news is able to trade on a non-binary market because LLMs are actually advanced enough to be good judges now.</p>
  </li>
  <li>
    <p><strong>Settlement is trustless</strong>. Instead of a designated oracle, the market is settled using web proofs. Web proofs prove data governance using a protocol over TLS [1] to prove that web data was fetched from the correct origin and remained untampered with. The major unlock here is that off-chain data can now be ported on-chain in a permissionless and verifiable way. tmr.news settles its daily market by directly querying the front page headline from <a href="https://www.nytimes.com/">https://www.nytimes.com/</a>, eliminating the need for trusted intermediaries.</p>
  </li>
</ol>

<p>But these details are indicative of a broader theme: both crypto and AI landscapes have matured enough for AI prediction markets to work well and to be interesting.</p>

<p>Past crypto x AI applications did not make sense because crypto infrastructure was not yet consumer-friendly (especially pre-L2 era), LLMs could not yet add real value, and cryptographic protocols that bridge off-chain and on-chain data (like web proofs) did not yet exist. But now, we have all the right tools to launch multidimensional experiments and uncover fresh discoveries. The design space for AI prediction markets is promising and the timing is finally right to pursue meaningful explorations.</p>

<p>–</p>

<p>[1] There are multiple ways to implement proof of data provenance operating over the Transport Layer Security (TLS) protocol. Protocols like <a href="https://pluto.xyz/blog/how-tlsnotary-works">TLS Notary</a> and <a href="https://drive.google.com/file/d/1wmfdtIGPaN9uJBI1DHqN903tP9c_aTG2/view">Reclaim Protocol</a> use a proxy attestor placed between the client and the server to sign off on the exchanged encrypted messages to prove data provenance. These protocols also allow for selective disclosure, a way to only reveal selective parts of fetched data (e.g. revealing your bank balance but not your account number). Another approach is using a Trusted Execution Environment (TEE) to authenticate TLS data. The TEE assumes the role of the TLS client, such that it receives and signs server data before relaying that data to the actual client. A relayer is used to efficiently reduce messages between the client and server to keep TEE work to a minimum.</p>

<p><strong>Appendix</strong></p>

<p>Sam Bankman-Fried allegedly wanted to work on <a href="https://www.dwarkeshpatel.com/p/brett-harrison">political prediction markets</a> after his departure from Jane Street.</p>

<p>A number of famous economists have <a href="https://comments.cftc.gov/PublicComments/ViewComment.aspx?id=70761&amp;SearchText=">advocated</a> for the legalization of prediction markets.</p>

<p>Polymarket markets have proven to be quite accurate; they predicted that Biden would drop out of the presidential race a few weeks before it actually happened.</p>

<p><a href="https://worksinprogress.co/issue/why-prediction-markets-arent-popular/">This article</a> suggests that even if regulatory chokeholds were lifted, prediction markets would still not be popular because they have “little natural demand.” People who trade on markets can be classified into one of three types of traders — savers, gamblers, and sharps — and it is not in any type’s best interest to participate in the market.</p>]]></content><author><name></name></author><summary type="html"><![CDATA[Prediction markets allow participants to bet on outcomes of future events. They are historically accurate, canonical, and valuable financial instruments when constructed well.]]></summary></entry></feed>